FordParts
My Garage
My Account
Cart
OEM Ford Crown Victoria Front Cross-Member
Front Engine Cross Member- Select Vehicle by Model
- Select Vehicle by VIN
Select Vehicle by Model
orMake
Model
Year
Select Vehicle by VIN
For the most accurate results, select vehicle by your VIN (Vehicle Identification Number).
5 Front Cross-Members found


Ford Crown Victoria Front Crossmember Part Number: 3W1Z-5019-AA
$22.91 MSRP: $32.50You Save: $9.59 (30%)
Ford Crown Victoria Transmission Support Part Number: FOAZ-5027-A


Ford Crown Victoria Crossmember Part Number: F8AZ-5019-AA


Ford Crown Victoria Transmission Support Part Number: 3W1Z-5027-AA

Ford Crown Victoria Suspension Crossmember Part Number: 6W1Z-5C145-BD
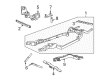
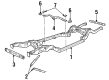
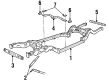
Ford Crown Victoria Front Cross-Member
OEM Front Cross-Member boasts unmatched quality. Each part goes through full quality checks. They adhere to Ford's official factory standards. These steps remove flaws and inconsistencies. So you can get Front Cross-Member with long life and a perfect fit. Come to our website and find genuine Ford Crown Victoria parts. We keep a wide inventory of OEM Crown Victoria parts at the highly affordable prices. It's easy to search, compare, and pick what you need. You'll love the clear info and simple checkout. We offer top-rated customer service, and we reply fast. We also ship promptly to ensure your order arrives on time.
The essential component of the Ford Crown Victoria Front Cross-Member stands out for its reliability and performance which supports the engine and transmission system to achieve superior vehicle stability. The strong K-frame steel component secures beneath the Ford Crown Victoria to achieve proper body panel alignment through its cross-underneath installation. The framework design lets the system function with different engine positions through its segment which demonstrates superior resistance to multiple torque and twisting effects. The front cross-member functions as a vital structure which sustains both performance and integrity of the Ford Crown Victoria and plays a massive role in vehicle efficiency and safety. This automotive component shows market excellence by adapting to different Crown Victoria models while it improves ride quality and handling for preferred use by daily drivers and car fans alike. The Front Cross-Member represents engineering mastery from Ford as part of the legendary Crown Victoria heritage through its multiple luxury and reliable vehicle models. The Front Cross-Member enhances both steering performance and suspension modifications which not only strengthens the Ford model's structure but produces an elevated driving experience so both performance and dependability make it a dependable sedan.
Ford Crown Victoria Front Cross-Member Parts and Q&A
- Q: How to service and repair the front cross-member on Ford Crown Victoria?A:Starting the service and repair of the transmission support crossmember requires the vehicle to be set to neutral while it stands on a hoist. The service requires RH HO2S sensor connector and catalyst monitor connector separation followed by exhausting the RH exhaust flange bolts. Open the exhaust clamp before removing the RH Exhaust Pipe. The LH side service requires transferring the same steps as the RH side - first disconnect the LH HO2S sensor and catalyst monitor connectors then remove bolts from LH exhaust flange while loosening the exhaust clamp before extracting the LH exhaust pipe. First properly fix a transmission jack before you uninstall the rear transmission insulator nuts. Start by removing the bolts from both the crossmember sides followed by removing parking brake cable bracket bolts that you will set aside. The crossmember has a press fit into the pocket that might need gentle prying for preservation; begin by lowering the right-hand side then the left-hand side before removing the crossmember. To install the crossmember start by placing the left-hand side into the pocket then loosely attach its bolts followed by similar steps on the right-hand side. Both LH and RH crossmember bolts must be tightened while you reinstall the parking brake cable bracket before lowering the transmission onto the crossmember and installing the rear transmission insulator nuts followed by transmission jack removal. Position the RH Catalytic Converter assembly without tightening the clamp before instantiating RH exhaust flange nuts followed by proper tightening of the RH exhaust clamp. Before the final installation proceed by connecting RH sensor connectors followed by positioning LH assembly then adding LH flange nuts and finishing with clamp tightening. Complete the installation by connecting both LH HO2S sensor and catalyst monitor connectors when the vehicle is at its lowest position.

Related Ford Crown Victoria Parts
 Ford Crown Victoria Axle Beam
 Ford Crown Victoria Car Mirror
 Ford Crown Victoria Car Speakers
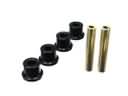 Ford Crown Victoria Crossmember Bushing
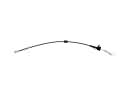 Ford Crown Victoria Door Latch Cable
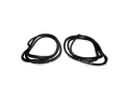 Ford Crown Victoria Door Seal
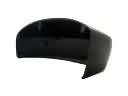 Ford Crown Victoria Mirror Cover
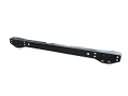 Ford Crown Victoria Rear Crossmember
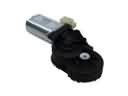 Ford Crown Victoria Seat Motor
 Ford Crown Victoria Seat Switch
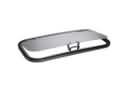 Ford Crown Victoria Sunroof
 Ford Crown Victoria Windshield Wiper