FordParts
My Garage
My Account
Cart
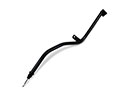
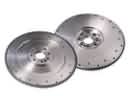
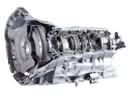
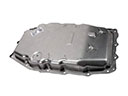
OEM Ford Flex Shift Cable
Transmission Shift Cable- Select Vehicle by Model
- Select Vehicle by VIN
Select Vehicle by Model
orMake
Model
Year
Select Vehicle by VIN
For the most accurate results, select vehicle by your VIN (Vehicle Identification Number).
1 Shift Cable found


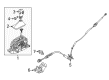
Ford Flex Shift Control Cable Part Number: 8A8Z-7E395-D
$100.00 MSRP: $145.57You Save: $45.57 (32%)
Ford Flex Shift Cable
OEM Shift Cable boasts unmatched quality. Each part goes through full quality checks. They adhere to Ford's official factory standards. These steps remove flaws and inconsistencies. So you can get Shift Cable with long life and a perfect fit. Come to our website and find genuine Ford Flex parts. We keep a wide inventory of OEM Flex parts at the highly affordable prices. It's easy to search, compare, and pick what you need. You'll love the clear info and simple checkout. We offer top-rated customer service, and we reply fast. We also ship promptly to ensure your order arrives on time.
Ford Flex Shift Cable Parts and Q&A
- Q: How to Service and Repair the Shift Cable on Ford Flex?A:Service and repair operations on the selector lever cable begin only when the vehicle is in neutral position and mounted on a hoist. Start your work by taking the selector lever trim ring off followed by lifting the storage compartment lid after which you should remove the floor console finish panel. Proceed to detach the front part of trim panel from its pin-type retainers using cardboard for protection. This step requires pulling the floor console trim panel outward to release its retaining clips. Remove the selector lever cable from its bracket at the selector lever and disconnect the cable connection to the lever. Remove the floor grommet nuts first while pulling the selector lever cable out of the heater housing area before detaching the retainer from its floor connection. Begin by disconnecting both the mass air flow sensor connector and engine breather from the air cleaner assembly after you remove the two assembly bolts. Use a wrench to release the ACL outlet pipe clamp situated by the Throttle Body before removing the ACL assembly together with its outlet pipe unit. Disconnect both the selector lever cable retainer from the brake tube bracket followed by disconnecting the cable end from the manual control lever. You must remove the selector lever cable from the bracket. You must insert the selector lever cable into its bracket positioning inside the vehicle before securing the tabs to a locked position. Attach the selector lever cable retainer to its position on the brake tube bracket while you add the grommet and fasten both nuts to 7 Nm (62 lb-in). The cable should run underneath the heater housing before installing the retainer to the floor while attaching the cable to the selector lever housing with tabs in their locked position. Connect the cable end to the selector lever then set the selector lever to drive position before rotating the manual control lever clockwise until it stops before counterclockwise rotation by one detent. First unlock the adjuster before you align the cable end to the manual control lever and join them with the adjuster locking tab released. Position the ACL assembly while sliding the adjuster tab to lock and install the two bolts and tighten them to 11 Nm (97 lb-in). The verbal torque must reach 5 Nm (44 lb-in) when tightening the ACL outlet pipe at the TB before reconnecting the engine breather and MAF sensor connector. Before attaching the floor console trim panel to its retainer employ cardboard protection. Guide the trim until the retainer accepts it and then install both the floor console trim panel along with its finish panel. After all installation conclude by attaining positive results - the vehicle must start in park and neutral positions while the reverse lamps must activate during reverse mode.