FordParts
My Garage
My Account
Cart
OEM Ford Taurus Clock Spring
Spiral Cable Clock Spring- Select Vehicle by Model
- Select Vehicle by VIN
Select Vehicle by Model
orMake
Model
Year
Select Vehicle by VIN
For the most accurate results, select vehicle by your VIN (Vehicle Identification Number).
12 Clock Springs found


Ford Taurus Clockspring Part Number: 8G1Z-14A664-A
$108.95 MSRP: $158.58You Save: $49.63 (32%)


Ford Taurus Clockspring Part Number: FG1Z-14A664-C
$128.29 MSRP: $186.73You Save: $58.44 (32%)Ships in 1 Business Day


Ford Taurus Clockspring Part Number: GB5Z-14A664-D
$185.67 MSRP: $270.27You Save: $84.60 (32%)


Ford Taurus Clockspring Part Number: GB5Z-14A664-C
$237.12 MSRP: $348.20You Save: $111.08 (32%)Ships in 1-2 Business Days


Ford Taurus Clockspring Part Number: FG1Z-14A664-B
$245.78 MSRP: $360.92You Save: $115.14 (32%)Ships in 1-2 Business Days

Ford Taurus Clockspring Part Number: F7AZ-14A664-BA


Ford Taurus Clockspring Part Number: AG1Z-14A664-A
$125.66 MSRP: $182.92You Save: $57.26 (32%)


Ford Taurus Clockspring Part Number: 4F1Z-14A664-AB
Ford Taurus Clockspring Part Number: YF1Z-14A664-AA

Ford Taurus Clockspring Part Number: F8DZ-14A664-AA
Ford Taurus Clockspring Part Number: F6ZZ-14A664-AA

Ford Taurus Clockspring Part Number: 2F1Z-14A664-AA
Ford Taurus Clock Spring
OEM Clock Spring boasts unmatched quality. Each part goes through full quality checks. They adhere to Ford's official factory standards. These steps remove flaws and inconsistencies. So you can get Clock Spring with long life and a perfect fit. Come to our website and find genuine Ford Taurus parts. We keep a wide inventory of OEM Taurus parts at the highly affordable prices. It's easy to search, compare, and pick what you need. You'll love the clear info and simple checkout. We offer top-rated customer service, and we reply fast. We also ship promptly to ensure your order arrives on time.
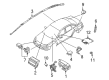
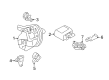
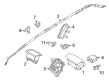
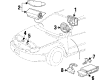
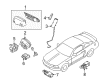
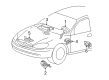
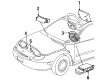
As a fundamental part of the Ford Taurus airbag system the Clock Spring plays a crucial role to enhance both reliability and performance functions. The critical function of this component creates a critical connection between the airbag module and vehicle electrical system to enable fast airbag activation during accidents thus improves passenger protection. The Ford Taurus Clock Spring features a flat multicore cable wrapped as a spiral so it can store energy along with dealing with steering wheel movement. Various Clock Spring designs appear throughout Taurus models through which Ford demonstrates their dedication to both quality and innovation through evolving materials and construction techniques. Due to its Clock Spring design the Ford Taurus vehicle maintains strong positions in the American auto industry since 1985 as the innovation contributes to both operational effectiveness and driver protection. The component is designed to work with different Taurus models which gives drivers dependable performance in their vehicles. The automotive market distinguishes the Ford Taurus Clock Spring through its special design element which includes brush mechanisms that face concentric slip rings thus establishing it as a reliable option. The Ford model Clock Spring stands as a symbol of the automaker's determination to develop safer and more performant automobiles which has reinforced their status in automotive manufacturing.
Ford Taurus Clock Spring Parts and Q&A
- Q: How to Service and Repair the Clock Spring Assembly on Ford Taurus?A:The first step for repairing or servicing the Clock Spring assembly requires wearing safety glasses as a protection measure against potential air bag activation. The system requires powering down while removing the driver air bag module. The straight-ahead position needs to be established on wheels before starting removal of the Steering Wheel. The first step requires removing the lower Steering Column opening cover consisting of two bolts and its retaining clips. To prevent unwanted movement use two pieces of masking tape that you should place across the Clock Spring. It is vital to put the steering column tilt mechanism into its lowest position and then remove the components of the tilt wheel handle and shank. Begin by setting the ignition switch lock cylinder to RUN position followed by pressing upward on the release tab while you pull the tab outside. The three screws located on the steering column shroud need removal before proceeding. To work on a vehicle with column shift functions you should first disconnect the Shift Indicator tube by unscrewing the cable while removing its indicator. You should detach the two nuts at the rear of the column and only slightly loosen the two nuts at the front but keep them in place. The upper steering column shroud must first be removed before you detach the passive anti-theft system (PATS) transmitter by unscrewing its retaining screw then put the PATS transmitter aside. Start by detaching the key-in-ignition warning indicator sensor before releasing the electrical connectors and pin-type retainers from the Clock Spring electrical connector. Removal of the Clock Spring begins with extracting the wire harness through the column wire holders while you remove both its retaining clips to detach the Clock Spring. Installation requires the removal of the sealing key when keeping the rotor in its center position and preventing it from turning. To recenter the Clock Spring maintain the outer housing still while rotating the rotor counterwise until resistance occurs before rotating it clockwise three turns. Before reinstalling a reused Clock Spring users must remove existing tape but should not rotate it while doing so. Mount the Clock Spring onto its mount point in the steering column while securing the retaining clips first and feed the wire harness into position through its wire holders. Secure the upper steering column shroud afterward and fasten the four steering column nuts until they reach 15 Nm (11 lb-ft) torque. Install shift indicator cables and their housings when working on vehicles that use column shift. Also connect Clock Spring electrical wiring at the same time. Afterward attach the key-in-ignition warning indicator switch sensor with the PATS transmitter to its retaining screw. Screw in the lower steering column shroud together with the three screws while positioning the ignition switch lock cylinder at the OFF position. Insert the tilt wheel handle and shank and fasten the lower steering column opening cover with reinforcement by tightening its two bolts to 7 Nm (62 lb-in). Before putting on the steering wheel, make sure wheels are parallel. After that return the driver air bag module and reactivate the system.
- Q: What Precautions Should Be Taken When Servicing the Clock Spring Assembly on Ford Taurus?A:Safety glasses are mandatory to wear when servicing the Clock Spring assembly because they minimize injuries associated with accidental air bag deployment. Handle a live air bag module with its air bag section and trim cover orienting sideways to your body while placing it nowhere with the trim cover facing directly downwards. Avoid using memory saver devices. The air bag warning lamp tours on because the RCM fuse removal activates it during the ON stage of ignition yet it signifies no SRS malfunction. Vehicle return to the customer must happen only after a complete check that shows a fault-free operation of the SRS system. The repair process requires installation of new components however you should restore the original components after persistent problems occur while performing diagnostic procedures again. The process starts with disabling the electrical system while keeping the wheels pointed straight forward. Remove the Steering Wheel (3600) before you proceed to take out the lower steering column opening cover with reinforcement by removing all bolts and releasing the retaining clips. Two pieces of masking tape should be positioned across the Clock Spring so it does not accidentally spin while you position the steering column for full down tilt in order to remove the tilt wheel handle and shank. Press the Ignition Switch lock cylinder to RUN and push the release tab while pulling it out to accomplish removal. The installation starts by taking off lower and upper steering column shrouds followed by dismantling the PATS transmitter through its retaining screw removal and extracting the key-in-ignition warning indicator switch. The tube for shift indication must be detached in vehicles with column shift by unscrewing the shift indicator cable. Users must separate pin-type retainers on the Clock Spring electrical connector bracket before guiding the wire harness outside of steering column mounts. Then they can liberate and extract the Clock Spring by releasing its retention clips. To install the new Clock Spring keep the key away from the rotor during the task while preventing any rotor movement. The outer housing must be stationary to properly recenter the Clock Spring by rotating the rotor counterclockwise until resistance is felt and completing the process by turning it clockwise three full turns until reaching the center position. When keeping the original Clock Spring there should be no rotation of the tape when removing it. After mounting the Clock Spring on the steering column users should lock down the retaining clips while guiding the wire harness into its intended holders. The installation of shift indicator tube and cable needs to occur alongside other components in vehicles equipped with column shifts. Accomplish the connection of Clock Spring electrical connectors while also installing the key-in-ignition warning indicator switch and the PATS transmitter using its retaining screw. Screw the steering column shrouds in position starting from the upper section then the lower section while aligning them perfectly before fastening them with retaining screws. The first step includes placing the ignition switch lock cylinder into the OFF position while also attaching the tilt wheel handle along with the shank. Before closing the screw the steering wheel the technician must begin by installing the lower steering column opening cover with reinforcement then securing the bolts at 7 Nm (62 lb in) before placing the steering wheel.


Related Ford Taurus Parts
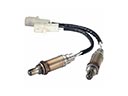 Ford Taurus Oxygen Sensor
 Ford Taurus MAP Sensor
 Ford Taurus Speedometer
 Ford Taurus Air Bag Control Module
 Ford Taurus Air Bag Sensor
 Ford Taurus Airbag
 Ford Taurus Antenna Mast
 Ford Taurus Armature
 Ford Taurus Battery Fuse
 Ford Taurus Ignition Relay
 Ford Taurus Occupant Detection Sensor
 Ford Taurus Oil Pressure Gauge