FordParts
My Garage
My Account
Cart
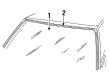
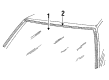
OEM Ford Taurus Windshield
Glass Windshield- Select Vehicle by Model
- Select Vehicle by VIN
Select Vehicle by Model
orMake
Model
Year
Select Vehicle by VIN
For the most accurate results, select vehicle by your VIN (Vehicle Identification Number).
9 Windshields found

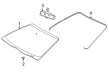
Ford Taurus Windshield, Front Part Number: 2F1Z-5403100-AA
$111.02 MSRP: $151.08You Save: $40.06 (27%)
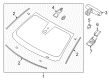
Ford Taurus Windshield, Front Part Number: FG1Z-5403100-A
$229.05 MSRP: $336.35You Save: $107.30 (32%)Ships in 1-3 Business Days
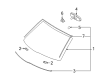
Ford Taurus Windshield, Front Part Number: 8G1Z-5403100-AA
$265.83 MSRP: $390.35You Save: $124.52 (32%)Ships in 1-3 Business DaysFord Taurus Windshield, Front Part Number: FG1Z-5403100-B
$250.85 MSRP: $368.35You Save: $117.50 (32%)
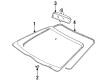
Ford Taurus Windshield, Front Part Number: YF1Z-5403100-AA

Ford Taurus Glass Panel Part Number: FODZ-5403100-B
Ford Taurus Glass Part Number: F5DZ-5403100-A

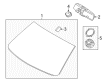
Ford Taurus Windshield, Front Part Number: BG1Z-5403100-B
Ford Taurus Windshield, Front Part Number: 4F1Z-5403100-AA
Ford Taurus Windshield
OEM Windshield boasts unmatched quality. Each part goes through full quality checks. They adhere to Ford's official factory standards. These steps remove flaws and inconsistencies. So you can get Windshield with long life and a perfect fit. Come to our website and find genuine Ford Taurus parts. We keep a wide inventory of OEM Taurus parts at the highly affordable prices. It's easy to search, compare, and pick what you need. You'll love the clear info and simple checkout. We offer top-rated customer service, and we reply fast. We also ship promptly to ensure your order arrives on time.
Ford Taurus Windshield Parts and Q&A
- Q: How to service and repair the windshield glass on Ford Taurus?A:Accessible repair and servicing of the windshield glass requires removing both the interior mirror and the A-pillar trim panels first. Lower a section of the front headliner by the windshield header just enough to reach the glass area then secure it by using appropriate support. To proceed with removing the cowl panel grille users must wear protective gloves along with eye protection since this step creates a risk of injury. Protect the paint and primer on the pinch weld when taking off windshield glass because this step prevents rust development. The flat side of the Deluxe Windshield Remover Tool blade should face the glass because it will protect the urethane adhesive bead on the pinch weld for easy installation of a new windshield. The existing urethane adhesive needs a water-based lubrication to make cutting easier. Having multiple technicians working on this task yields better results according to professional recommendation. Use a Deluxe Windshield Remover Tool to cut the urethane adhesive from the windshield glass from the center top toward the bottom corner positions. Afterward, implement The Pumper to create distance between the glass and vehicle body then finish cutting the adhesive before removing the glass. The windshield glass installation starts with dry fitting the glass to the present urethane adhesive bead at the body pinch weld while preserving its alignment. When marking windshield glass for alignment use a pen with temporary ink at the body and setting blocks. Users should remove glass pieces then fix all corrosion present on pinch welds which provide vital structural support to the automobile. The pinch weld requires no scratching while you must fix small scrapes and metal exposure by following the manufacturer's methods using specific pinch weld primer as well as glass primer and urethane adhesive products from the same company. Separate the urethane adhesive to achieve a base width between 1 mm and 2 mm at the pinch weld before cleaning the area from all foreign substances. The inside surface needs glass cleaner to clean residual urethane adhesive before reinstalling original windshield glass. The installation process of new glass requires glass primer application following manufacturer guidelines with a minimum drying period of 6 minutes. A high-ratio electric or battery-operated caulk gun with a specific applicator tip cut to size should be used to maintain continuous urethane adhesive application without any gaps on top of the trimmed bead. Driving the vehicle should not occur before urethane adhesive curing while adhering to manufacturer-issued curing directions for adequate glass retention. Open all vehicle windows before placing the windshield glass to stop air pressure from weakening the adhesive bond. The technician must align the glass with the mark points while the adhesive cures for one hour minimum. Afterward you need to place back the cowl panel grille, headliner, interior mirror along with A-pillar trim panels.
- Q: How to reseal a windshield on Ford Taurus?A:A proper windshield resealing process begins by disassembling the cowl panel grille together with the interior/map reading lamp. Begin by placing both left-hand (LH) front door Weather Strips and right-hand (RH) front door weather strips to the side. Then extract LH and RH windshield side garnish mouldings. Your next step is to take off eight screws and both left-hand and right-hand sun visors together with their corresponding clips. The installation requires removal of roof opening panel garnish moulding when it is present. Support the lowered front section of the headliner with proper materials when dropping it partially. Apply non-alcohol based glass cleaner to clean all areas of the windshield glass from inside and out. Use a high-ratio caulk gun operated by electricity or batteries to apply urethane adhesive through an applicator tip with specified length for creating a uniform bead along all gaps before adding the windshield side garnish moulding and headliner. You need to unfold urethane adhesive that covers both the windshield top and sides inside the vehicle while also stretching the urethane bead along the bottom exterior edge. The urethane adhesive needs one hour to cure before checking air or water leaks on the urethane bead by adding additional adhesive when needed. The front headliner section must be readjusted before installing the roof opening accessory garnish and re-attaching sun visors with clips and screws throughout both sides. The proper placement of alignment tabs must be checked before fitting the LH and RH windshield side garnish mouldings and then the LH and RH front door weather strips and interior map reading lamp and cowl panel grille.


Related Ford Taurus Parts
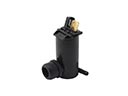 Ford Taurus Windshield Washer Pump
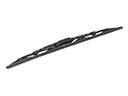 Ford Taurus Windshield Wiper
 Ford Taurus Car Mirror
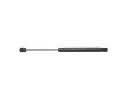 Ford Taurus Lift Support
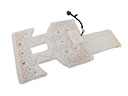 Ford Taurus Seat Heater
 Ford Taurus Weather Strip
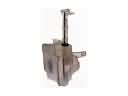 Ford Taurus Windshield Washer Fluid Reservoir
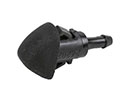 Ford Taurus Windshield Washer Nozzle
 Ford Taurus Wiper Arm
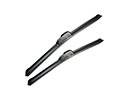 Ford Taurus Wiper Blade
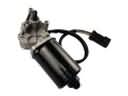 Ford Taurus Wiper Motor
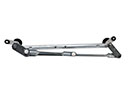 Ford Taurus Wiper Pivot