FordParts
My Garage
My Account
Cart
OEM Lincoln LS Drive Shaft
Axle Shaft- Select Vehicle by Model
- Select Vehicle by VIN
Select Vehicle by Model
orMake
Model
Year
Select Vehicle by VIN
For the most accurate results, select vehicle by your VIN (Vehicle Identification Number).
2 Drive Shafts found

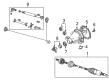
Lincoln LS Drive Shaft Part Number: 3W4Z-4R602-BB
Lincoln LS Drive Shaft Part Number: 3W4Z-4R602-AB
Lincoln LS Drive Shaft
OEM Drive Shaft boasts unmatched quality. Each part goes through full quality checks. They adhere to Lincoln's official factory standards. These steps remove flaws and inconsistencies. So you can get Drive Shaft with long life and a perfect fit. Come to our website and find genuine Lincoln LS parts. We keep a wide inventory of OEM LS parts at the highly affordable prices. It's easy to search, compare, and pick what you need. You'll love the clear info and simple checkout. We offer top-rated customer service, and we reply fast. We also ship promptly to ensure your order arrives on time.
The Drive Shaft is very crucial part, both for the reliability and performance, which is responsible for transmitting power output of the engine to the rear axle of the Lincoln LS car models. Constructed to handle torsional and transverse loads, the Drive Shaft links the engine and rear wheels for improved efficiency in rear-wheel applications. It can fit most Lincoln LS models, be it one with a V6 or a V8 engine, thus proving that it can be molded to fit the car performance of any type. In the transmission of power, other elements like universal joints and slip-in-tube designs are used in the Drive Shaft; in addition, aspects of crash safety have also been incorporated in the manufacture of the drive shaft hence placing the Drive Shaft at a vantage point in the market. This focus on safety and reliability is again seen in small print by virtue of the fact that the Lincoln LS boasts some impressive safety ratings, especially for occupant protection. Drive Shaft is designed in such a way that it focuses on increased strength and reduced as much as possible, inertia to improve performance of a vehicle while on the same note it improves the safety features of a vehicle. The Drive Shaft also provides a great deal of latitude for allowing slight misalignments and differing distances so as to make the drive as smooth and responsive as possible. All in all, the Drive Shaft is a perfect example of the company's strive for quality and innovation that characterizes the Lincoln brand thus making this component to be a perfect fit for the Lincoln LS.
Lincoln LS Drive Shaft Parts and Q&A
- Q: How to Service and Repair a Drive Shaft on Lincoln LS?A:Service and repair operations on driveshafts can start when the vehicle is set to neutral position on a hoist. First remove the exhaust system together with the heat shield. Paint or marker marks on the bolt, nut and washer along with flex coupling and pinion flange help maintain their correct positions because these fasteners function as balance weights and improper reassembly affects NVH performance. Catch the driveshaft bolt while you unscrew its nut to extract the three locking nuts and bolts that connect flex coupling to the flange. Detaching the driveshaft assembly requires one to slide the front shaft assembly rearward and remove its center support bearing bolts after doing index-marking on the driveshaft at its slip joint. Before inserting the alignment bushing on the pinion flange piloting stem you must apply 1 gram of grease into both alignment bushing cavities while lining up the index marks. Place all selective spacers along with their original bolts but do not fully tighten them. Then secure all center support bearing bolts by hand only. Push the front shaft assembly forward before realigning the index marks to set the transmission flange alignment bushing on its piloting stem. Reinstall the driveshaft flex coupling bolts in position while making sure their heads point toward the flange but their nuts face the flex coupling. Keep short bolts at the transmission flange and long bolts at the drive pinion flange. Before tightening, apply Threadlock 262 on thread surfaces of both nut and bolt then torque them to 81 Nm (60 ft. lbs.). Finish the process by tightening all center support bearing bolts evenly to 43 Nm (32 ft. lbs.) before reinstalling the heat shield and exhaust system.

Related Lincoln LS Parts
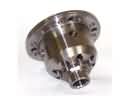 Lincoln LS Differential
 Lincoln LS Axle Shaft
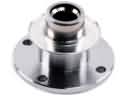 Lincoln LS CV Joint Companion Flange
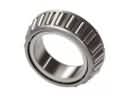 Lincoln LS Differential Bearing
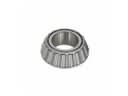 Lincoln LS Differential Pinion Bearing
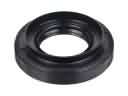 Lincoln LS Differential Seal
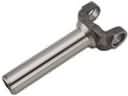 Lincoln LS Driveshaft Yokes
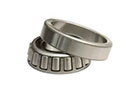 Lincoln LS Pinion Bearing
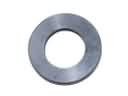 Lincoln LS Pinion Washer
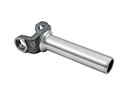 Lincoln LS Slip Yoke
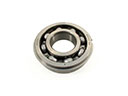 Lincoln LS Transfer Case Bearing