FordParts
My Garage
My Account
Cart
OEM Mercury Mountaineer Seat Motor
Car Seat Motor- Select Vehicle by Model
- Select Vehicle by VIN
Select Vehicle by Model
orMake
Model
Year
Select Vehicle by VIN
For the most accurate results, select vehicle by your VIN (Vehicle Identification Number).
2 Seat Motors found


Mercury Mountaineer Seat Motor
OEM Seat Motor boasts unmatched quality. Each part goes through full quality checks. They adhere to Mercury's official factory standards. These steps remove flaws and inconsistencies. So you can get Seat Motor with long life and a perfect fit. Come to our website and find genuine Mercury Mountaineer parts. We keep a wide inventory of OEM Mountaineer parts at the highly affordable prices. It's easy to search, compare, and pick what you need. You'll love the clear info and simple checkout. We offer top-rated customer service, and we reply fast. We also ship promptly to ensure your order arrives on time.
Mercury Mountaineer Seat Motor Parts and Q&A
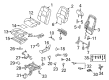
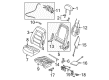
- Q: How to Address Issues with the Seat Motor in the Third Row of a Mercury Mountaineer?A:The first step to service the third row power-fold motor requires maneuvering the functional backrest next to the unfunctioning motor location. The third row seat needs removal so you can take off both latch-to-floor mounting bracket nuts while securing them at 22 Nm (16 lb-ft) for reinstalling. The service of the left-hand motor requires opening the right-hand seat underneath to remove its two cushion pivot link assembly-to-cushion frame nuts before detaching that right-hand 50 percent seat from the floor mounting bracket where both components must be tightened to 22 Nm (16 lb-ft) during reinstallation. When reinstalling the bolt between latch and cushion frame adjust the torque to 25 Nm (18 lb-ft). First detach both bolts and the latch cover followed by a careful release of the backrest trim cover lower J-clip which is on the side of the service motor. Take very careful actions when you remove the seat back trim cover from its hook-and-loop strip to prevent unintentionally tearing off the foam pad from the backrest. Opening access to the two latch-to-backrest frame bolts on the motor side becomes possible after removing side J-clips and hook-and-loop strips from the backrest trim cover. Separate the latch with the motor as you remove two bolts and reinstall these bolts at 25 Nm (18 lb-ft). The left-hand motor requires removing its safety belt buckle assembly-to-latch nut before separating the safety belt buckle assembly from its mounting points. Reinstallation requires a 75 Nm (55 lb-ft) torque specification on this assembly. Also normalize power when possible. The task concludes by executing the reverse order of steps for motor installation.
- Q: How to service and repair the power seat motor and seat recliner motor on Mercury Mountaineer?A:Privacy and comfort services and repairs on the power seat motor and seat recliner motor need to start with the complete removal of the front seat followed by separation of the front seat backrest. You need to disconnect the plastic rivets which fix the backrest trim cover to its inboard and outboard recliners. It is essential to be careful while pulling the backrest trim cover off the hook-and-loop strip in order to prevent damage to the backrest foam pad. Open the lower J-clip system and hook-and-loop strip of the trim cover before flipping it toward the first row of hog rings. The process of rotating the recliner shaft must be avoided when both recliners are separated since this creates synchronization problems. Disengage the one-way push clip on the inboard power recliner before pulling the recliner shaft out from the outboard direction until the inboard recliner and power recline motor are clear of each other. The power recline motor requires disconnecting its electrical connector and removing its screw and then extracting the motor from the system. To install the recliner shaft properly position it through the recliner motor and inboard recliner before possibly requiring light adjustment. Secure a new one-way push clip to the recliner shaft of the inboard power recliner while matching the recliner motor mounting hole to the screw hole before fastening it using a recliner motor bolt. The electrical protocol should be reattached to the recliner motor before rolling down the backrest trim cover with hook-and-loop strip attachment and lower J-clip activation. The backrest trim cover will be installed onto the inboard and outboard recliners before readding the plastic rivets. End the procedure by reinstalling both the front seat backrest alongside the front seat component. The SRS system should not be proved out when servicing the passenger seat. The Occupant Classification Sensor (OCS) System Zero Seat Weight Test needs to be performed and the SRS needs to be tested during final check procedures.


Related Mercury Mountaineer Parts
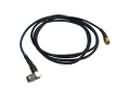 Mercury Mountaineer Antenna Cable
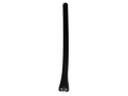 Mercury Mountaineer Antenna Mast
 Mercury Mountaineer Crankcase Breather Hose
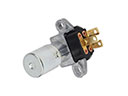 Mercury Mountaineer Dimmer Switch
 Mercury Mountaineer Headlight Switch
 Mercury Mountaineer Instrument Cluster
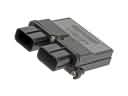 Mercury Mountaineer Occupant Detection Sensor
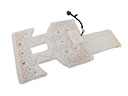 Mercury Mountaineer Seat Heater
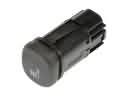 Mercury Mountaineer Seat Heater Switch
 Mercury Mountaineer Speedometer
 Mercury Mountaineer TPMS Sensor
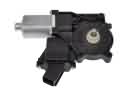 Mercury Mountaineer Window Motor