Popular OEM Mercury Mountaineer Parts
- Body & Hardware Parts View More >
- Electrical Parts View More >
- Interior & Exterior Trim Parts View More >
- Air & Fuel Delivery Parts View More >
- Steering Parts View More >
- Emission Control & Exhaust Parts View More >
- Charging & Starting Parts View More >
- Engine Parts View More >
- Belts & Cooling Parts View More >
- Suspension Parts View More >
- Brakes Parts View More >
- A/C & Heating Parts View More >
Why Buy Genuine Mercury Mountaineer Parts From FordPartsDeal.com
FordPartsDeal.com offers a smart and convenient way to buy genuine parts online. We sell new OEM Mercury Mountaineer parts. Authorized dealers directly provide all the Mercury Mountaineer parts and assemblies to ensure the optimal quality and fit. We also provide all properly fitting Mercury Mountaineer parts specific to your model. When you shop here, you get real Mercury value at highly competitive prices. All our products come with the same Mercury warranty available at other dealerships. Our easy-to-use catalog helps you quickly identify the right part for your car. You'll receive fast shipping from our warehouse network, keeping your Mercury Mountaineer running smoothly. Our staff consists of Mercury professionals who are ready to assist you. We aim to treat each customer as if they were stepping out of a Mercury showroom. VIN verification and our live support ensure that the part you order is the right Mercury Mountaineer part for your vehicle.
Three successive generations of the Mercury Mountaineer Luxury SUV appeared at production starting in 1996 before its termination in 2010. The Mercury Mountaineer implements all-wheel or rear-wheel drive systems through its Ford U2 platform front-engine structure to deliver versatile driving capabilities. Different combinations of powerplants ranging from the 4.0 L V6 engine through the 5.0 L V8 option to the 4.6 V8 engine can pair with five and the six-speed automatic transmission options for selectable performance control. The third-generation Mercury Mountaineer received an entirely new chassis and framework upgrade which made the vehicle handle more effectively. The safety package on this model consists of Advance Trac antiskid system with Roll Stability Control and antilock 4-wheel disc brakes which collectively improve driving dynamics and safety performance. The interior received new modern amenities including a DVD system and voice-controlled navigation because Mercury wanted to deliver comfort and convenience to its drivers. The stringent quality control standards that genuine Mercury Mountaineer parts must meet demonstrate the high-level quality of the products. The Mercury Mountaineer remains an outstanding automotive model which continues its market competitiveness through its comprehensive engineering design as well as ongoing product enhancements.
Mercury Mountaineer has the issue of group into valvetrain timing, cooling system integrity, and intake sealing. In engine air control, intake manifold O-Ring gaskets leaks cause vacuum leaks. The Mountaineer can idle, jerk, and stall and light the warning lamp. Perform the smoke inspections of the intake, check the PCV hoses and change the gaskets in order to reinstate the trims. Check before unmetered air codes and fuel trims that create excessively lean conditions in idle. With worn guides, the guides will rattle as the timing chain slaps in a valvetrain. The Mountaineer slogs on a cold start and during neutral blip throttle. Change over new cassettes and tensioner with the help of Mercury service data, check oil pressure and alignment chain. A leaking radiator drains and overheats the Mountaineer in cooling. Check white residue, pressure test and install updated radiator with Mercury updates. Train fan operation and maintain the stability of temperatures when a graded climb is experienced. Once repaired, the Mercury Mountaineer will start without noise, idle evenly and pull cleanly. According to Mercury inspection schedules, retest fluids after a heat soak. Time inspections accordingly that the Mountaineer is reliable in daily use. Freeze frames and fault codes to compare in the post repair drive.
Mercury Mountaineer Parts and Q&A
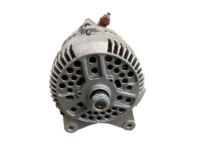
- Q: How to service and repair the alternator on Mercury Mountaineer?A:And to service the alternator, disconnect the battery followed by loosening the front end accessory drive belt by turning the tensioner counter-clockwise and position the belt aside. Since the protective cover has been moved, remove the generator B+ terminal nut. The reverse of these steps will re-install.
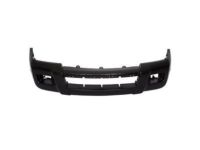
- Q: How to remove and replace the front bumper cover on Mercury Mountaineer?A:To install the front bumper cover on the Explorer, Explorer Sport Trac and Mountaineer, begin by un screwing the headlamp assembly and removing the connectors of the fog lamp and turn signal. Take off the splash shield screws, bolts and scrivets. In the case of the Mountaineer, unscrew the upper screws, spin the cover and unscrew the tabs. Installation is a reverse process.
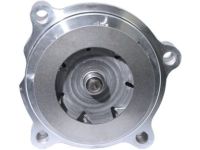
- Q: How to service the water pump on a 4.0L SOHC engine on Mercury Mountaineer?A:To replace the cooling pump on a 4.0 L SOHC engine, drain the cooling system, take out the fan and drive belt and un-attach the coolant pump pulley. Unplug hoses, take off pump and gasket and clean surfaces using plastic scraper. Install a new gasket, tightening bolts as desired.


