FordParts
My Garage
My Account
Cart
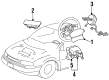
OEM Mercury Villager Clock Spring
Spiral Cable Clock Spring- Select Vehicle by Model
- Select Vehicle by VIN
Select Vehicle by Model
orMake
Model
Year
Select Vehicle by VIN
For the most accurate results, select vehicle by your VIN (Vehicle Identification Number).
3 Clock Springs found


Mercury Villager Clockspring Part Number: F6XY-14A664-AD
$76.24 MSRP: $105.47You Save: $29.23 (28%)Ships in 1-2 Business DaysMercury Villager Clockspring Part Number: F4XY-14A664-A
$298.94 MSRP: $410.15You Save: $111.21 (28%)
Mercury Villager Clockspring Part Number: XF5Z-14A664-BA
Mercury Villager Clock Spring
OEM Clock Spring boasts unmatched quality. Each part goes through full quality checks. They adhere to Mercury's official factory standards. These steps remove flaws and inconsistencies. So you can get Clock Spring with long life and a perfect fit. Come to our website and find genuine Mercury Villager parts. We keep a wide inventory of OEM Villager parts at the highly affordable prices. It's easy to search, compare, and pick what you need. You'll love the clear info and simple checkout. We offer top-rated customer service, and we reply fast. We also ship promptly to ensure your order arrives on time.
Mercury Villager Clock Spring Parts and Q&A
- Q: What Precautions Should Be Taken When Servicing the Clock Spring on Mercury Villager?A:The service of air bag sliding contact requires safety glasses together with the need to handle air bag modules with trim cover directed away from your body to prevent accidental deployment injuries. Setting live air bag modules with the trim cover facing down is forbidden at all times yet handwashing with soap and water must be done following deployed air bag contact because sodium hydroxide remains on the surface. Touching the air bag module connectors will cause deployment and lead to personal injury. Air bag modules should be exchanged for new trim covers when discoloration or damage occurs instead of performing repainting services. Air bag components service requires the depleting of back up power supply energy through battery ground cable disconnect along with a three-minute waiting period. The service starts with disconnection of the battery ground cable before removing the driver air bag module followed by Steering Wheel removal with wheels positioned straight ahead. Two strips of masking tape should be placed across the Clock Spring for safety during rotor removal. Begin this step by unscrewing four screws on the lower steering column shroud and then taking off four pushpins from both sides along with removing the C.D. changer cover or console compartment door and the ashtray/cup holder assembly by depressing tabs. The next operation requires removal of the center instrument panel finish panel which needs two screws as well as releasing its retaining clips. Start by pulling the Headlight Switch and disconnecting it before removing the instrument cluster finish panel without complete detachment. The process requires removal of the fuse panel cover coupled with the upper and lower steering column opening finish panel retaining screw and its two pushpins and one screw. First disconnect the cigarette lighter and speed control switch before removing the lower steering column opening finish panel with its associated reinforcement. Removal of the three screws and Clock Spring begins after disconnecting the two electrical connectors then removing pushpins while opening wire harness retainers and removing the wire harness. When centralizing the Clock Spring of vehicles you should rotate the rotor clockwise until you sense resistance then continue counterclockwise turning for 2-1/2 turns until reaching the center position but ensure the rotor stays stationary. Repeating the centralizing procedure makes sure premature component failure does not occur when centralization is uncertain. The installation procedure includes first aligning the Clock Spring by keeping the wheels straight followed by reinstalling all components then performing supplemental restraint system (SRS) verification.

Related Mercury Villager Parts
 Mercury Villager Air Bag Control Module
 Mercury Villager Air Bag Sensor
 Mercury Villager Airbag
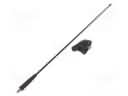 Mercury Villager Antenna
 Mercury Villager Antenna Base
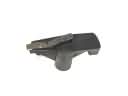 Mercury Villager Distributor Rotor
 Mercury Villager Ignition Lock Cylinder
 Mercury Villager Instrument Cluster
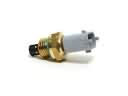 Mercury Villager Intake Manifold Temperature Sensor
 Mercury Villager Mass Air Flow Sensor
 Mercury Villager Tachometer
 Mercury Villager Windshield Wiper Switch