My Garage
Cart
Make sure this part fits

Ford 9W1Z-5035-A
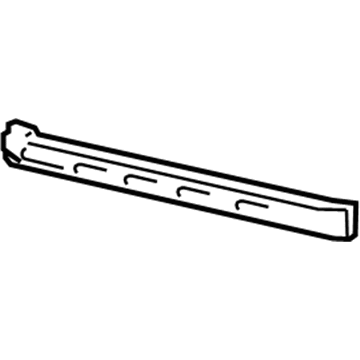
Rear Crossmember

2003-2011 Ford 9W1Z5035A

Customer Questions & Expert Answers (5)
Ford 9W1Z-5035-A Rear Crossmember
  • Part Description
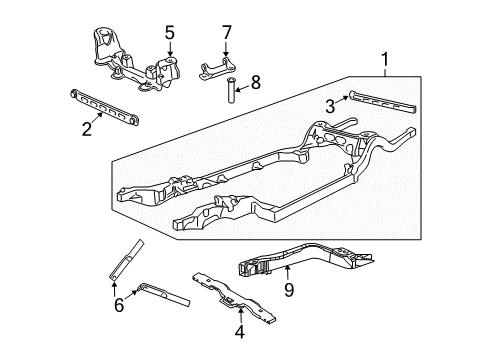
    Cross Member Assembly; Frame Crossmember, Rear
  • Base No.
    5035
  • Position
    Rear
  • Replaces
    3W1Z-5035-AA
  • Manufacturer
    Ford
Make sure this part fits
$86.34 MSRP: $119.44
You Save: $33.10 (28%)
Ships in 1-2 Business Days
1
ADD TO CART
  • Related Parts
  • Product Specifications
  • Vehicle Fitment
  • Customer Questions & Expert Answers
  • Product Specifications

    BrandGenuine Ford
    Base No.5035
    Manufacturer Part Number9W1Z-5035-A
    Part DescriptionCross Member Assembly; Frame Crossmember, Rear
    Item Weight9.50 Pounds
    PositionRear
    ConditionNew
    Fitment TypeDirect Replacement
    Replaces3W1Z-5035-AA
    ManufacturerFord
    SKU9W1Z-5035-A
    Shipping & ReturnShipping Policy Return Policy
    Warning: California's Proposition 65
  • Vehicle Fitment

    Year Make Model Trim Engine
    2003-2011 Ford Crown VictoriaBase, LWB, LX, LX Sport, Police Interceptor, S, Special Edition8 Cyl 4.6 L CNG, 8 Cyl 4.6 L FLEX, 8 Cyl 4.6 L GAS
    2003-2011 Lincoln Town CarCartier, Cartier L, Designer Series, Executive, Executive L, Executive Protection Series, Protection Series, Signature, Signature L, Signature Limited, Ultimate, Ultimate L8 Cyl 4.6 L FLEX, 8 Cyl 4.6 L GAS
    2003-2011 Mercury Grand MarquisGS, GSL, Limited Edition, LS, LSE, Ultimate Edition8 Cyl 4.6 L FLEX, 8 Cyl 4.6 L GAS
    2003-2004 Mercury MarauderBase8 Cyl 4.6 L GAS
  • Customer Questions & Expert Answers

    Q:
    Is this 9W1Z-5035-A compatible with my car? Posted by FordPartsDeal Specialist
    A:
    Select Your Vehicle model to verify if part number 9W1Z-5035-A fits your car.
    Posted by FordPartsDeal Specialist
    Q:
    How to service and repair the rear crossmember for transmission support on Ford Crown Victoria? Posted by Customer
    A:
    Service or repair operations on the transmission support crossmember start with depowering any fire suppression system. Position the vehicle on a hoist in neutral gear position. The vehicle requires disconnected RH heated oxygen sensor (HO2S) connector along with the RH catalyst monitor connector. Unscrew both bolts at the RH exhaust flange as well as the RH catalytic converter. The same procedure applies to the left-hand side by disconnecting the LH HO2S connector and the LH catalyst monitor connector followed by LH exhaust flange and LH catalytic converter bolt removal. Proceed to remove the rear transmission insulator nuts while implementing a suitable transmission jack for installation. Cut the bolts securing both sides of the parking brake cable bracket before setting this bracket aside. The crossmember must be pried out from its pocket space before you lower both side pieces for removal. Handle it gently because damage to this structure will occur. Begin with the LH crossmember side insertion into the pocket before installing its bolts as a first step followed by installing the RH side crossmember bolts next. Repeat this procedure to install the parking brake cable bracket by securing it with 55 Nm (41 lb-ft) torque. Position the transmission onto the crossed member before installing rear transmission insulator nuts using a torque of 30 Nm (22 lb-ft). Replace the transmission jack and insert the new gasket before placing the RH catalytic converter assembly into position followed by loose bolt installation without tightening the fasteners. Fasten the RH exhaust flange nuts at 48 Nm (35 lb-ft) then move to tightening the RH exhaust bolts to 40 Nm (30 lb-ft). Connect both monitor connectors for the right-hand HO2S and catalyst. The gasket installation process for the LH catalytic converter requires the same procedure using LH exhaust flange nuts to 48 Nm (35 lb-ft) as well as LH exhaust bolts to 40 Nm (30 lb-ft). Next, install the LH HO2S and catalyst monitor connectors. To complete the procedure repower any fire suppression system with an active function then lower the vehicle.
    Posted by FordPartsDeal Specialist
    Q:
    How to Service and Repair the Rear Crossmember for the 4R70E/4R75E Transmission Support on Lincoln Town Car? Posted by Customer
    A:
    You can start rear cross-member service and repair on 4R70E/4R75E transmission support by positioning the vehicle on a hoist with neutral transmission settings. Start by detaching both connectors from the right-hand heated oxygen sensor system (HO2S) and the RH catalyst monitor before removing bolts securing the RH exhaust flange and the right-hand catalytic converter. You should disconnect the left-hand (LH) HO2S connector along with the LH catalyst monitor connector before removing bolts from both the LH exhaust flange and LH catalytic converter. Mount a transmission jack while you take away the insulator nuts from the transmission. The parking brake cable bracket and RH and LH side transmission support crossmember bolts need to be removed before the bracket can be discarded. Handle this operation carefully because the transmission support crossmember needs to be removed from its pocket without inflicting damage. Remove the complete transmission support crossmember by lowering both its sides. The LH side of the transmission support crossmember should be placed into its pocket before loosely installing bolts and finishing with the RH side. Secure the transmission support crossmember bolts on both LH and RH sides at 70 Nm (52 lb-ft) torque. Finally lower the transmission onto the support crossmember then put lag the transmission insulator nuts with a torque setting of 30 Nm (22 lb-ft) while the parking brake cable bracket requires a torque setting of 55 Nm (41 lb-ft). Position the new gasket for the RH catalytic converter assembly and install its bolts without complete torque. Begin the RH exhaust flange installation by tightening its nuts to 48 Nm (35 lb-ft) and then secure the RH catalytic converter-to-exhaust pipe bolts at 40 Nm (30 lb-ft). Fasten the RH HO2S and catalyst monitor connectors. The same procedure is used for the LH catalytic converter assembly where loose bolts are installed until new gaskets are fitted and then the exhaust flange nuts are tightened to 48 Nm (35 lb-ft) and the LH catalytic converter-to-exhaust pipe bolts are tightened to 40 Nm (30 lb-ft). Settle the LH HO2S and catalyst monitor connectors as the final step.
    Posted by FordPartsDeal Specialist
    Q:
    How to Service and Repair the Rear Crossmember on Lincoln Town Car? Posted by Customer
    A:
    The first step for transmission support crossmember repair and service requires placing the vehicle in NEUTRAL position while using a hoist system. The service process begins by first removing the connector from each HO2S sensor followed by removal of the catalyst monitor connectors before uninstalling bolts attaching the exhaust flange to the catalytic converter. The same process should then be performed on the LH side after disconnecting the LH HO2S sensor connector and the LH catalyst monitor connector then removing both bolts from the LH exhaust flange and the LH catalytic converter. Before working on the transmission you must remove its rear insulator nuts and then use an appropriate transmission jack to secure it. Clear away both bolts from the RH and LH crossmember before extracting the parking brake cable bracket. It is necessary to gently pry the crossmember from its pocket but avoid damaging the structure as you lower both sides to remove it. Install the crossmember by inserting the left-hand side first into its pocket where you should secure the bolts loosely then follow with the right-hand side bolts. Next install the parking brake cable bracket before torquing it to 55 Nm (41 ft. lbs). Place the transmission onto the crossmember then fasten its rear insulator nuts to 30 Nm (22 ft. lbs) torque. First install a new gasket to the RH catalytic converter assembly before placing it in position while loosely installing its bolts. First tighten the RH exhaust flange nuts to 48 Nm before tightening the RH exhaust bolts to 40 Nm. The technician will connect the RH HO2S sensor connector together with the RH catalyst monitor connector. Follow the same gasket installation process for the LH catalytic converter assembly before installing the bolts without torque then securing the LH exhaust flange nuts with 48 Nm (35 ft. lbs) before torquing LH exhaust bolts to 40 Nm (30 ft. lbs). Start by connecting the LH HO2S sensor connector as well as the LH catalyst monitor connector.
    Posted by FordPartsDeal Specialist
    Q:
    How is the Rear Crossmember of the 4R70E/4R75E Transmission Serviced on Mercury Grand Marquis? Posted by Customer
    A:
    The fire suppression system requires depowering before working on the rear cross-member of the 4R70E/4R75E transmission to prevent injuries. Place the vehicle with neutral position and in a hoist setup while disconnecting both the HO2S connector and catalyst monitor connector available on the right-hand side. First detach nuts from the right-hand exhaust flange followed by removing nuts from the right-hand catalytic converter bolts which attach it to the exhaust. Proceed with the same steps to work on the left-hand side where you disconnect both the left-hand HO2S connector and catalyst monitor connector following the nuts removal process of the left-hand exhaust flange then the catalytic converter-to-exhaust bolts. Mount the suitable transmission jack before moving forward to take off the transmission insulator nuts. First remove the bolts from both right-hand and left-hand side transmission support crossmembers before taking out all bolts that secure the park brake cable bracket for separate storage. Take careful precautions when removing the transmission support crossmember from its pocket as damaging it could occur. Lower the entire transmission support crossmember by both of its sides to detach it from the vehicle. First align the left-hand side of the transmission support crossmember into its pocket before loosely installing the bolts then complete the installation with the right-hand side. Tighten both left-hand and right-hand transmission support crossmember bolts to 70 Newton meters which also equates to 52 pound feet. Lower the transmission frame onto the support crossmember while also installing transmission insulator nuts that must be secured with 30 Nm (22 lb-ft). First remove the transmission jack and add new gaskets for right-hand catalytic converter assembly components before installing the bolts while leaving them untightened. Fasten right-hand exhaust flange nuts until they reach 48 Nm (35 lb-ft) torque then torque right-hand catalytic converter-to-exhaust bolts to 40 Nm (30 lb-ft). Use the diagnostic tool to connect the connectors for right-hand HO2S and catalyst monitor. You should perform the same gasket installation then bolt process on the left-hand catalytic converter assembly by tightening both left-hand exhaust flange nuts to 48 Nm (35 lb-ft) and left-hand catalytic converter-to-exhaust bolts to 40 Nm (30 lb-ft). After connecting the left-hand HO2S and catalyst monitor connectors it is necessary to raise the fire suppression systems and lower the vehicle if fire suppression is enabled.
    Posted by FordPartsDeal Specialist
    If you have any questions about this product, please don't hesitate to ask us. We will be happy to help you!

OEM Ford 9W1Z-5035-A, Excellent Performance and Perfect Fitment

To ensure reliability, purchase Ford part # 9W1Z-5035-A Rear Crossmember. It is sometimes referred to as Ford Axle Beam, Ford Rear Crossmember. For those Ford owners who aspire to maintain their vehicles in optimal shape, opting for OEM parts is a wise choice. Precisely engineered, these components adhere to stringent factory guidelines and are produced in state-of-the-art facilities using cutting-edge technologies. Moreover, they are subjected to thorough testing to certify their resilience and safety, thereby making them a dependable option for Ford owners.

FordPartsDeal.com is a leading supplier of genuine Ford parts such as Ford 9W1Z5035A Rear Crossmember. A vast selection of genuine Ford parts is available on our website, all offered at discounted prices. Every OEM Ford part is covered by the manufacturer's warranty, which also applies to our hassle-free return policy. Enjoy fast delivery service, ensuring you get your parts when you need them. Your shopping experience here is guaranteed to be pleasurable. For detailed Ford parts information, click here.
Choose FordPartsDeal for discounted prices, exceptional service and fast delivery