FordParts
My Garage
My Account
Cart
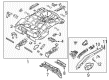
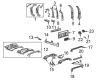
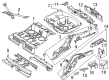
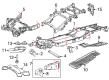
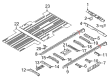
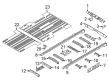
OEM Ford Rear Crossmember
Rear Suspension Crossmember- Select Vehicle by Model
- Select Vehicle by VIN
Select Vehicle by Model
orMake
Model
Year
Select Vehicle by VIN
For the most accurate results, select vehicle by your VIN (Vehicle Identification Number).
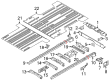
181 Rear Crossmembers found


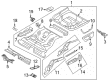
Ford Rear Crossmember Part Number: CP9Z-4K338-A
$90.41 MSRP: $131.60You Save: $41.19 (32%)Ships in 1-3 Business DaysProduct Specifications- Other Name: Cross Member - Rear Axle Mount; Floor Pan Crossmember, Rear Rearward; Cross Member - Rear Axle Mounting
- Position: Rear


Ford Rear Crossmember Part Number: 8C3Z-2510608-A
$247.63 MSRP: $363.63You Save: $116.00 (32%)Product Specifications- Other Name: Member - Rear Floor Cross; Floor Pan Crossmember, Rear, Rear Rearward
- Position: Rear
- Replaces: 5C3Z-2510608-AA, F81Z-25109A68-AA


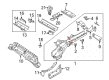
Ford Seat Crossmember, Rear Part Number: DB5Z-7810780-A
$266.80 MSRP: $391.78You Save: $124.98 (32%)Product Specifications- Other Name: Member Assembly - Floor Cross; Floor Pan Crossmember, Rear, Rear Rearward; Crossmember
- Position: Rear


Ford Crossmember Part Number: FL3Z-5L005-A
$396.33 MSRP: $581.98You Save: $185.65 (32%)Ships in 1 Business DayProduct Specifications- Other Name: Arm - Trailing; Frame Crossmember


Ford Suspension Crossmember Part Number: JR3Z-5035-J
$652.28 MSRP: $966.33You Save: $314.05 (33%)Ships in 1-3 Business DaysProduct Specifications- Other Name: Cross Member Assembly; Crossmember
- Replaces: FR3Z-5035-F, FR3Z-5035-J, FR3Z-5035-B, JR3Z-5035-E

Ford Rear Crossmember, Driver Side Part Number: GN1Z-7410693-B
$106.26 MSRP: $185.60You Save: $79.34 (43%)Ships in 1-3 Business DaysProduct Specifications- Other Name: Cross Member Assembly; Seat Track Reinforcement, Rear Left
- Position: Driver Side

Ford Suspension Crossmember Part Number: MB5Z-5035-F
$672.13 MSRP: $995.75You Save: $323.62 (33%)Ships in 1-2 Business DaysProduct Specifications- Other Name: Cross Member Assembly; Crossmember
- Replaces: MB5Z-5035-C

Ford Suspension Crossmember, Rear Part Number: HG9Z-5035-A
$393.34 MSRP: $616.72You Save: $223.38 (37%)Ships in 1-2 Business DaysProduct Specifications- Other Name: Cross Member Assembly; Suspension Subframe Crossmember, Rear; Crossmember
- Position: Rear
- Replaces: DG9Z-5035-A, DG9Z-5035-C

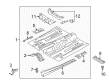
Ford Crossmember, Rear Part Number: DV6Z-4K338-B
$93.90 MSRP: $144.50You Save: $50.60 (36%)Ships in 1-2 Business DaysProduct Specifications- Other Name: Cross Member - Rear Axle Mount; Cross Member - Rear Axle Mounting
- Position: Rear
Ford Crossmember, Rear Part Number: DV6Z-4K338-D
$98.16 MSRP: $151.07You Save: $52.91 (36%)Ships in 1-2 Business DaysProduct Specifications- Other Name: Cross Member - Rear Axle Mount; Cross Member - Rear Axle Mounting
- Position: Rear


Ford Rear Crossmember Part Number: F2GZ-58101C16-C
$101.85 MSRP: $156.73You Save: $54.88 (36%)Ships in 1-2 Business DaysProduct Specifications- Other Name: Member - Rear Floor Cross
- Position: Rear
- Replaces: F2GZ-58101C16-A, F2GZ-58101C16-B

Ford Front Crossmember, Rear Center Part Number: CK4Z-61102A24-C
$114.49 MSRP: $176.20You Save: $61.71 (36%)Ships in 1-3 Business DaysProduct Specifications- Other Name: Member - Rear Floor Cross; Floor Pan Crossmember, Rear Center; Center Crossmember
- Position: Front Rear Center
- Replaces: BK2Z-61102A24-A

Ford Rear Crossmember, Center Part Number: AE9Z-74101C16-A
$124.48 MSRP: $181.20You Save: $56.72 (32%)Ships in 1-2 Business DaysProduct Specifications- Other Name: Member - Rear Floor Cross; Floor Pan Crossmember, Rear Center; Center Crossmember
- Position: Rear Center
- Replaces: 8A8Z-74101C16-A

Ford Center Crossmember, Rear Part Number: LK4Z-61102A24-A
$126.98 MSRP: $195.42You Save: $68.44 (36%)Ships in 1-2 Business DaysProduct Specifications- Other Name: Member - Rear Floor Cross; Floor Pan Crossmember, Rear Center; Crossmember
- Position: Rear Center

Ford Crossmember, Rear Part Number: AE8Z-4K338-A
$141.76 MSRP: $206.35You Save: $64.59 (32%)Ships in 1-3 Business DaysProduct Specifications- Other Name: Cross Member - Rear Axle Mount; Floor Pan Crossmember, Rear; Cross Member - Rear Axle Mounting
- Position: Rear

Ford Rear Crossmember Part Number: NK4Z-61102A24-D
$134.16 MSRP: $207.03You Save: $72.87 (36%)Ships in 1-2 Business DaysProduct Specifications- Other Name: Member - Rear Floor Cross
- Position: Rear
- Replaces: BK3Z-61102A24-B, BK3Z-61102A24-C, NK3Z-61102A24-A

Ford Rear Crossmember Part Number: NK4Z-61102A24-E
$137.47 MSRP: $204.85You Save: $67.38 (33%)Ships in 1-2 Business DaysProduct Specifications- Other Name: Member - Rear Floor Cross
- Position: Rear


Ford Rear Crossmember Part Number: F5RZ-5035-B
Product Specifications- Other Name: Cross Member Assembly; Suspension Crossmember; Crossmember
- Position: Rear


Ford Suspension Crossmember, Rear Part Number: 8S4Z-5035-A
Product Specifications- Other Name: Cross Member Assembly; Suspension Subframe Crossmember, Rear; Crossmember
- Position: Rear
- Replaces: 3S4Z-5035-AA


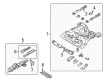
Ford Crossmember, Front Part Number: 2L2Z-5035-AA
Product Specifications- Other Name: Cross Member Assembly; Frame Crossmember, Front
- Manufacturer Note: Crossmember #5
- Position: Front
- Replaces: 1L5Z-5035-AA
| Page 1 of 10 |Next >
1-20 of 181 Results
Ford Rear Crossmember
If you own Ford and want to keep it in top shape, choosing OEM Rear Crossmember is a smart move. They are precisely engineered and follow strict factory standards. They are made in advanced facilities that use cutting edge technology. Each part goes through thorough testing to confirm strength and safety, so you can trust it. FordPartsDeal.com gives you genuine Ford Rear Crossmember at some of the affordable online prices without cutting quality. Every OEM Ford part includes the manufacturer's warranty, easy returns, and super-fast delivery. So why wait? Shop now and get your vehicle back to peak condition.
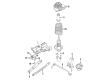
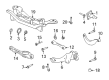
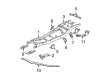
Ford Rear Crossmember united the driveshaft and suspension with stability and steering feel smooth. Ford was a product that started in 1903 in a workshop Henry had built and was able to shatter the mass production concept with the 1913 moving line and establish that mass can still be able to reach honest prices. Ford maintains that rebel fire with EcoBoost engines that punch bigger than they are and sip fuel providing drivers with thrust without emptying wallets. Ford equips cabins with SYNC voice technology that activates playlists and finds directions immediately and Co-Pilot360 reads lanes and bangs the brakes when drivers respond slowly. Ford moves forward with battery trucks such as F-150 Lightning that move silently, empty zero tailpipe emissions, and can even tow heavy freight. Rear Crossmember goes across lower chassis rails with high tensile steel, supports engine weight, supports transmission mount, and connects pick up points of suspension to one rigid plane preventing unwanted geometry change in corners. Rear Crossmember also protects hybrid drives by keeping battery cradle loads stationary thus keeping electric motors and gasoline engines in harmony and providing sharp acceleration without shaking. Rear Crossmember prevents corrosion, snickers at pothole strikes, and increases the life of the vehicle since a strong backbone reduces vibration and prevents weld seams from being destroyed from overuse and years of hard travel.
Ford Rear Crossmember Parts and Q&A
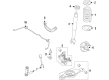
- Q: How to Properly Handle the Rear Crossmember for Transmission Support in a Ford Explorer?A:Approach the service of the transmission support crossmember by hoisting the vehicle into neutral position. Disassemble the four bolts holding the transfer case skid plate in place and remove the skid plate before returning it back with 15 Nm (11 lb-ft) torque. The first step requires you to remove the right heat shield bolt before tightening it to 18 Nm (13 lb-ft) during installation then performing the same procedure with the left heat shield bolt. You should support the transmission with an appropriate jack then take off the two transmission mount nuts before securing them with a torque of 90 Nm (66 lb-ft). The installation process requires torqueing the six lower bolts of the transmission crossmember to 80 Nm (59 lb-ft) after installing. When reinstalling the crossmember transmission remove two bolts and upper nuts then secure them at 143 Nm (105 lb-ft). To complete the task reinstall the transmission crossmember by following the reversal of removal steps.
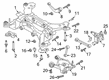
- Q: How to Service and Repair the Rear Crossmember on Ford Focus?A:Service and repair operations on the rear cross-member start by suppressing the stabilizer bar. Support the wheel knuckles first before breaking attachment of the rear lower arms then the front lower arms and upper arms. The exhaust system needs support to avoid damage so detach its bracket system. The evaporative emission canister needs removal in 3-door and 4-door models. Begin by placing the crossmember in the jack position then support it by a suitable transmission device before removing all three bolts that secure the system from each side before you can lower the crossmember for replacement steps. Find the proper placement for the crossmember before installing retaining bolts on each side by using three bolts. The exhaust system installation should follow the reinstallation of the evaporative emission canister for both 3-door and 4-door vehicle models. While adding the upper arms and front lower arms and rear lower arms to the suspension maintain its design height. The final step requires installing the stabilizer bar together with rear wheel alignment inspection to finish the repair.


Related Ford Parts
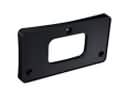 Ford License Plate
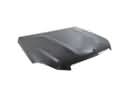 Ford Hood
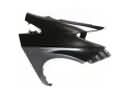 Ford Fender
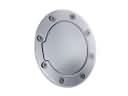 Ford Fuel Door
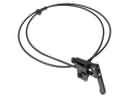 Ford Hood Release Cable
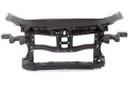 Ford Radiator Support
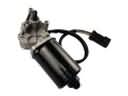 Ford Wiper Motor
 Ford Floor Pan
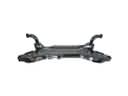 Ford Front Cross-Member
 Ford Fuel Door Hinge
 Ford Fuel Filler Housing
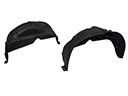 Ford Wheelhouse
Browse Ford Rear Crossmember by Models
Ranger Bronco Mustang Explorer Focus Fusion F-150 Maverick Escape Edge Expedition Fiesta Taurus Thunderbird Flex Transit Connect Bronco Sport Explorer Sport Trac Crown Victoria Probe EcoSport Escort C-Max Contour Explorer Sport Freestyle Mustang Mach-E Police Interceptor Utility Taurus X F-350 Super Duty Police Interceptor Sedan E-Transit F-150 Lightning F-250 Super Duty Police Responder Hybrid Special Service Police Sedan SSV Plug-In Hybrid Transit-150 Transit-250 Transit-350 Transit-350 HD