My Garage
Cart
Make sure this part fits

Ford 8G1Z-3504-FRM
Steering Gear

2008-2009 Ford 8G1Z3504FRM

Customer Questions & Expert Answers (4)
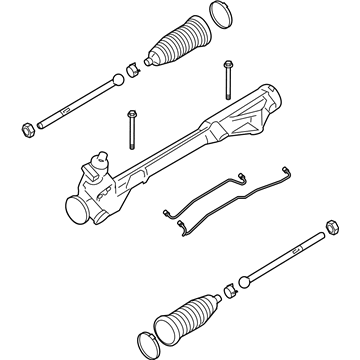
Ford 8G1Z-3504-FRM Steering Gear
  • Part Description
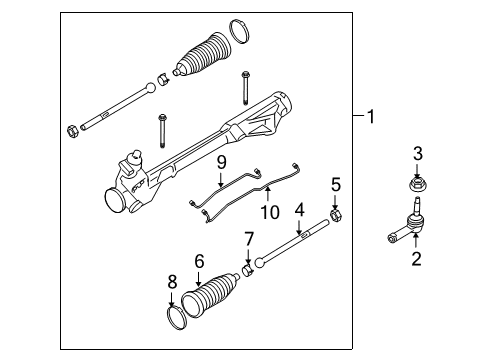
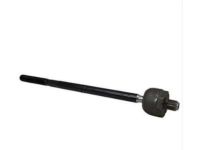
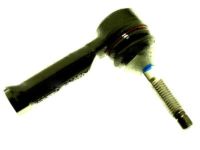
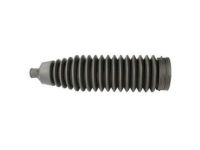
    Reman Kit - Steering Gear Repair; Rack and Pinion Assembly; Steering Gearbox
  • Base No.
    3504
  • Replaces
    8G1Z-3504-C, STG-446, STG-443, 8G1Z-3504-F, 8G1Z-3504-E
  • Manufacturer
    Ford
Make sure this part fits
$391.17 MSRP: $641.67
You Save: $250.50 (40%)
Core Charge: $225.00
Ships in 1-2 Business Days
1
ADD TO CART
  • Related Parts
  • Product Specifications
  • Vehicle Fitment
  • Customer Questions & Expert Answers
  • Product Specifications

    BrandGenuine Ford
    Base No.3504
    Manufacturer Part Number8G1Z-3504-FRM
    Part DescriptionReman Kit - Steering Gear Repair; Rack and Pinion Assembly; Steering Gearbox
    Other NamesGear Assembly; Gear; Kit - Steering Gear Repair
    Manufacturer NoteRemanufactured
    Item Dimensions6.0 x 10.9 x 53.0 inches
    Item Weight22.40 Pounds
    ConditionNew
    Fitment TypeDirect Replacement
    Replaces8G1Z-3504-C, STG-446, STG-443, 8G1Z-3504-F, 8G1Z-3504-E
    ManufacturerFord
    SKU8G1Z-3504-FRM
    WarrantyThis genuine Ford part is guaranteed by Ford's factory warranty.
    Shipping & ReturnShipping Policy Return Policy
    Warning: California's Proposition 65
  • Vehicle Fitment

    Year Make Model Trim Engine
    2008-2009 Ford TaurusLimited, SE, SEL6 Cyl 3.5 L GAS
    2008-2009 Ford Taurus XEddie Bauer, Limited, SEL6 Cyl 3.5 L GAS
    2008-2009 Mercury SableBase, Premier6 Cyl 3.5 L GAS
  • Customer Questions & Expert Answers

    Q:
    Will this 8G1Z-3504-FRM work in my car? Posted by FordPartsDeal Specialist
    A:
    Select Your Vehicle model to verify if part number 8G1Z-3504-FRM fits your car.
    Posted by FordPartsDeal Specialist
    Q:
    What Are the Crucial Steps to Follow When Repairing the Front Rack and Pinion in the Power Steering System on Ford Taurus X? Posted by Customer
    A:
    Repairing power steering requires preventing foreign material from entering because this will lead to power steering component failure. The Hunter(R) 28-75-1 steering wheel holding device should be utilized first to maintain the wheel in a straight-ahead position. The hex-holding feature will keep the stud from turning as you remove the two tie-rod end nuts and disconnect the tie-rod ends from the wheel knuckles, install them at 115 Nm (85 lb-ft). The pressure line bracket-to-rack and pinion bolt requires removal before installation during which you should tighten it to 23 Nm (17 lb-ft). New O-ring seals must be used during power steering line disconnects to avoid fluid leakage and both seals need proper installation placement. Extract the power steering line clamp plate bolt from its position to rotate the clamp plate while detaching the pressure and return lines from the rack and pinion then discard the two O-ring seals before torquing the clamp plate bolt to 23 Nm (17 lb-ft). When disconnecting the lower shaft keep the steering column shaft from rotating to protect the Clock Spring. Replacement of the Clock Spring is necessary when the shaft has rotated. Safely remove the steering column shaft-to-rack and pinion bolt then throw it away and replace it with a new bolt which needs torquing to 25 Nm (18 lb-ft). During reinstallation you should secure the two new stabilizer bar link upper nuts to 55 Nm (41 lb-ft) while positioning the stabilizer bar and links in an upward direction. To install the roll resistor bracket-to-transaxle nut and bolt on Taurus and Sable All-Wheel Drive vehicles, follow the recommendation to tighten them to 48 Nm (35 lb-ft). Place a suitable jack under the roll resistor-to-transaxle bracket then lift the engine/transaxle approximately 25.4 mm (1 in) maintaining its distance from engine and transaxle components. Install new stabilizer bar bracket bolts on Taurus X vehicles while discarding the old ones and securely tighten them to 50 Nm (37 lb-ft). The last step includes rack and pinion removal through the left side of the vehicle where you should discard the nuts before securely fastening new ones to 117 Nm (86 lb-ft). After reversing the procedure install the system into power steering position while filling the system then check the toe alignment but only if necessary.
    Posted by FordPartsDeal Specialist
    Q:
    What Are the Crucial Steps to Follow When Repairing the Front Rack and Pinion in the Power Steering System on Ford Taurus? Posted by Customer
    A:
    Repairing power steering requires preventing foreign material from entering because this will lead to power steering component failure. The Hunter(R) 28-75-1 steering wheel holding device should be utilized first to maintain the wheel in a straight-ahead position. The hex-holding feature will keep the stud from turning as you remove the two tie-rod end nuts and disconnect the tie-rod ends from the wheel knuckles, install them at 115 Nm (85 lb-ft). The pressure line bracket-to-rack and pinion bolt requires removal before installation during which you should tighten it to 23 Nm (17 lb-ft). New O-ring seals must be used during power steering line disconnects to avoid fluid leakage and both seals need proper installation placement. Extract the power steering line clamp plate bolt from its position to rotate the clamp plate while detaching the pressure and return lines from the rack and pinion then discard the two O-ring seals before torquing the clamp plate bolt to 23 Nm (17 lb-ft). When disconnecting the lower shaft keep the steering column shaft from rotating to protect the Clock Spring. Replacement of the Clock Spring is necessary when the shaft has rotated. Safely remove the steering column shaft-to-rack and pinion bolt then throw it away and replace it with a new bolt which needs torquing to 25 Nm (18 lb-ft). During reinstallation you should secure the two new stabilizer bar link upper nuts to 55 Nm (41 lb-ft) while positioning the stabilizer bar and links in an upward direction. To install the roll resistor bracket-to-transaxle nut and bolt on Taurus and Sable All-Wheel Drive vehicles, follow the recommendation to tighten them to 48 Nm (35 lb-ft). Place a suitable jack under the roll resistor-to-transaxle bracket then lift the engine/transaxle approximately 25.4 mm (1 in) maintaining its distance from engine and transaxle components. Install new stabilizer bar bracket bolts on Taurus X vehicles while discarding the old ones and securely tighten them to 50 Nm (37 lb-ft). The last step includes rack and pinion removal through the left side of the vehicle where you should discard the nuts before securely fastening new ones to 117 Nm (86 lb-ft). After reversing the procedure install the system into power steering position while filling the system then check the toe alignment but only if necessary.
    Posted by FordPartsDeal Specialist
    Q:
    What Are the Crucial Steps to Follow When Repairing the Front Rack and Pinion in the Power Steering System on Mercury Sable? Posted by Customer
    A:
    The primary task when fixing power steering components involves blocking foreign material from entering the system because it could lead to power steering failure. The first step needs drivers to position the steering wheel at straight ahead before taking out the ignition key. Proceed with removing both wheels as well as tires. Use the hex holding feature to stop the stud from rotating during two tie-rod end nut removal before you disconnect the tie-rod ends from wheel knuckles and tighten all new nuts to 115 Nm (85 lb-ft) torque specification. Install the new power steering pressure line bracket-to-rack and pinion bolt with a torque of 25 Nm (18 lb-ft) when installing it to avoid damage to the rack and pinion. The installation of fresh O-ring seals should occur when disconnecting power steering lines while maintaining a specific placement sequence to block fluid leakage. First detach the power steering line clamp plate bolt before rotating the clamp plate then detach the power steering pressure and return lines from the rack and pinion where you will replace and tighten two new O-ring seals to 25 Nm (18 lb-ft). Steer away from rotating the steering column shaft when disconnecting the lower shaft because this could damage the Clock Spring; if this happens the Clock Spring will need complete removal and repositioning. Replace the steering column shaft-to-rack and pinion bolt and discard the old one while installing a new bolt with minimal torque of 25 Nm (18 lb-ft). When replacing stabilizer bar link upper nuts install them to 55 Nm (41 lb-ft) torque setting after which position the bar and links upward. Taurus and Sable all-wheel drive vehicles need technicians to remove the roll resistor bracket-to-transaxle nut and bolt while tightening the new bolt to 48 Nm (35 lb-ft) torque values when reinstalling the hardware. A properly positioned jack should support the roll resistor-to-transaxle bracket while elevating the engine-transaxle approximately 25.4 mm (1 inch) through the supporting surface. Use the left-side to extract the rack and pinion after you remove its two nuts and bolts then discard the old nuts before installing the new ones with a torque of 117 Nm (86 lb-ft). After removal extension the power steering system should be filled and front toe should receive any required adjustments.
    Posted by FordPartsDeal Specialist
    If you have any questions about this product, please don't hesitate to ask us. We will be happy to help you!

OEM Ford 8G1Z-3504-FRM, Excellent Performance and Perfect Fitment

To ensure reliability, purchase Ford part # 8G1Z-3504-FRM Steering Gear. It is sometimes referred to as Ford Rack And Pinion, Ford Steering Gear Box. For those Ford owners who aspire to maintain their vehicles in optimal shape, opting for OEM parts is a wise choice. Precisely engineered, these components adhere to stringent factory guidelines and are produced in state-of-the-art facilities using cutting-edge technologies. Moreover, they are subjected to thorough testing to certify their resilience and safety, thereby making them a dependable option for Ford owners.

FordPartsDeal.com is a leading supplier of genuine Ford parts such as Ford 8G1Z3504FRM Steering Gear. A vast selection of genuine Ford parts is available on our website, all offered at discounted prices. Every OEM Ford part is covered by the manufacturer's warranty, which also applies to our hassle-free return policy. Enjoy fast delivery service, ensuring you get your parts when you need them. Your shopping experience here is guaranteed to be pleasurable. For detailed Ford parts information, click here.
Choose FordPartsDeal for discounted prices, exceptional service and fast delivery