My Garage
Cart
Make sure this part fits

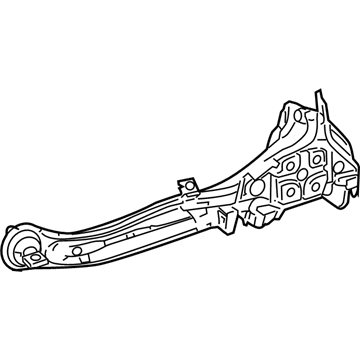
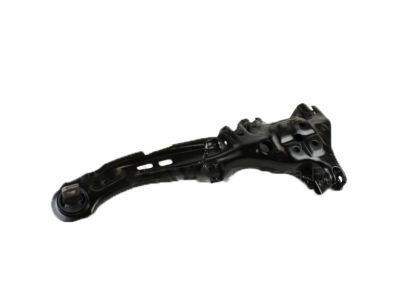
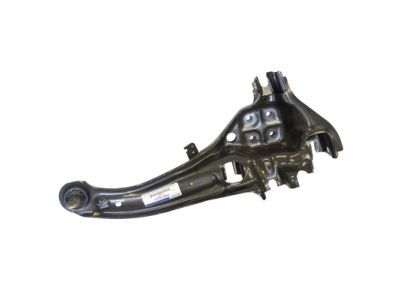
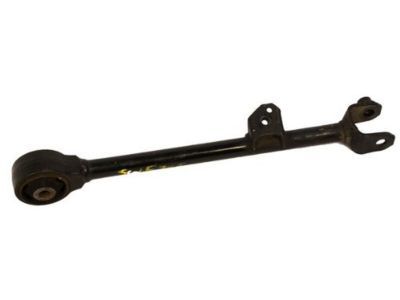
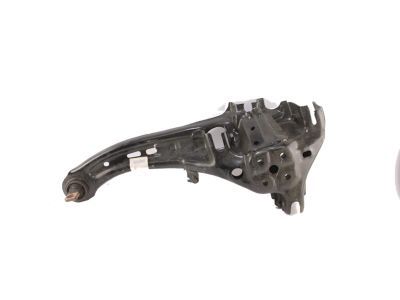
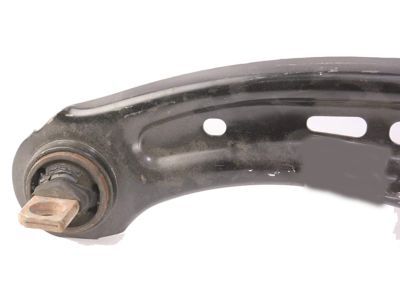
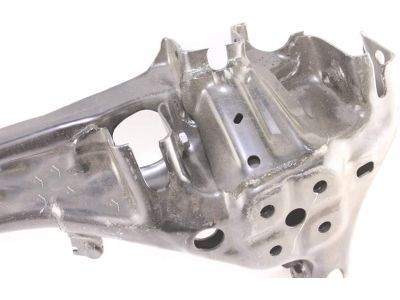
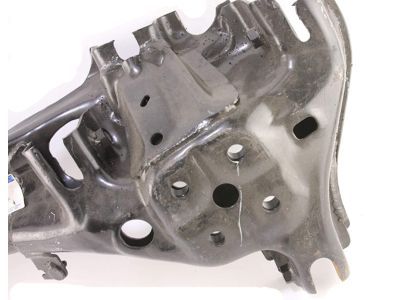
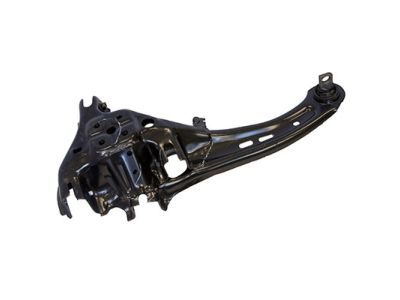
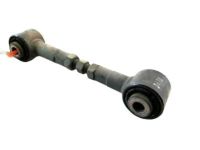
Ford 4M8Z-5500-B
Trailing Arm, Rear Passenger Side

2006-2012 Ford 4M8Z5500B

Customer Questions & Expert Answers (6)
Ford 4M8Z-5500-B Trailing Arm, Rear Passenger Side
  • Part Description
    Link; Suspension Trailing Arm, Rear Right
  • Base No.
    5500C
  • Position
    Rear Passenger Side
  • Manufacturer
    Ford
Make sure this part fits
$130.99 MSRP: $190.67
You Save: $59.68 (32%)
Ships in 1-2 Business Days
1
ADD TO CART
  • Related Parts
  • Product Specifications
  • Vehicle Fitment
  • Customer Questions & Expert Answers
  • Product Specifications

    BrandGenuine Ford
    Base No.5500C
    Manufacturer Part Number4M8Z-5500-B
    Part DescriptionLink; Suspension Trailing Arm, Rear Right
    Other NamesTrailing Link
    Item Dimensions5.2 x 31.2 x 13.7 inches
    Item Weight20.30 Pounds
    PositionRear Passenger Side
    ConditionNew
    Fitment TypeDirect Replacement
    ManufacturerFord
    SKU4M8Z-5500-B
    WarrantyThis genuine Ford part is guaranteed by Ford's factory warranty.
    Shipping & ReturnShipping Policy Return Policy
    Warning: California's Proposition 65
  • Vehicle Fitment

    Year Make Model Trim Engine
    2006-2012 Ford FusionHybrid, S, SE, SEL, Sport4 Cyl 2.3 L GAS, 4 Cyl 2.5 L FULL HYBRID EV-GAS (FHEV), 4 Cyl 2.5 L GAS, 6 Cyl 3.0 L FLEX, 6 Cyl 3.0 L GAS, 6 Cyl 3.5 L GAS
    2007-2012 Lincoln MKZBase, Hybrid4 Cyl 2.5 L FULL HYBRID EV-GAS (FHEV), 6 Cyl 3.5 L GAS
    2006 Lincoln ZephyrBase6 Cyl 3.0 L GAS
    2006-2011 Mercury MilanBase, Hybrid, Premier4 Cyl 2.3 L GAS, 4 Cyl 2.5 L FULL HYBRID EV-GAS (FHEV), 4 Cyl 2.5 L GAS, 6 Cyl 3.0 L FLEX, 6 Cyl 3.0 L GAS
  • Customer Questions & Expert Answers

    Q:
    Is this 4M8Z-5500-B compatible with my car? Posted by FordPartsDeal Specialist
    A:
    Select Your Vehicle model to verify if part number 4M8Z-5500-B fits your car.
    Posted by FordPartsDeal Specialist
    Q:
    How to service and repair the trailing arm on Ford Fusion? Posted by Customer
    A:
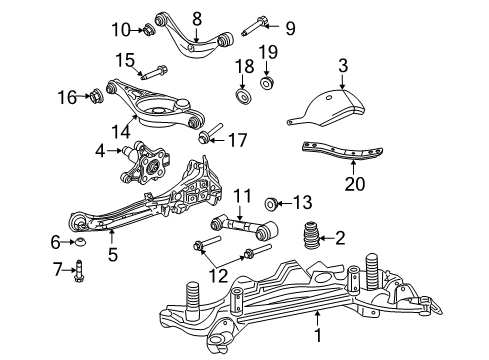
    The process to service or repair the trailing arm requires first disconnecting the wheel spindle and parking brake cable bracket bolt before placing the parking brake cable in position and torquing it to 10 Nm (89 inch lbs.) for reinstallation. The wheel speed sensor harness should be detached from the trailing arm when necessary. The trailing arm requires elevation using an appropriate jack but users must exercise caution because excessive spring compression represents a safety risk to themselves. During installation of the lower arm outboard bolt the suspension needs to be at the bushing fastener tightening position while you tighten it to 101 Nm (74 ft. lbs.). Discard the upper arm outboard bolt after you uninstall it but re-install it with a torque of 110 Nm (81 ft. lbs.) at conditions equal to the removal procedure. Drop the trailing arm while using the jack before removing it. Complete the removal of shock absorber lower bolt and flag nut by tightening them together to 115 Nm (85 ft. lbs.) when installing new components at bushing fastener tightening position. Replace the toe link outboard bolt after tightening it to 110 Nm (81 ft. lbs.) when reinstalling it to its proper location. Remove the two trailing arm forward bolts for replacement before taking out the trailing arm and tighten refurbished bolts to 133 Nm (98 ft. lbs.) during reinstallation. Start the tightening operation only after raising the suspension with a jack and placing it at the bushing fastener tightening position which is reached when the hub center to fender lip distance measures 395 mm (15.55 inch). After fitting the components complete the installation procedure by returning the assembly then check the alignment of the rear end and adjust if needed.
    Posted by FordPartsDeal Specialist
    Q:
    How to service and repair the trailing arm on both Front Wheel Drive (FWD) and All-Wheel Drive (AWD) on Lincoln MKZ? Posted by Customer
    A:
    Before working on the trailing arm either on FWD or AWD vehicles start by taking off the wheel together with its tire. The procedure involves disconnecting the parking brake cable bracket bolt followed by placement of the parking brake cable while tightening it to 10 Nm (89 lb-in). FWD vehicles require spindle removal as well as possible wheel speed sensor harness detachment from the trailing arm. To avoid serious injury from coil spring forces place a jack properly beneath the trailing arm while keeping extra care. At the bushing fastener tightening position, install the new lower arm outboard bolt and tighten it to 103 Nm (76 lb-ft). Apply the same procedure to the upper arm outboard bolt until it reaches 110 Nm (81 lb-ft). Pull down the trailing arm after jacking removal. Use the bushing fastener tightening position of the suspension to install new lower bolt and flagnut which needs tightening to 115 Nm (85 lb-ft). The outboard bolt of the toe link must be removed before reuse with a new bolt that needs to be tightened to 110 Nm (81 lb-ft) when the suspension reaches the bushing fastener tightening position. During AWD vehicle repairs, technicians should remove the bracket nut from the wheel speed sensor harness before placing it aside for reinstallation at a torque of 23 Nm (17 lb-ft). Detach the toe link and remove four trailing arm-to-wheel knuckle nuts together with the trailing arm toe link bracket but discard these parts before tightening new nuts to 100 Nm (74 lb-ft). Washers along with trailing arm-to-frame bolts can be discarded when you replace them with new bolts secured to 125 Nm (92 lb-ft) torque. Tighten all suspension bushing fasteners when the suspension reaches its mounting position by using a suitable jack to raise the suspension until the center hub stands 395 mm (15.55 in) diagonal to the fender lining. This positioning avoids incorrect stress on the bushing and damage to the suspension. The procedure ends by checking and adjusting the rear end alignment after removing all components.
    Posted by FordPartsDeal Specialist
    Q:
    How to service and repair the trailing arm on Lincoln Zephyr? Posted by Customer
    A:
    The process to service or repair the trailing arm requires first disconnecting the wheel spindle and parking brake cable bracket bolt before placing the parking brake cable in position and torquing it to 10 Nm (89 inch lbs.) for reinstallation. The wheel speed sensor harness should be detached from the trailing arm when necessary. The trailing arm requires elevation using an appropriate jack but users must exercise caution because excessive spring compression represents a safety risk to themselves. During installation of the lower arm outboard bolt the suspension needs to be at the bushing fastener tightening position while you tighten it to 101 Nm (74 ft. lbs.). Discard the upper arm outboard bolt after you uninstall it but re-install it with a torque of 110 Nm (81 ft. lbs.) at conditions equal to the removal procedure. Drop the trailing arm while using the jack before removing it. Complete the removal of shock absorber lower bolt and flag nut by tightening them together to 115 Nm (85 ft. lbs.) when installing new components at bushing fastener tightening position. Replace the toe link outboard bolt after tightening it to 110 Nm (81 ft. lbs.) when reinstalling it to its proper location. Remove the two trailing arm forward bolts for replacement before taking out the trailing arm and tighten refurbished bolts to 133 Nm (98 ft. lbs.) during reinstallation. Start the tightening operation only after raising the suspension with a jack and placing it at the bushing fastener tightening position which is reached when the hub center to fender lip distance measures 395 mm (15.55 inch). After fitting the components complete the installation procedure by returning the assembly then check the alignment of the rear end and adjust if needed.
    Posted by FordPartsDeal Specialist
    Q:
    How to service and repair the trailing arm on both front wheel drive (FWD) and all wheel drive (AWD) on Lincoln MKZ? Posted by Customer
    A:
    The procedure to repair or service the trailing arm system can start on both front wheel drive (FWD) and all wheel drive (AWD) vehicles provided the vehicle is set to NEUTRAL position and secured on a hoist. Cut the parking brake cable bracket bolt and place the cable aside before tightening it to 10 Nm (89 inch lbs.) when reattaching it. The wheel speed sensor harness should be disconnected first then the wheel spindle removed while using a suitable jack to support the FWD trailing arm. Secure the spring by executing its removal process while discarding the lower arm outboard bolt for installation at 103 Nm (76 ft. lbs.) to the suspension bushing fastener tightening position. The next step includes removing and discarding the upper arm outboard bolt before installing it tightly at 110 Nm (81 ft. lbs.) while applying the same tightening conditions. After carefully lowering the trailing arm and removing the jack proceed with removing the shock absorber lower bolt and flag nut before installing both components properly tightened to 90 Nm (66 ft. lbs.) with the suspension at the bushing fastener tightening position. Keep the toe link outboard bolt in position before installation with 110 Nm (81 ft. lbs.) torque when the experiments use similar conditions. The wheel speed sensor harness bracket nut needs removal from AWD vehicles and the bracket requires setting aside before reinstallation using 23 Nm (17 ft. lbs.) torque. A technician should remove the toe link and four trailing arm-to-knuckle nuts alongside the trailing arm toe link bracket before discarding the nuts and reinstalling them at 115 Nm (85 ft. lbs.). Disassemble the trailing arm from all vehicles by taking out two frame-to-arm bolts as well as cone washers and arm but keep the bolts for reinstalling at 133 Nm (98 ft. lbs.). The suspension needs to be positioned at its bushing fastener tightening position before tightening the fasteners. Achieving this requires using a suitable jack to raise the suspension until the center of the hub reaches 395 mm (15.55 inches) from the fender lip. The reinstallation process requires the reverse order of removal then a check of rear end alignment followed by required adjustments.
    Posted by FordPartsDeal Specialist
    Q:
    What is the final step regarding the trailing arm-to-frame bolts for the 2008 Mercury Milan? Posted by Customer
    A:
    Remove the two trailing arm-to-frame bolts and cone washers, discarding the nuts and reinstalling the bolts to 125 Nm (92 lb-ft).
    Posted by FordPartsDeal Specialist
    See expert answers on similar Trailing Arm
    If you have any questions about this product, please don't hesitate to ask us. We will be happy to help you!

OEM Ford 4M8Z-5500-B, Excellent Performance and Perfect Fitment

To ensure reliability, purchase Ford part # 4M8Z-5500-B Trailing Arm, Rear Passenger Side. It is sometimes referred to as Ford Trailing Arm. For those Ford owners who aspire to maintain their vehicles in optimal shape, opting for OEM parts is a wise choice. Precisely engineered, these components adhere to stringent factory guidelines and are produced in state-of-the-art facilities using cutting-edge technologies. Moreover, they are subjected to thorough testing to certify their resilience and safety, thereby making them a dependable option for Ford owners.

FordPartsDeal.com is a leading supplier of genuine Ford parts such as Ford 4M8Z5500B Trailing Arm, Rear Passenger Side. A vast selection of genuine Ford parts is available on our website, all offered at discounted prices. Every OEM Ford part is covered by the manufacturer's warranty, which also applies to our hassle-free return policy. Enjoy fast delivery service, ensuring you get your parts when you need them. Your shopping experience here is guaranteed to be pleasurable. For detailed Ford parts information, click here.
Choose FordPartsDeal for discounted prices, exceptional service and fast delivery