My Garage
Cart
Make sure this part fits

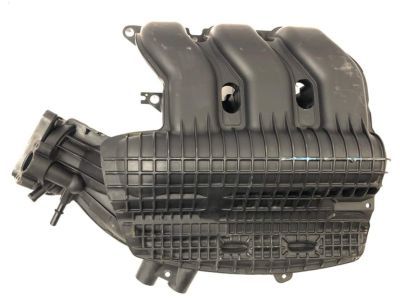
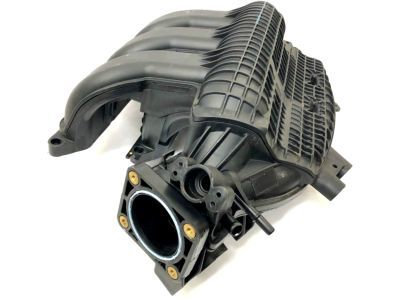
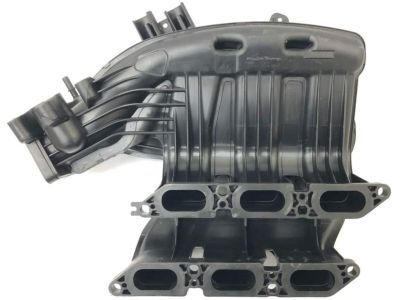
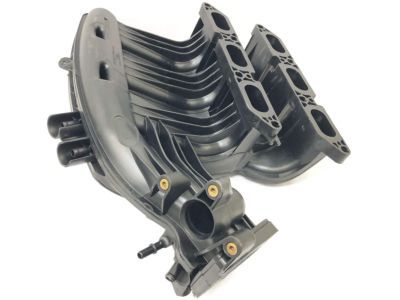
Ford 5F9Z-9424-DB
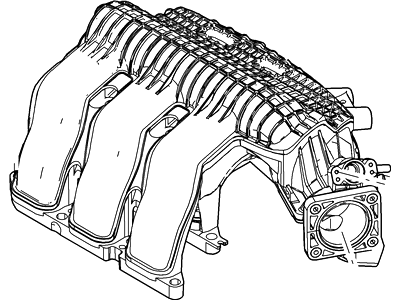
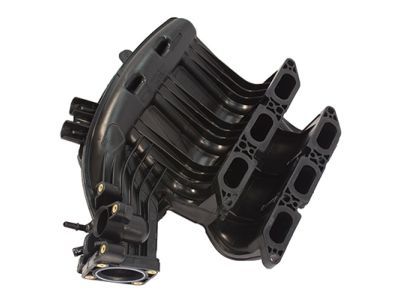
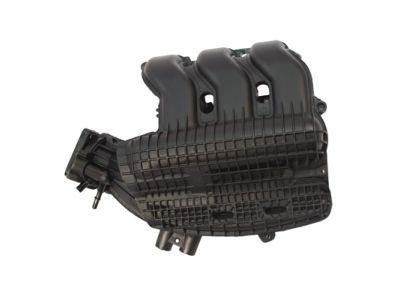
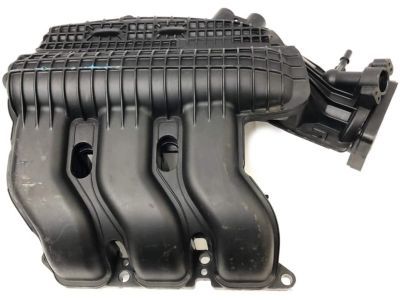
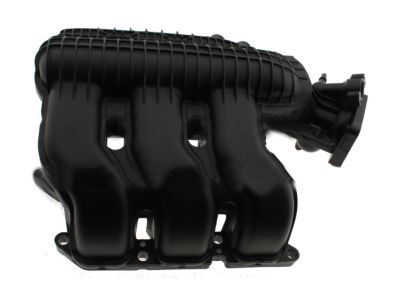
Intake Plenum

2005-2007 Ford 5F9Z9424DB

Customer Questions & Expert Answers (7)
Ford 5F9Z-9424-DB Intake Plenum
  • Part Description
    Manifold Assembly - Inlet
  • Base No.
    9424A
  • Manufacturer
    Ford
Make sure this part fits
$208.84 MSRP: $306.67
You Save: $97.83 (32%)
Currently Unavailable

Due to manufacturer supply shortage, this item isn't currently available for ordering.

  • Product Specifications
  • Vehicle Fitment
  • Customer Questions & Expert Answers
  • Product Specifications

    BrandGenuine Ford
    Base No.9424A
    Manufacturer Part Number5F9Z-9424-DB
    Part DescriptionManifold Assembly - Inlet
    Item Dimensions9.9 x 24.9 x 20.4 inches
    Item Weight15.00 Pounds
    ConditionNew
    Fitment TypeDirect Replacement
    ManufacturerFord
    SKU5F9Z-9424-DB
    WarrantyThis genuine Ford part is guaranteed by Ford's factory warranty.
    Shipping & ReturnShipping Policy Return Policy
    Warning: California's Proposition 65
  • Vehicle Fitment

    Year Make Model Trim Engine
    2005-2007 Ford Five HundredLimited, SE, SEL6 Cyl 3.0 L GAS
    2005-2007 Ford FreestyleLimited, SE, SEL6 Cyl 3.0 L GAS
    2005-2007 Mercury MontegoLuxury, Premier6 Cyl 3.0 L GAS
  • Customer Questions & Expert Answers

    Q:
    Do you think this 5F9Z-9424-DB will fit my car? Posted by FordPartsDeal Specialist
    A:
    Select Your Vehicle model to verify if part number 5F9Z-9424-DB fits your car.
    Posted by FordPartsDeal Specialist
    Q:
    How to service the lower intake manifold on Ford Freestyle? Posted by Customer
    A:
    Before servicing the lower intake manifold always exercise safety precautions by keeping fuel-related parts away from open flames and smoking areas because flammable mixture exists. First relieve fuel pressure then disconnect the ground cable of the battery. First disconnect the upper intake manifold before removing its fuel tube redundant clip to succeed in untethering the fuel tube from the fuel rail by pushing the quick release coupling button. Separate the electrical connector of the fuel rail pressure and temperature sensor and vacuum tube from the other connector belonging to the fuel charging wiring harness. The lower intake manifold should be disposed after removal. Clean and inspect all sealing surfaces first then place the new lower intake manifold while using new gaskets. Reconnect the fuel charging wiring harness electrical connector before reattaching both the fuel rail pressure sensor electrical connector and temperature sensor electrical connector as well as vacuum tube. Click the fuel tube coupling to achieve full seat by pulling the tube while lubricating its end with engine oil. Fasten the fuel tube to its proper position on the fuel rail using the available redundant clip. As the last step install the upper intake manifold while you reconnect the battery ground cable.
    Posted by FordPartsDeal Specialist
    Q:
    How to service and repair the upper intake manifold on Ford Five Hundred? Posted by Customer
    A:
    The first step for upper intake manifold maintenance requires you to disconnect the grounding cable of the battery. Service the upper intake manifold by first removing the air cleaner outlet pipe and afterward removing the transaxle roll restrictor cross brace bolt between the four bolts and finally removing the brace itself. The team needs to disconnect the evaporative emissions (EVAP) canister purge valve tube from the upper intake manifold and discard the retaining device. Service of the upper intake manifold starts with PCV tube removal while simultaneously detaching the brake booster and vacuum harness tubes and the fuel tube retainer. Disconnect the exhaust gas recirculation (EGR) system module electrical connector while removing the vacuum tube and then separate the vacuum tube from the upper intake manifold vacuum tube retainer. Disconnect the EGR system module tube from its connection to the EGR system module and seal both PCV coolant hoses and the vacuum lines (not required for the related article). First detach the throttle body electrical connector while removing the four upper-to-lower intake manifold screws if the vehicle has them. The eight bolts fastening the upper intake manifold need removal before discarding the gaskets. The installation requires cleaning and inspection of all sealing surfaces before positioning the upper intake manifold before bolting it with eight bolts which should be tightened to 10 Nm (89 lb-in) per manufacturer instruction sequence. The installation process requires attaching the throttle body electrical connector as well as plugging and connecting the two PCV coolant hoses with proper torque at 40 Nm (30 lb-ft). Finally, connect and torque tighten the EGR system module tube to its respective module. Installation requires the attachment of the vacuum tube to the upper intake manifold vacuum tube retainer along with connecting the EGR system module electrical connector and vacuum tube followed by fuel tube retainer attachment to the upper intake manifold. The vacuum harness tubes with the brake booster and PCV need attachment to the upper intake manifold. Then attach the EVAP canister purge valve tube followed by installing the appropriate retainer. Begin by cleaning the four transaxle roll restrictor cross brace bolts using a wire brush and apply new threadlock on their threads before placing the transaxle roll restrictor cross brace in position with four new bolts which need to be tightened to 55 Nm (41 lb-ft). A wire brush should be used to clean the transaxle roll restrictor cross brace-to-roll restrictor bolt before applying new threadlock and installing a new bolt that needs to be tightened to 48 Nm (35 lb-ft). After tightening the battery ground cable you should mount the air cleaner outlet pipe.
    Posted by FordPartsDeal Specialist
    Q:
    How to service the lower intake manifold on Ford Five Hundred? Posted by Customer
    A:
    Service of the lower intake manifold should begin with safety precautions by keeping away from smoking or open flames because fuel components contain flammable mixtures. First release fuel system pressure before disconnecting the ground cable from the battery. Unte the upper intake manifold while disconnecting the fuel tube redundant clip. First detach the fuel tube from the fuel rail through the quick release coupling button until the tube disconnects. Following this disconnect the fuel rail pressure and temperature sensor electrical connector along with the vacuum tube together with the fuel charging wiring harness electrical connector. Next detach the lower intake manifold while discarding its gaskets. All sealing surfaces should be cleaned and inspected before setting the new lower intake manifold with fresh gaskets. The installer must position these three components back in place: fuel charging wiring harness electrical connector, fuel rail pressure and temperature sensor electrical connector and vacuum tube. Check that the fuel tube coupling locks into its seat by pulling on the tube after applying clean engine oil to the end of the tube. Attach the fuel tube to the fuel rail by using the redundant clip for security. The procedure finishes with upper intake manifold installation followed by reconnecting the battery ground cable.
    Posted by FordPartsDeal Specialist
    Q:
    How to service and repair the upper intake manifold on Ford Freestyle? Posted by Customer
    A:
    The upper intake servicing process starts by draining the fluid from the cooling system and disconnecting the battery ground cable. Proceed with the service by first removing the air cleaner outlet pipe followed by the four transaxle roll restrictor cross brace bolts which then allows removal of the cross brace. The service requires you to disconnect the evaporative emissions (EVAP) canister purge valve tube from the upper intake manifold while detaching the retainer and disconnecting the positive crankcase ventilation (PCV) along with its brake booster and vacuum harness tubes. The technician should detach the fuel tube retainer and disconnect the exhaust gas recirculation (EGR) system module electrical connector together with the vacuum tube which also requires removal from the upper intake manifold vacuum tube retainer. The procedure for early builds consists of plugging the throttle body along with both the PCV coolant hoses whereas late builds require plugging both PCV coolant hoses. First detach the throttle body electrical connector before removing and discarding any four upper-to-lower intake manifold screws installed when present. Next, install the eight bolts along the upper intake manifold after discarding the gaskets. After cleansing all sealing surfaces install the upper intake manifold and bolt it into place with eight bolts to be tightened to 10 Nm (89 inch lbs.) following the specified installation order. To reconnect the electrical throttle body install the throttle body connector while late builds require linking the two PCV coolant hoses although early builds need tubing connections between throttle body and PCV coolant. Install the EGR system module tube onto the EGR system module while applying 40 Nm (30 ft. lbs.) torque and join the vacuum tube to its upper intake manifold tube retainer. Connect the electrical connector of the EGR system module with a vacuum tube while you secure the fuel tube retainer and join the PCV and brake booster and vacuum harness tubes to the upper intake manifold. Fasten the EVAP canister purge valve tube before installing its retainer. Apply new thread-lock to the bolts after brushing them with a wire brush then install the transaxle roll restrictor cross brace before tightening these bolts to 55 Nm (41 ft. lbs.). New threadlock goes on the transaxle roll restrictor cross brace-to-roll restrictor bolt before installing a new bolt that should be torqued to 48 Nm (35 ft. lbs.). The last step includes reconnecting the battery ground cable then installing the air cleaner outlet pipe and finally performing the cooling system fill and bleed operations.
    Posted by FordPartsDeal Specialist
    Q:
    How to service the lower intake manifold on Mercury Montego? Posted by Customer
    A:
    The first step towards servicing the lower intake manifold includes avoiding both smoking and open flames in proximity to the fuel components because flammable mixtures exist. Before work starts on the fuel system begin by reducing pressure then disconnect the electrical ground cable from the battery. First detach the upper intake manifold before you take off the fuel tube redundant clip to free the fuel tube by pressing the quick release coupling button at the fuel rail. The procedure requires removal of the fuel rail pressure and temperature sensor electrical connection and vacuum tube together with the fuel charging wiring harness electrical connector. Clean all surfaces on the lower intake manifold before installing it by replacing any necessary gaskets. You should connect the fuel rail pressure and temperature sensor electrical connector together with the fuel charging wiring harness electrical connector and the vacuum tube. The complete seating of the fuel tube coupling requires a pull on the tube and applying engine oil at its end before insertion. Secure the fuel tube at its rail position by using the fuel tube redundant clip. After finishing the operation install the upper intake manifold and re-install the battery ground cable.
    Posted by FordPartsDeal Specialist
    Q:
    How to service and repair the upper intake manifold on Mercury Montego? Posted by Customer
    A:
    One must start the service and repair process for the upper intake manifold by disconnecting the battery ground cable first. Folloing the removal of the air cleaner outlet pipe proceed with unboltng the four transaxle roll restrictor cross brace bolts before separating the bolt and transaxle roll restrictor cross brace. Remove first the EVAP canister purge valve tube from the upper intake manifold then disconnect its retainer. The service begins with upper intake manifold PCV and brake booster and vacuum harness tubes disconnected as well as fuel tube retainer detaching. Start by removing the exhaust gas recirculation (EGR) system module electrical connector followed by detaching its vacuum tube and the vacuum tube from upper intake manifold vacuum tube retainer. Secure the EGR system module tube at its EGR system module while plugging the throttle body and PCV coolant hoses. A technician must disconnect the throttle body electrical connection followed by removal of four upper-to-lower intake manifold screws when present. First uninstall the eight upper intake manifold bolts by hand. All sealing surfaces need inspection before installing new gaskets during assembly work. Install the upper intake manifold while keeping the sequence in mind before tightening its eight bolts to 10 Nm (89 inch lbs.). After connectivity of the throttle body electrical connector and throttle body along with PCV coolant hoses, establish a connection between the EGR system module tube and EGR system module while tightening it at 40 Nm (30 ft. lbs.). First install the vacuum tube on upper intake manifold vacuum tube retainer while attaching the EGR system module electrical connector with its vacuum tube and fuel tube retainer to upper intake manifold. After connecting the PCV tube with the brake booster and vacuum harness tubes to the upper intake manifold you can proceed with installing the EVAP canister purge valve tube along with its retainer. After cleaning the four transaxle roll restrictor cross brace bolts with a wire brush apply new threadlocker to the threads before the installation of four new bolts which must be tightened with a torque of 55 Nm (41 ft. lbs.). The cross brace-to-roll restrictor bolt needs threadlocker applied before receiving a new bolt which must be tightened to 48 Nm (35 ft. lbs.). The last step includes installing the air cleaner outlet pipe while reestablishing the battery ground connection.
    Posted by FordPartsDeal Specialist
    If you have any questions about this product, please don't hesitate to ask us. We will be happy to help you!

OEM Ford 5F9Z-9424-DB, Excellent Performance and Perfect Fitment

To ensure reliability, purchase Ford part # 5F9Z-9424-DB Intake Plenum. It is sometimes referred to as Ford Intake Manifold. For those Ford owners who aspire to maintain their vehicles in optimal shape, opting for OEM parts is a wise choice. Precisely engineered, these components adhere to stringent factory guidelines and are produced in state-of-the-art facilities using cutting-edge technologies. Moreover, they are subjected to thorough testing to certify their resilience and safety, thereby making them a dependable option for Ford owners.

FordPartsDeal.com is a leading supplier of genuine Ford parts such as Ford 5F9Z9424DB Intake Plenum. A vast selection of genuine Ford parts is available on our website, all offered at discounted prices. Every OEM Ford part is covered by the manufacturer's warranty, which also applies to our hassle-free return policy. Enjoy fast delivery service, ensuring you get your parts when you need them. Your shopping experience here is guaranteed to be pleasurable. For detailed Ford parts information, click here.
Choose FordPartsDeal for discounted prices, exceptional service and fast delivery