
Popular OEM Ford Five Hundred Parts
- Body & Hardware Parts View More >
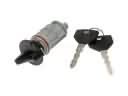
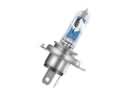
- Electrical Parts View More >
- Air & Fuel Delivery Parts View More >
- Steering Parts View More >
- Emission Control & Exhaust Parts View More >
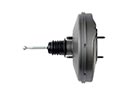
- Charging & Starting Parts View More >
- Engine Parts View More >
- Belts & Cooling Parts View More >
- Suspension Parts View More >
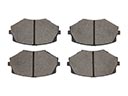
- Brakes Parts View More >
- A/C & Heating Parts View More >
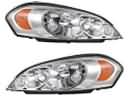
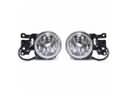
- Headlights & Lighting Parts View More >


Why Buy Genuine Ford Five Hundred Parts From FordPartsDeal.com
FordPartsDeal.com offers a smart and convenient way to buy genuine parts online. We sell new OEM Ford Five Hundred parts. Authorized dealers directly provide all the Ford Five Hundred parts and assemblies to ensure the optimal quality and fit. We also provide all properly fitting Ford Five Hundred parts, such as Transmission specific to your model. When you shop here, you get real Ford value at highly competitive prices. All our products come with the same Ford warranty available at other dealerships. Our easy-to-use catalog helps you quickly identify the right part for your car. You'll receive fast shipping from our warehouse network, keeping your Ford Five Hundred running smoothly. Our staff consists of Ford professionals who are ready to assist you. We aim to treat each customer as if they were stepping out of a Ford showroom. VIN verification and our live support ensure that the part you order is the right Ford Five Hundred part for your vehicle.
The Ford Five Hundred arrived in the market during 2005 to bring Ford Motor Company its vital entry into full-size sedans before its 2007 production termination. The Ford D3 platform underpins the Five Hundred which uses front-engine setup and features front-wheel-drive but allows an optional all-wheel-drive system too. The Five Hundred measures 200.7 inches in length with a 112.9-inch wheelbase which produces generous interior measurement space particularly in the rear seats and trunk compartment. The Ford Five Hundred offers two powertrain options: a 3.0L Duratec 30 V6 engine paired with a 6-speed Aisin F21 automatic transmission for FWD models, and a ZF Batavia CFT30 continuously variable transmission (CVT) for AWD models. The powertrain assembly between the Duratec 30 V6 engine and Aisin F21 automatic transmission creates a reputation for the Ford Five Hundred consisting of great driving dynamics alongside good handling abilities. The Ford Five Hundred comes equipped with standard front and side-impact airbags, as well as curtain-type airbags for enhanced occupant protection. The Ford Five Hundred ranks top for its genuine OEM parts because these components satisfy demanding specifications developed by Ford for factory-quality reliability and driving performance. Ford Five Hundred customers can easily access authentic parts that offer both long-term reliability and perfect performance compatibility making them essential for preserving vehicle quality. The Ford Five Hundred benefits the entire customer base through its well-engineered and designed approach that positions it as a practical solution within the full-size sedan segment.
Ford Five Hundred issues group into powertrain control, throttle management, and rear brake wear. Transmission system concerns appear as harsh or delayed shifts during light throttle. In the Ford Five Hundred, early software can mishandle shift timing. Prolonged driving then damages internals and the valve body. Reprogram the PCM and TCM, inspect fluid, and service the valve body if worn. Throttle control faults affect acceleration response and idle stability. The Ford Five Hundred may enter limp mode with poor throttle response. A failing electronic throttle body sticks or loses position tracking. Replace the electronic throttle body, then relearn idle and clear codes. For braking, the Five Hundred can wear rear friction quickly and dust wheels. Soft compound or binding slides accelerate wear of rear brake pads. Install revised brake pads, clean and lubricate hardware, and verify rotor thickness. After repairs, road test the Ford Five Hundred and confirm smooth tip-in. Monitor shift quality, throttle response, and wheel temperatures on the Five Hundred. Scan for transmission codes and update learned shift tables. On the Ford Five Hundred, verify fluid level and cooler flow.
Ford Five Hundred Parts and Q&A
- Q: How to service the radiator grille on Ford Five Hundred?A:To service the radiator grille of Five Hundred and Montego models, the hood is opened and the four scrivets and bolts attaching the opening panel can be unscrewed and tightened to 6 Nm when refixed. Take out the panel, reach the grille bolts and in the case of the Montego, take off the pin-shaped retainer and six bolts. Reverse steps to reinstall.
- Q: How to service the alternator on Ford Five Hundred?A:In order to service the alternator, place the vehicle in neutral using a hoist and un-connect the battery. Take off accessory drive belt, splash shield and crankshaft position sensor. Unplug the connector to the generator, unplug the generator and repeat until the generator is back connected again, with proper torque requirements on all hardware.
- Q: How to service the lower intake manifold on Ford Five Hundred?A:To maintain the lower intake manifold, be safe by keeping flames away from the fuels. Caution: De-pressurize fuel, unscrew battery and take out the upper intake manifold. Unplug the fuel tube and sensors and unscrew the lower manifold and gaskets. Wipe down the surface, mount the new manifold with gaskets and reconnect parts.


