
Popular OEM Ford Freestyle Parts
- Body & Hardware Parts View More >
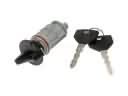
- Electrical Parts View More >
- Air & Fuel Delivery Parts View More >
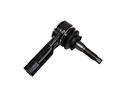
- Steering Parts View More >
- Emission Control & Exhaust Parts View More >
- Charging & Starting Parts View More >
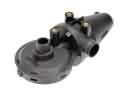
- Engine Parts View More >
- Belts & Cooling Parts View More >
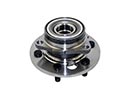
- Suspension Parts View More >
- Brakes Parts View More >
- A/C & Heating Parts View More >
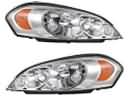
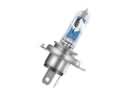
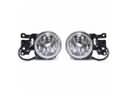
- Headlights & Lighting Parts View More >


Why Buy Genuine Ford Freestyle Parts From FordPartsDeal.com
FordPartsDeal.com offers a smart and convenient way to buy genuine parts online. We sell new OEM Ford Freestyle parts. Authorized dealers directly provide all the Ford Freestyle parts and assemblies to ensure the optimal quality and fit. We also provide all properly fitting Ford Freestyle parts, such as Transmission specific to your model. When you shop here, you get real Ford value at highly competitive prices. All our products come with the same Ford warranty available at other dealerships. Our easy-to-use catalog helps you quickly identify the right part for your car. You'll receive fast shipping from our warehouse network, keeping your Ford Freestyle running smoothly. Our staff consists of Ford professionals who are ready to assist you. We aim to treat each customer as if they were stepping out of a Ford showroom. VIN verification and our live support ensure that the part you order is the right Ford Freestyle part for your vehicle.
The Ford Freestyle entered the market in 2005 as a crossover utility vehicle that provided an alternative to the Ford Taurus station wagon in Ford's vehicle lineup. The 2005–2007 Ford Freestyle was equipped with a 3.0L Duratec V6 engine that produces 203 horsepower, paired with a continuously variable transmission (CVT) for smooth acceleration and improved fuel efficiency. The Freestyle maintains excellent off-road performance because its front-engine front-wheel-drive construction enables various driving conditions when additional optional four-wheel-drive is selected. The Ford Freestyle offers comfortable seating for six passengers across its dimensions of 199.8 inches long by 74.4 inches wide through its forward-facing third-row seating supported by the "command seating" design that enhances both accessibility and visibility. The Ford Freestyle maintains stability through its 4,112 pounds maximum weight and 112.9 inches wheelbase design. The vehicle comes with safety standards which include standard four-wheel antilock disc brakes alongside Electronic Brakeforce Distribution but also offers optional side-impact and head curtain airbags. Reliability and performance of the vehicle come from its installation of high-quality original equipment manufacturer parts. Ford makes premium Freestyle replacement parts accessible to buyers while offering manufacturer warranty coverage because they stand for quality and durability excellence. The Ford Freestyle provides practical features and performs well when safety measures are taken into account which is why it stands out in its crossover segment.
Ford Freestyle groups these concerns into throttle control, rear braking, and shifter mechanism function. In engine management, the Freestyle may lose throttle response and show warning lights. A defective electronic throttle body sticks or misreads position and restricts airflow. Replace the electronic throttle body, clear codes, and perform an idle relearn. Ford recommends checking software levels and cleaning connectors before reassembly. For braking, the Freestyle can wear rear friction quickly and create wheel dust. Defective rear brake pads and tight slides accelerate wear and noise. Install revised rear brake pads, service slides, and measure rotor thickness. Bed the new friction, then verify even braking on the Freestyle. In controls, the Freestyle shift lever can bind and feel stiff. A worn shifter bezel causes the slider to drag inside the console. Replace the shifter bezel, inspect cable routing, and confirm full range selection. Ford advises checking PRNDL alignment and park lock release. After repairs, road test the Freestyle and recheck for stored faults. Monitor live data, throttle angles, and wheel temperatures during the drive. These steps restore predictable response and safe operation using proven Ford procedures.
Ford Freestyle Parts and Q&A
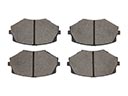
- Q: How to service and repair the front brake pads on Ford Freestyle?A:Brake pads on front brakes should be serviced with DOT3 brake fluid only and should not be spilled on the surfaces. Push compress pistons, take off caliper bolts and hold caliper. Check leakage, clean mating surfaces, and install new pads using hardware provided. Install bolts, fill reservoir and check that the brakes are working properly.
- Q: How to service the ignition coil-on-plug on Ford Freestyle?A:To remove ignition coil-on-plug, the upper intake manifold should be taken off, electrical connectors should be disconnected and ignition coil bolts need to be removed (replaced fixed bolts to 6 Nm). Twist it with an easy removal. Coat boots with Silicone Brake Caliper Grease and Dielectric Compound XG-3-A and reinstall.
- Q: How to service the lower intake manifold on Ford Freestyle?A:Not to risk fires, around fuel parts one must be careful when servicing the lower intake manifold. Weaken the fuel pressure, discontinue power battery and dismount upper intake manifold. Unscrew the fuel tube and sensors, unscrew the lower manifold and dispose of gaskets. Clean the surfaces, put the new manifold using gaskets and reconnect. Install the lower manifold back and reconnect the battery.


