
Popular OEM Mercury Montego Parts
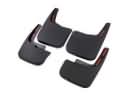
- Body & Hardware Parts View More >
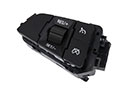
- Electrical Parts View More >
- Interior & Exterior Trim Parts View More >
- Air & Fuel Delivery Parts View More >
- Steering Parts View More >
- Emission Control & Exhaust Parts View More >
- Charging & Starting Parts View More >
- Engine Parts View More >
- Belts & Cooling Parts View More >
- Suspension Parts View More >
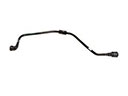
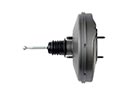
- Brakes Parts View More >
- A/C & Heating Parts View More >


Why Buy Genuine Mercury Montego Parts From FordPartsDeal.com
FordPartsDeal.com offers a smart and convenient way to buy genuine parts online. We sell new OEM Mercury Montego parts, including Headlights & Lighting. Authorized dealers directly provide all the Mercury Montego parts and assemblies to ensure the optimal quality and fit. We also provide all properly fitting Mercury Montego parts, such as Transmission specific to your model. When you shop here, you get real Mercury value at highly competitive prices. All our products come with the same Mercury warranty available at other dealerships. Our easy-to-use catalog helps you quickly identify the right part for your car. You'll receive fast shipping from our warehouse network, keeping your Mercury Montego running smoothly. Our staff consists of Mercury professionals who are ready to assist you. We aim to treat each customer as if they were stepping out of a Mercury showroom. VIN verification and our live support ensure that the part you order is the right Mercury Montego part for your vehicle.
The Mercury Montego was available as a two-door and four-door sedan vehicle under the Mercury division of Ford Motor Company in 1968. The Montego name returned to production in 2004 to replace the Mercury Sable and continued until 2007 before going out of production. The Mercury Montego uses a front-engine, front-wheel-drive layout as standard, with the option of an all-wheel-drive system for enhanced traction. This car comes with 3.0L V6 engine power that produces a maximum of 203 horsepower with 207 lb-ft of torque for steady performance during everyday drives. All-wheel-drive models feature both continuously variable transmission (CVT) systems for their countless ratios in different road conditions and six-speed automatic transmissions for better driving response. The Montego's dimensions produce a roomy interior through its 112.9 inches wheelbase and 200.4 inches in total length although it provides a more streamlined design than earlier models. Real Mercury Montego parts maintain both durability and exact installation capabilities which leads to better overall vehicle performance according to their dedication to quality. The testing process at Mercury presents multiple levels of safety and performance assessment to guarantee ultimate quality of OEM parts which demonstrates dedication to both customer satisfaction and vehicle reliability.
Mercury Montego issues group into HVAC controls and transmission hydraulics. On models with manual controls, the Montego often loses lower fan speeds. Failure of the blower motor resistor leaves only high speed and weak defrost. Inspect the connector behind the glove box, verify power and ground, then replace the blower motor resistor. On automatic climate models, the Montego may surge fan speed without reason. The control module, often called the blower motor resistor, fails and drives unstable airflow. Confirm by scan data and temperature stability, then install the updated controller. For drivetrain operation, the Montego can shift harshly as temperature climbs. Software strategy or a worn transmission valve body can cause flare and slip. Update PCM and TCM software, check pressures, and service the transmission valve body if wear appears. Fresh fluid helps the Mercury Montego maintain smooth shifts and steady temperatures. Monitor for converter shudder during the verification drive. After repairs, the Mercury Montego should deliver strong cooling and clean gear changes. Use Mercury service procedures for torque values and climate calibration. Finish with a short road test and verify stable vent temperatures at idle.
Mercury Montego Parts and Q&A
- Q: How to service and repair front brake pads on Mercury Montego?A:In order to service front brake pads, adopt certified DOT 3 brake fluid and treat it cautiously. Test fluid level, compress caliper pistons, and change the pads, using new hardware. Leak inspection, clean mating surfaces and post-instal testing of brakes is required.
- Q: How to Service the Air Filter Element on Mercury Montego?A:To change the air cleaner element, it is possible to unlatch and lift the air cleaner housing cover first and does not require any tools. Reverse the steps and remove the old element, and place the new element and ensure to use the alignment notches to fit the housing cover in the air cleaner tray correctly.
- Q: How to service the ignition coil-on-plug on Mercury Montego?A:In order to service the ignition coil-on-plug, take off intake upper manifold, unscrew electrical connectors and take off ignition coil bolts (reassemble with 6 Nm torque). For easier coil removal use a twisting motion. Before replacing coil boots reapply Silicone Brake Caliper Grease and Dielectric compound.


