My Garage
Cart

OEM 2001 Mercury Cougar Oil Pan

Oil Drain Pan
  • Select Vehicle by Model
  • Select Vehicle by VIN
Select Vehicle by Model
Make
Model
Year
or
Select Vehicle by VIN
For the most accurate results, select vehicle by your VIN (Vehicle Identification Number).

2 Oil Pans found

  • 2001 Mercury Cougar Oil Pan - 8L8Z-6675-A
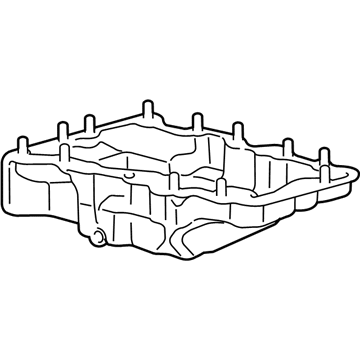
    2001 Mercury Cougar Oil Pan Diagram - 8L8Z-6675-A
    View related parts

    2001 Mercury Cougar Oil Pan Part Number: 8L8Z-6675-A

    $94.95 MSRP: $138.22
    You Save: $43.27 (32%)
    Ships in 1-3 Business Days
    ADD TO CART
    Product Specifications
    • Other Name: Pan Assembly - Engine Oil; Engine Oil Pan
    • Replaces: 7L8Z-6675-A, 5L8Z-6675-AA
    • Base No.: 6675
    • Item Weight: 12.00 Pounds
    • Item Dimensions: 9.6 x 18.9 x 14.9 inches
    • Condition: New
    • Fitment Type: Direct Replacement
    • SKU: 8L8Z-6675-A
    • Warranty: This genuine part is guaranteed by Ford's factory warranty.
    More Info
    Fits the following 2001 Mercury Cougar Submodels:
    • Base, S, V6 | 6 Cyl 2.5 L GAS
  • 2001 Mercury Cougar Oil Pan - F7RZ-6675-AA
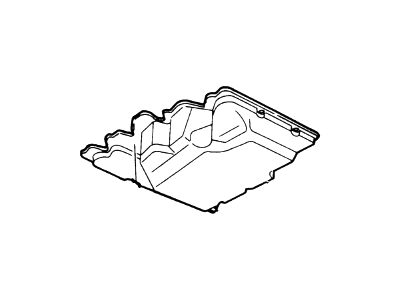
    2001 Mercury Cougar Oil Pan Diagram - F7RZ-6675-AA
    View related parts

    2001 Mercury Cougar Oil Pan Part Number: F7RZ-6675-AA

    $10.34 MSRP: $14.30
    You Save: $3.96 (28%)
    Ships in 1-2 Business Days
    ADD TO CART
    Product Specifications
    • Other Name: Pan Assembly - Engine Oil; Engine Oil Pan
    • Manufacturer Note: Use RTV to seal pan to ladderframe
    • Base No.: 6675
    • Item Weight: 3.40 Pounds
    • Item Dimensions: 16.6 x 8.6 x 3.7 inches
    • Condition: New
    • Fitment Type: Direct Replacement
    • SKU: F7RZ-6675-AA
    • Warranty: This genuine part is guaranteed by Ford's factory warranty.
    More Info
    Fits the following 2001 Mercury Cougar Submodels:
    • Base | 4 Cyl 2.0 L GAS

2001 Mercury Cougar Oil Pan

If you're seeking quality and affordability, look no further than our extensive inventory of genuine 2001 Mercury Cougar Oil Pan available at FordPartsDeal.com. You can confidently purchase our OEM 2001 Mercury Cougar Oil Pan as they are supported by the manufacturer's warranty and our hassle-free return policy, alongside the benefit of our fast delivery service.

2001 Mercury Cougar Oil Pan Parts Q&A

  • Q: How to service and repair the oil pan on 2001 Mercury Cougar?
    A: Service and repair of the oil pan requires users to begin by unplugging the battery ground cable alongside heat shield removal. Begin by unrusting the upper bolt then remove the coolant hose bracket followed by the engine-lifting eye and engine oil dipstick tube. To begin removal of the A/C tube/hose equipment one should disconnect its bracket then unfasten the lower bolts. Start the service by disconnecting the Three Way Catalytic Converter from the exhaust manifold followed by vehicle lift then removal of the TWC by unhooking its rubber mountings after taking out the bolt and retaining clip. The technician disconnects the Heated Oxygen Sensor (H02S) electrical connector then takes off the TWC from its bracket allowing engine oil drainage from the drain plug before removing all six oil pan bolts. A sharp spatula and light hammer movement should be used to separate the oil pan from the lower crankcase without damaging the mating faces. Installation begins with cleansing the mating faces to remove all traces of old sealer after their oil and gasket residue is removed. Clean the oil pan with solvent. Install studs (M6 x 20) in dead end bores of the oil pan then apply 3 mm silicone gasket and sealant to the mating face before installing the pan within 10 minutes without touching anything afterward. Crank the indicated bolts following two steps which start with 6 Nm force in stage one then move to 10 Nm force in stage two. You should reinstall the TWC by guiding it to the exhaust manifold studs while attaching it to the bracket and connecting the HO2S electrical connector and rubber mounting before securing it to the exhaust with proper contact against the exhaust manifold. First secure the retaining clip for the TWC before you install the bolt. Afterward you should lower the vehicle to attach the TWC to the exhaust manifold. Begin by installing the heat shield then add the oil level indicator tube into the cylinder block followed by placing the coolant hose bracket and engine lifting eye. Secure the upper bolt/nut while installing all lower bolts and then install the bracket to the A/C line. The tank should receive engine oil according to its fill level instructions and oil type requirements. Some abnormal drive symptoms will appear after battery reconnection as the vehicle learns its adaptive strategy during which driving at least 16 km (10 miles) could be necessary. Verify fluid levels while also making necessary adjustments before securing vacuum hoses and wiring according to the cable tie procedure.