FordParts
My Garage
My Account
Cart
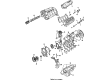
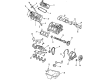
OEM Mercury Cougar Oil Pan
Oil Drain Pan- Select Vehicle by Model
- Select Vehicle by VIN
Select Vehicle by Model
orMake
Model
Year
Select Vehicle by VIN
For the most accurate results, select vehicle by your VIN (Vehicle Identification Number).
7 Oil Pans found

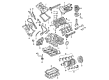
Mercury Cougar Oil Pan Part Number: 8L8Z-6675-A
$94.95 MSRP: $138.22You Save: $43.27 (32%)Ships in 1-3 Business Days
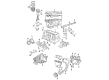
Mercury Cougar Oil Pan Part Number: F7RZ-6675-AA
$12.92 MSRP: $17.87You Save: $4.95 (28%)Ships in 1-2 Business Days
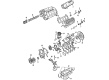
Mercury Cougar Oil Pan Part Number: F1SZ-6675-B
Mercury Cougar Oil Pan Part Number: F1SZ-6675-A

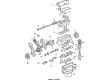
Mercury Cougar Oil Pan Part Number: E7RY6675B

Mercury Cougar Oil Pan Part Number: E7AZ-6675-C

Mercury Cougar Oil Pan Part Number: 3R3Z-6675-DA
Mercury Cougar Oil Pan
OEM Oil Pan boasts unmatched quality. Each part goes through full quality checks. They adhere to Mercury's official factory standards. These steps remove flaws and inconsistencies. So you can get Oil Pan with long life and a perfect fit. Come to our website and find genuine Mercury Cougar parts. We keep a wide inventory of OEM Cougar parts at the highly affordable prices. It's easy to search, compare, and pick what you need. You'll love the clear info and simple checkout. We offer top-rated customer service, and we reply fast. We also ship promptly to ensure your order arrives on time.
Mercury Cougar Oil Pan Parts and Q&A
- Q: How to Ensure Proper Functioning of the Oil Pan on a Mercury Cougar?A:The service or repair of the oil pan requires beginning work by disconnecting the battery ground wire and removing the heat shield. The repair of the oil pan begins with undoing the upper bolt/nut before removing the coolant hose bracket and the engine lifting eye and the engine oil Dipstick Tube. Before servicing the tube/hose related to the A/C component and the lower bolts you should remove their bracket. The first service step involves disconnecting the Three Way Catalytic Converter from the Exhaust Manifold but vehicle support is required before removing the TWC from its rubber mountings by unhooking its Heated Oxygen Sensor (H02S) electrical connector as well as draining engine oil at the drain plug. Start by disconnecting all oil pan bolts then proceed to separate the oil pan from the lower crankcase by using a sharp spatula which requires mild tapping against the drain plug with a rubber hammer. To install the parts first wipe off the mating areas from previous sealer while making sure both surfaces have no remaining oil or gasket residue before cleaning the oil pan with solvent. Running 10 studs (M6 x 20mm) through dead end bores serves to protect the ladder frame before applying a 3mm silicone gasket seal that needs installation within 10 minutes of application. Install the bolts through their designated order by first tightening them to 6 Nm and then progressing to 10 Nm torque. You should install the TWC by placing it onto the exhaust manifold studs while you connect it to the bracket then link the H02S electrical connector and rubber mounting and finally attach it to the exhaust touching the exhaust manifold. Fix the retaining clip before instilling the TWC bolt then lower the vehicle down. Add the heat shield to the vehicle then place the oil level indicator tube within the cylinder block followed by mounting the coolant hose bracket alongside installing the engine lifting eye. Install the upper bolt and screw in the upper nut before adding lower bolts to the bracket which should attach to the A/C line. The system requires engine oil in designated amounts and specific kind for proper filling. Abnormal drive symptoms might be experienced during adaptive strategy learning until the vehicle traveled 16 km (10 miles) or more. You should check the fluid levels for proper adjustment and use cable ties to secure all vacuum hoses and wires.
- Q: How to service and repair the oil pan on Mercury Cougar?A:Service and repair of the oil pan requires users to begin by unplugging the battery ground cable alongside heat shield removal. Begin by unrusting the upper bolt then remove the coolant hose bracket followed by the engine-lifting eye and engine oil Dipstick Tube. To begin removal of the A/C tube/hose equipment one should disconnect its bracket then unfasten the lower bolts. Start the service by disconnecting the Three Way Catalytic Converter from the Exhaust Manifold followed by vehicle lift then removal of the TWC by unhooking its rubber mountings after taking out the bolt and retaining clip. The technician disconnects the Heated Oxygen Sensor (H02S) electrical connector then takes off the TWC from its bracket allowing engine oil drainage from the drain plug before removing all six oil pan bolts. A sharp spatula and light hammer movement should be used to separate the oil pan from the lower crankcase without damaging the mating faces. Installation begins with cleansing the mating faces to remove all traces of old sealer after their oil and gasket residue is removed. Clean the oil pan with solvent. Install studs (M6 x 20) in dead end bores of the oil pan then apply 3 mm silicone gasket and sealant to the mating face before installing the pan within 10 minutes without touching anything afterward. Crank the indicated bolts following two steps which start with 6 Nm force in stage one then move to 10 Nm force in stage two. You should reinstall the TWC by guiding it to the exhaust manifold studs while attaching it to the bracket and connecting the HO2S electrical connector and rubber mounting before securing it to the exhaust with proper contact against the exhaust manifold. First secure the retaining clip for the TWC before you install the bolt. Afterward you should lower the vehicle to attach the TWC to the exhaust manifold. Begin by installing the heat shield then add the oil level indicator tube into the cylinder block followed by placing the coolant hose bracket and engine lifting eye. Secure the upper bolt/nut while installing all lower bolts and then install the bracket to the A/C line. The tank should receive engine oil according to its fill level instructions and oil type requirements. Some abnormal drive symptoms will appear after battery reconnection as the vehicle learns its adaptive strategy during which driving at least 16 km (10 miles) could be necessary. Verify fluid levels while also making necessary adjustments before securing vacuum hoses and wiring according to the cable tie procedure.


Related Mercury Cougar Parts
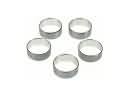 Mercury Cougar Camshaft Bearing
 Mercury Cougar Crankshaft
 Mercury Cougar Crankshaft Pulley
 Mercury Cougar Dipstick
 Mercury Cougar Dipstick Tube
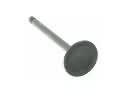 Mercury Cougar Intake Valve
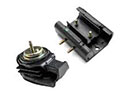 Mercury Cougar Motor And Transmission Mount
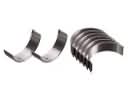 Mercury Cougar Rod Bearing
 Mercury Cougar Timing Chain
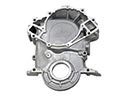 Mercury Cougar Timing Cover
 Mercury Cougar Valve Cover Gasket
 Mercury Cougar Valve Stem Seal