FordParts
My Garage
My Account
Cart
OEM 2002 Mercury Cougar Blower Control Switches
HVAC Control Switch- Select Vehicle by Model
- Select Vehicle by VIN
Select Vehicle by Model
orMake
Model
Year
Select Vehicle by VIN
For the most accurate results, select vehicle by your VIN (Vehicle Identification Number).
2 Blower Control Switches found

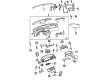
2002 Mercury Cougar Temperature Control Part Number: 1S8Z19980BA
Product Specifications- Other Name: Control; Climate Control Module; Heater Control
- Item Weight: 0.40 Pounds
- Condition: New
- Fitment Type: Direct Replacement
- SKU: 1S8Z19980BA
- Warranty: This genuine part is guaranteed by Ford's factory warranty.
2002 Mercury Cougar Temperature Control Part Number: 1S8Z19980AA
Product Specifications- Other Name: Control; Climate Control Module; Heater Control
- Item Weight: 1.60 Pounds
- Condition: New
- Fitment Type: Direct Replacement
- SKU: 1S8Z19980AA
- Warranty: This genuine part is guaranteed by Ford's factory warranty.
2002 Mercury Cougar Blower Control Switches
If you're seeking quality and affordability, look no further than our extensive inventory of genuine 2002 Mercury Cougar Blower Control Switches available at FordPartsDeal.com. You can confidently purchase our OEM 2002 Mercury Cougar Blower Control Switches as they are supported by the manufacturer's warranty and our hassle-free return policy, alongside the benefit of our fast delivery service.
2002 Mercury Cougar Blower Control Switches Parts Q&A
- Q: How to Service Blower Control Switches on 2002 Mercury Cougar?A: Service of the blower motor switch starts with removing the audio unit then the floor console and switch assembly before detaching the switch assembly and disconnecting electrical connectors. The move to detach the heater control/audio unit bezel starts with unscrewing its fasteners followed by unclipping the panel from its attachment points. First detach the electrical connectors from the heater control/audio unit bezel before removing it and cutting the vacuum lines. Uninstall the heater control panel followed by the blower motor switch from the system. The reversal of these steps should be followed for installing the components.
Related 2002 Mercury Cougar Parts
 2002 Mercury Cougar A/C Compressor
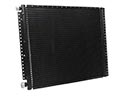 2002 Mercury Cougar A/C Condenser
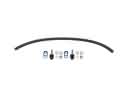 2002 Mercury Cougar A/C Hose
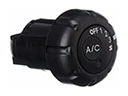 2002 Mercury Cougar A/C Switch
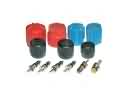 2002 Mercury Cougar A/C System Valve Core
 2002 Mercury Cougar Blend Door Actuator
 2002 Mercury Cougar Blower Motor
 2002 Mercury Cougar Blower Motor Resistor
 2002 Mercury Cougar Cabin Air Filter
 2002 Mercury Cougar Heater Core
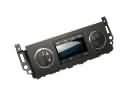 2002 Mercury Cougar HVAC Control Module
 2002 Mercury Cougar HVAC Pressure Switch