FordParts
My Garage
My Account
Cart
OEM 2004 Ford Escape Catalytic Converter
Cat. Converter- Select Vehicle by Model
- Select Vehicle by VIN
Select Vehicle by Model
orMake
Model
Year
Select Vehicle by VIN
For the most accurate results, select vehicle by your VIN (Vehicle Identification Number).
4 Catalytic Converters found

 Product Specifications
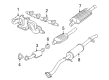
- Other Name: Manifold Assembly - Exhaust; Catalytic Converter with Integrated Exhaust Manifold; Manifold Converter; Manifold
- Position: Driver Side
- Base No.: 9430A
- Item Weight: 13.40 Pounds
- Item Dimensions: 18.9 x 14.6 x 10.4 inches
- Condition: New
- Fitment Type: Direct Replacement
- SKU: 5L8Z-5G232-EA
- Warranty: This genuine part is guaranteed by Ford's factory warranty.
- Product Specifications
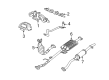
- Other Name: Converter Assembly; Catalytic Converter with Integrated Exhaust Manifold; Manifold Converter; Manifold
- Position: Passenger Side
- Base No.: 9430B
- Item Weight: 19.70 Pounds
- Item Dimensions: 17.4 x 13.6 x 8.7 inches
- Condition: New
- Fitment Type: Direct Replacement
- SKU: 5L8Z-5G232-CC
- Warranty: This genuine part is guaranteed by Ford's factory warranty.

2004 Ford Escape Catalytic Converter Part Number: 2L8Z-5E212-BA
Product Specifications- Other Name: Converter Assembly; Converter
- Replaces: 2L8Z-5E212-AA
- Base No.: 5E212
- Item Weight: 13.70 Pounds
- Item Dimensions: 14.7 x 11.1 x 18.1 inches
- Condition: New
- Fitment Type: Direct Replacement
- SKU: 2L8Z-5E212-BA
- Warranty: This genuine part is guaranteed by Ford's factory warranty.

2004 Ford Escape Catalytic Converter Part Number: YL8Z-5E212-GB
Product Specifications- Other Name: Converter Assembly; Converter
- Base No.: 5E212
- Item Weight: 18.40 Pounds
- Item Dimensions: 16.4 x 13.5 x 8.7 inches
- Condition: New
- Fitment Type: Direct Replacement
- SKU: YL8Z-5E212-GB
- Warranty: This genuine part is guaranteed by Ford's factory warranty.
2004 Ford Escape Catalytic Converter
If you're seeking quality and affordability, look no further than our extensive inventory of genuine 2004 Ford Escape Catalytic Converter available at FordPartsDeal.com. You can confidently purchase our OEM 2004 Ford Escape Catalytic Converter as they are supported by the manufacturer's warranty and our hassle-free return policy, alongside the benefit of our fast delivery service.
2004 Ford Escape Catalytic Converter Parts Q&A
- Q: How to service the catalytic converter on a 3.0L (4V) engine on 2004 Ford Escape?A: The first step for servicing a 3.0L (4V) generator catalytic converter demands that you lift the vehicle while providing suspension. Start by removing both nuts and discarding both items before you disconnect the catalytic converter from the hanger. To separate the catalytic converter from the hanger you should first remove the U-bolt. The service of the 3.0L (4V) engine requires removing the main silencer after silencer pipe connecting nuts before discarding them. After separating the converter from the main silencer on the floor you should remove them together. During installation you should first perform the removal steps in reverse order while adding new gasket and fresh nuts.
Related 2004 Ford Escape Parts
 2004 Ford Escape EGR Valve
 2004 Ford Escape Muffler
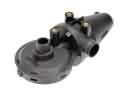 2004 Ford Escape PCV Valve
 2004 Ford Escape Canister Purge Valve
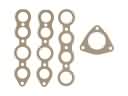 2004 Ford Escape Exhaust Manifold
 2004 Ford Escape Catalytic Converter Gasket
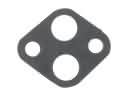 2004 Ford Escape EGR Valve Gasket
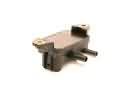 2004 Ford Escape EGR Valve Position Sensor
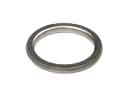 2004 Ford Escape Exhaust Flange Gasket
 2004 Ford Escape Exhaust Heat Shield
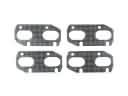 2004 Ford Escape Exhaust Manifold Gasket
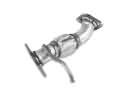 2004 Ford Escape Exhaust Pipe