FordParts
My Garage
My Account
Cart
OEM 2004 Ford F-150 Heritage Vehicle Speed Sensor
VSS- Select Vehicle by Model
- Select Vehicle by VIN
Select Vehicle by Model
orMake
Model
Year
Select Vehicle by VIN
For the most accurate results, select vehicle by your VIN (Vehicle Identification Number).
2 Vehicle Speed Sensors found


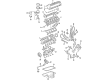
2004 Ford F-150 Heritage Speed Sensor Part Number: F65Z-9E731-AB
$101.53 MSRP: $138.16You Save: $36.63 (27%)Product Specifications- Other Name: Sensor Assembly - Speed; Vehicle Speed Sensor
- Replaces: F65Z-9E731-AA
- Base No.: 9E731
- Item Weight: 0.50 Pounds
- Item Dimensions: 6.2 x 2.5 x 2.4 inches
- Condition: New
- Fitment Type: Direct Replacement
- SKU: F65Z-9E731-AB
- Warranty: This genuine part is guaranteed by Ford's factory warranty.


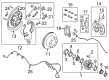
2004 Ford F-150 Heritage ABS Sensor, Rear Part Number: 6L3Z-9E731-A
$45.35 MSRP: $70.78You Save: $25.43 (36%)Product Specifications- Other Name: Sensor Assembly - Tripminder; ABS Wheel Speed Sensor, Rear; ABS Speed Sensor; Speed Sensor; Rear Speed Sensor; Sensor; ABS Wheel Speed Sensor
- Position: Rear
- Base No.: 9E731
- Item Weight: 0.30 Pounds
- Item Dimensions: 6.4 x 4.0 x 4.0 inches
- Condition: New
- Fitment Type: Direct Replacement
- SKU: 6L3Z-9E731-A
- Warranty: This genuine part is guaranteed by Ford's factory warranty.
2004 Ford F-150 Heritage Vehicle Speed Sensor
If you're seeking quality and affordability, look no further than our extensive inventory of genuine 2004 Ford F-150 Heritage Vehicle Speed Sensor available at FordPartsDeal.com. You can confidently purchase our OEM 2004 Ford F-150 Heritage Vehicle Speed Sensor as they are supported by the manufacturer's warranty and our hassle-free return policy, alongside the benefit of our fast delivery service.
2004 Ford F-150 Heritage Vehicle Speed Sensor Parts Q&A
- Q: How to service and repair the Vehicle Speed Sensor on a 4R100 Automatic Transmission on 2004 Ford F-150 Heritage?A: The service and repair procedure of Transmission Speed Sensor in a 4R100 Automatic Transmission starts with hoisting the vehicle in neutral position. Place an elevated transmission jack on the transmission after loosening transmission insulator-to-crossmember support nuts but leaving them securely fastened. Start by removing the crossmember bolts and then the two bolts which secure the heat shield to the transmission support crossmember to detach the crossmember. To access the sensors you need to lower the rear of the transmission then unplug the corresponding electric cable of the damaged sensor. To avoid contamination while working on the Turbine Shaft Speed (TSS) sensor, start by removing its bolt then uninstall the sensor. You should remove the Output Shaft Speed (OSS) sensor when needed by taking out its bolt. The Heated Oxygen Sensor connector should be put to the side while working on this step. The installation process should begin with O-ring lubrication followed by reinstalling the OSS and securing it with its bolt. Succeeding installation of the TSS device after HO2S connector repositioning, utilize lubrication on its O-ring and mount the TSS using its bolt. Expand the electrical connector of the affected sensor before reinstalling the crossmember to the transmission mount by using one nut for support while lifting the transmission to match crossmember bolt positions. Fasten the sensors and their bolts while tightening all installed nuts solidly. For the last step reinstall each of the two exhaust heat shield-to-crossmember bolts along with removing the high-lift transmission jack before lowering the vehicle.
Related 2004 Ford F-150 Heritage Parts
 2004 Ford F-150 Heritage ABS Control Module
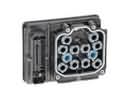 2004 Ford F-150 Heritage Brake Controller
 2004 Ford F-150 Heritage Coolant Temperature Sensor
 2004 Ford F-150 Heritage Crankshaft Position Sensor
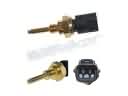 2004 Ford F-150 Heritage Cylinder Head Temperature Sensor
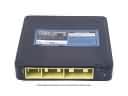 2004 Ford F-150 Heritage Engine Control Module
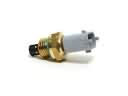 2004 Ford F-150 Heritage Intake Manifold Temperature Sensor
 2004 Ford F-150 Heritage Knock Sensor
 2004 Ford F-150 Heritage Oxygen Sensors
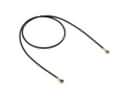 2004 Ford F-150 Heritage Speedometer Cable
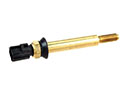 2004 Ford F-150 Heritage Temperature Sender
 2004 Ford F-150 Heritage Throttle Position Sensor