FordParts
My Garage
My Account
Cart
OEM 2004 Ford Focus Clock Spring
Spiral Cable Clock Spring- Select Vehicle by Model
- Select Vehicle by VIN
Select Vehicle by Model
orMake
Model
Year
Select Vehicle by VIN
For the most accurate results, select vehicle by your VIN (Vehicle Identification Number).
1 Clock Spring found


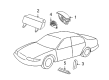
2004 Ford Focus Clockspring Part Number: 2M5Z-14A664-BA
$109.02 MSRP: $150.81You Save: $41.79 (28%)Ships in 1-2 Business DaysProduct Specifications- Other Name: Cover And Contact Plate Assembly; Air Bag Clockspring
- Manufacturer Note: Horn contact, without IVD (Interactive Vehicle Dymanics)
- Base No.: 14A664
- Item Weight: 1.20 Pounds
- Item Dimensions: 6.1 x 6.1 x 5.1 inches
- Condition: New
- Fitment Type: Direct Replacement
- SKU: 2M5Z-14A664-BA
- Warranty: This genuine part is guaranteed by Ford's factory warranty.
2004 Ford Focus Clock Spring
If you're seeking quality and affordability, look no further than our extensive inventory of genuine 2004 Ford Focus Clock Spring available at FordPartsDeal.com. You can confidently purchase our OEM 2004 Ford Focus Clock Spring as they are supported by the manufacturer's warranty and our hassle-free return policy, alongside the benefit of our fast delivery service.
2004 Ford Focus Clock Spring Parts Q&A
- Q: What Precautions Should Be Taken When Servicing the Clock Spring Assembly on 2004 Ford Focus?A: Safety glasses must be worn during Clock Spring assembly service to protect against accidental air bag deployment and probe the air bag module connectors at no time. Start the task only after putting the road wheels directly in the front direction. The new Clock Spring comes factory-centered while inside its red sealing key which needs breaking before fitting. The system power needs to be disabled and tools must not be inserted between the driver air bag module and steering wheel to protect these components from harm. Rotate the steering wheel to reach the captive bolts of the air bag module before taking off the driver air bag module through bolt removal and clip detachment and connector deconnection. Detach the steering wheel while removing all screws from the instrument panel lower panel and releasing its clip. Start the procedure by removing the steering column upper shroud clips before proceeding to disconnect the audio control switch attached to the steering column lower shroud when equipped. Detach the locking tab of the audio control switch with a thin-bladed screwdriver then separate its electrical connector. Pull the lower shroud from the steering column after unlocking the locking lever and unfastening its screws. Detach the multifunction switches from the Clock Spring by depressing locking tabs before sliding switches upwards and disconnect the Clock Spring electrical connector through a tab release. Record the Clock Spring spacing collar position in its center before removing it through steering column locking tab releases. Check for proper operation of retaining tangs via the locking sound when the new Clock Spring mounts to the steering column between its retaining tabs. Reinstall the multifunction switches and connect the Clock Spring electrical cord before installing the steering column shroud and fastening it with hardware and locking the column secure. Install the audio control switch by running its electrical connector and applying proper mounting. Fasten the clip to the instrument panel lower knee bolster before installing screws into it while attaching the steering column upper shroud. Keep the newly installed Clock Spring static during its time between breaking the red sealing key and steering wheel installation as any interruption will force a repeat of the centralization process. Turn the Clock Spring against the clockwise direction up to the point where resistance sets in followed by clockwise rotation until the rotor's arrow points at the "V" section on its raised portion at the 12 o'clock location requiring approximately two and a half turns to achieve centralization. Install the steering wheel only after verifying that the spacing collar is set correctly; a centralization process should be repeated if something is left unattended. A generous amount of electrical grease XG-12 needs application to the driver air bag module electrical connector face before you connect it to the Clock Spring. The last step involves connecting the driver air bag module electrical connector then installing the driver air bag module on the steering wheel through the process of retaining clip attachment and captive bolt installation followed by SRS reactivation.
Related 2004 Ford Focus Parts
 2004 Ford Focus Ignition Switch
 2004 Ford Focus Brake Light Switch
 2004 Ford Focus Headlight Switch
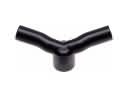 2004 Ford Focus PCV Valve Hose
 2004 Ford Focus Speedometer
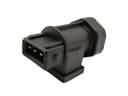 2004 Ford Focus Vehicle Speed Sensor
 2004 Ford Focus Spark Plug
 2004 Ford Focus Air Bag
 2004 Ford Focus Air Bag Control Module
 2004 Ford Focus Air Bag Sensor
 2004 Ford Focus Door Jamb Switch
 2004 Ford Focus Temperature Sender