FordParts
My Garage
My Account
Cart
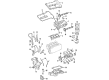
OEM 2004 Lincoln LS Timing Cover
Engine Timing Cover- Select Vehicle by Model
- Select Vehicle by VIN
Select Vehicle by Model
orMake
Model
Year
Select Vehicle by VIN
For the most accurate results, select vehicle by your VIN (Vehicle Identification Number).
2 Timing Covers found

2004 Lincoln LS Timing Cover, Front Part Number: 3W4Z-6019-AA
Product Specifications- Other Name: Cover - Cylinder Front; Front Cover
- Position: Front
- Base No.: 6019
- Item Weight: 11.80 Pounds
- Condition: New
- Fitment Type: Direct Replacement
- SKU: 3W4Z-6019-AA
- Warranty: This genuine part is guaranteed by Ford's factory warranty.

2004 Lincoln LS Timing Cover, Front Part Number: 2W9Z-6019-AA
Product Specifications- Other Name: Cover - Cylinder Front; Engine Timing Cover; Front Cover
- Position: Front
- Base No.: 6019
- Item Weight: 6.90 Pounds
- Item Dimensions: 9.1 x 17.0 x 3.1 inches
- Condition: New
- Fitment Type: Direct Replacement
- SKU: 2W9Z-6019-AA
- Warranty: This genuine part is guaranteed by Ford's factory warranty.
2004 Lincoln LS Timing Cover
If you're seeking quality and affordability, look no further than our extensive inventory of genuine 2004 Lincoln LS Timing Cover available at FordPartsDeal.com. You can confidently purchase our OEM 2004 Lincoln LS Timing Cover as they are supported by the manufacturer's warranty and our hassle-free return policy, alongside the benefit of our fast delivery service.
2004 Lincoln LS Timing Cover Parts Q&A
- Q: How to Service and Repair the Engine Front Timing Cover on 2004 Lincoln LS?A: The procedure for servicing the engine front cover starts with draining the cooling system fluid as well as engine oil before moving to the next step. The service starts with unfastening the left-hand as well as the right-hand valve covers before moving to the removal of the engine cooling fan assembly along with the crankshaft pulley and crankshaft seal. After draining engine fluid remove the A/C compressor and coolant pump one at a time while proceeding with the instructed component removal sequence. Disconnect the lower radiator-to-thermostat housing hose and heater hose and power steering reservoir hose while draining the reservoir if necessary. A power steering pressure (PSP) switch disconnection and removal of one bolt obstructed by the power steering pressure hose enables safe power steering pump handling before setting it aside. The first step is to detach both the power steering pump bracket and generator bracket before disassembling the five wiring harness clips to remove the engine front cover. Cleaning the sealing surfaces requires avoidance of metal scrapers and abrasive tools because a plastic scraping tool and metal surface cleaner should be used. The installation demands new gaskets and silicone gasket and sealant for application at designated areas. The front cover needs to be fastened down within four minutes after applying sealant. In this case remove the sealant and let the area dry prior to securing it. Fit the engine front cover onto the cylinder block before installing the bolts with this order: apply 5Nm then 10 Nm torque. Begin installation by reattaching the five wiring harness clips followed by generator and power steering pump brackets before setting the power steering pump and properly connecting the PSP switch together with power steering reservoir hose and heater hose and lower radiator hose to the thermostat housing. Equipment installation requires the final step which is the stud bolt.
Related 2004 Lincoln LS Parts
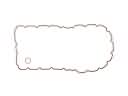 2004 Lincoln LS Oil Pan Gasket
 2004 Lincoln LS Crankshaft Seal
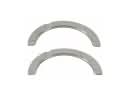 2004 Lincoln LS Crankshaft Thrust Washer Set
 2004 Lincoln LS Cylinder Head Bolts
 2004 Lincoln LS Dipstick
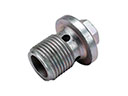 2004 Lincoln LS Drain Plug
 2004 Lincoln LS Engine Mount
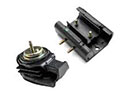 2004 Lincoln LS Motor And Transmission Mount
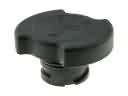 2004 Lincoln LS Oil Filler Cap
 2004 Lincoln LS Piston
 2004 Lincoln LS Rod Bearing
 2004 Lincoln LS Timing Cover Gasket