FordParts
My Garage
My Account
Cart
OEM 2005 Mercury Monterey Thermostat
Engine Coolant Thermostat- Select Vehicle by Model
- Select Vehicle by VIN
Select Vehicle by Model
orMake
Model
Year
Select Vehicle by VIN
For the most accurate results, select vehicle by your VIN (Vehicle Identification Number).
1 Thermostat found


2005 Mercury Monterey Thermostat Part Number: XR3Z-8575-BA
Product Specifications- Other Name: Thermostat Assembly; Engine Coolant Thermostat
- Manufacturer Note: Thermostat 192
#XR3E 8597-BA - Replaces: F88Z-8575-AA, E8TZ-8575-A, XL2Z-8575-AB
- Base No.: 8575
- Item Weight: 0.50 Pounds
- Item Dimensions: 6.2 x 4.1 x 4.1 inches
- Condition: New
- Fitment Type: Direct Replacement
- SKU: XR3Z-8575-BA
- Warranty: This genuine part is guaranteed by Ford's factory warranty.
2005 Mercury Monterey Thermostat
If you're seeking quality and affordability, look no further than our extensive inventory of genuine 2005 Mercury Monterey Thermostat available at FordPartsDeal.com. You can confidently purchase our OEM 2005 Mercury Monterey Thermostat as they are supported by the manufacturer's warranty and our hassle-free return policy, alongside the benefit of our fast delivery service.
2005 Mercury Monterey Thermostat Parts Q&A
- Q: How to service the thermostat on 2005 Mercury Monterey?A: Service of the thermostat starts with draining a portion of the cooling system fluid. The service starts with disconnecting the upper radiator hose from the thermostat housing and removing the air cleaner outlet tube. The next step is to remove the thermostat housing-to-engine bolts before taking out the thermostat housing which gets thrown into the trash because of its gasket. There are two steps to install the new thermostat housing bolts: tighten them first to 8 Nm (71 inch lbs.) then continue tightening an extra 60 degrees. Take a note of the thermostat vent pin area to reinstall it correctly afterward. A new procedure for thermostat removal is followed then followed by installation of removed components. The cooling system needs to be filled and bled as the final step.
Related 2005 Mercury Monterey Parts
 2005 Mercury Monterey Coolant Reservoir Cap
 2005 Mercury Monterey Cooling Fan Assembly
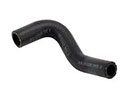 2005 Mercury Monterey Cooling Hose
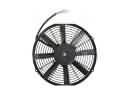 2005 Mercury Monterey Engine Cooling Fan
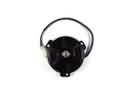 2005 Mercury Monterey Fan Motor
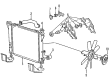
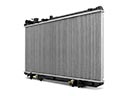 2005 Mercury Monterey Radiator
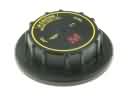 2005 Mercury Monterey Radiator Cap
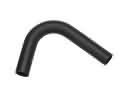 2005 Mercury Monterey Radiator Hose
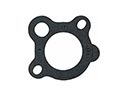 2005 Mercury Monterey Thermostat Gasket
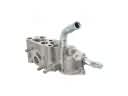 2005 Mercury Monterey Thermostat Housing
 2005 Mercury Monterey Water Pump
 2005 Mercury Monterey Water Pump Gasket