FordParts
My Garage
My Account
Cart
OEM 2006 Lincoln Mark LT Oil Pan
Oil Drain Pan- Select Vehicle by Model
- Select Vehicle by VIN
Select Vehicle by Model
orMake
Model
Year
Select Vehicle by VIN
For the most accurate results, select vehicle by your VIN (Vehicle Identification Number).
2 Oil Pans found


2006 Lincoln Mark LT Oil Pan Part Number: 2L1Z-6675-BA
Product Specifications- Other Name: Pan Assembly - Engine Oil; Engine Oil Pan
- Manufacturer Note: Less oil temp sensor provision
- Replaces: 2L1Z-6675-AA
- Base No.: 6675
- Item Weight: 10.20 Pounds
- Item Dimensions: 8.5 x 23.4 x 12.7 inches
- Condition: New
- Fitment Type: Direct Replacement
- SKU: 2L1Z-6675-BA
- Warranty: This genuine part is guaranteed by Ford's factory warranty.


2006 Lincoln Mark LT Oil Pan Part Number: 3L3Z-6675-BA
Product Specifications- Other Name: Pan Assembly - Engine Oil; Engine Oil Pan
- Manufacturer Note: With Oil Temp Sensor Provision
- Base No.: 6675
- Item Weight: 11.70 Pounds
- Item Dimensions: 8.7 x 23.2 x 12.7 inches
- Condition: New
- Fitment Type: Direct Replacement
- SKU: 3L3Z-6675-BA
- Warranty: This genuine part is guaranteed by Ford's factory warranty.
2006 Lincoln Mark LT Oil Pan
If you're seeking quality and affordability, look no further than our extensive inventory of genuine 2006 Lincoln Mark LT Oil Pan available at FordPartsDeal.com. You can confidently purchase our OEM 2006 Lincoln Mark LT Oil Pan as they are supported by the manufacturer's warranty and our hassle-free return policy, alongside the benefit of our fast delivery service.
2006 Lincoln Mark LT Oil Pan Parts Q&A
- Q: How to service and repair the oil pan on 2006 Lincoln Mark LT?A: Service and repair of the oil pan begins with placing the vehicle in neutral position on a hoist while draining the engine oil. Seamlessly disconnect the support bracket of starter wiring harness by removing the 4 bolts securing the frame crossmember. Hydraulic jacks should go under front axle sections of 4WD vehicles while using secure strap attachments. First torque the steering column to achieve space for the isolator bolt followed by bolt removal of the upper front axle carrier mounting bushing bolt and lower front axle carrier mounting bushing bolt and axle shaft housing carrier bushing bolt in succession. Lower the front axle housing tactfully to prevent breaking vacuum connections leading to the axle solenoid while making room for oil pan installation. Use care to check the oil pan gasket for damage while you remove the 16 bolts and oil pan with the gaskets. If the oil pan gasket shows signs of deterioration discard both it and the oil pan-to-oil pump gaskets. Installation should not involve metal scrapers or abrasive tools since they can produce leak paths on the sealing surfaces. A plastic scraping tool should be used to prepare the mating surface while cleaning it with silicone gasket remover and metal surface prep according to the drying time indicated on the label. Insulate both cranking rear seal retainer plate-to-cylinder block surfaces and engine front cover-to-cylinder block joints with silicone sealant. Secure the 16 oil pan bolts loosely and tighten them in three distinct stages using (2 Nm, 20 Nm and another 60 degree additional twist). When working on 4WD vehicles, install the front axle housing bolts loosely followed by tightening all mounting bolts at the front axle housing RH and LH front and LH rear to 89 Nm (66 ft. lbs.). Install the frame crossmember while tightening its four bolts to 102 Nm (75 ft. lbs.). Reinstall the starter wiring harness support bracket before filling the crankcase with clean engine oil.
Related 2006 Lincoln Mark LT Parts
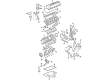
 2006 Lincoln Mark LT Camshaft
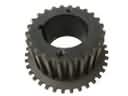 2006 Lincoln Mark LT Crankshaft Gear
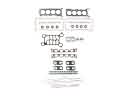 2006 Lincoln Mark LT Cylinder Head Gasket
 2006 Lincoln Mark LT Engine Mount
 2006 Lincoln Mark LT Oil Pump
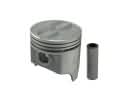 2006 Lincoln Mark LT Piston
 2006 Lincoln Mark LT Piston Ring Set
 2006 Lincoln Mark LT Rocker Arm
 2006 Lincoln Mark LT Rod Bearing
 2006 Lincoln Mark LT Timing Cover
 2006 Lincoln Mark LT Valve Stem Seal
 2006 Lincoln Mark LT Variable Timing Sprocket