FordParts
My Garage
My Account
Cart
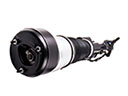
OEM 2008 Ford Crown Victoria Air Suspension Compressor
Suspension Levelling Compressor- Select Vehicle by Model
- Select Vehicle by VIN
Select Vehicle by Model
orMake
Model
Year
Select Vehicle by VIN
For the most accurate results, select vehicle by your VIN (Vehicle Identification Number).
1 Air Suspension Compressor found


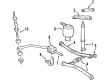
2008 Ford Crown Victoria Compressor Assembly Part Number: 8W1Z-5319-A
Product Specifications- Other Name: Compressor - Suspension Leveling; Air Suspension Compressor; Air Compressor; Compressor; Compressor - Suspension Levelling
- Replaces: 6W1Z-5319-AA
- Base No.: 5319
- Item Weight: 8.10 Pounds
- Item Dimensions: 6.9 x 12.6 x 10.7 inches
- Condition: New
- Fitment Type: Direct Replacement
- SKU: 8W1Z-5319-A
- Warranty: This genuine part is guaranteed by Ford's factory warranty.
2008 Ford Crown Victoria Air Suspension Compressor
If you're seeking quality and affordability, look no further than our extensive inventory of genuine 2008 Ford Crown Victoria Air Suspension Compressor available at FordPartsDeal.com. You can confidently purchase our OEM 2008 Ford Crown Victoria Air Suspension Compressor as they are supported by the manufacturer's warranty and our hassle-free return policy, alongside the benefit of our fast delivery service.
2008 Ford Crown Victoria Air Suspension Compressor Parts Q&A
- Q: How to service and repair the air suspension compressor on 2008 Ford Crown Victoria?A: The first step for servicing and repairing the air suspension compressor requires turning off power to the air suspension system because unexpected air spring changes can lead to vehicle shifts posing significant personal injury risks. It is important to turn the air suspension service switch to off state. Place the vehicle in neutral position before setting it onto the hoist. Start the service or repair by removing the air cleaner followed by dealing with the air compressor drier cover while you take out its pushpins first. You must first discard the canister pushpin to extract the canister itself from the system configuration. Use the quick connect locking ring to press then pull out the air tube leading to the disconnection of the air suspension compressor followed by disconnecting its electrical connector. You should tighten the three air suspension compressor bracket nuts to 44 lb-inch and 5 Nm (44 lb-inch) after reattaching them. To finish the task remove the air suspension compressor assembly. You should insert at least 3 millimeters (1/8 inch) of white tube through the fitting before assembly of air tubes to the compressor drier while following the opposite procedure to installation. Reinstall the components by using new parts with identical part numbers or equivalent parts while following the specified torque requirements to maintain correct component retention.
Related 2008 Ford Crown Victoria Parts
 2008 Ford Crown Victoria Air Suspension
 2008 Ford Crown Victoria Air Suspension Solenoid
 2008 Ford Crown Victoria Bump Stop
 2008 Ford Crown Victoria Coil Spring Insulator
 2008 Ford Crown Victoria Coil Springs
 2008 Ford Crown Victoria Control Arm
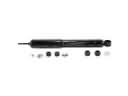 2008 Ford Crown Victoria Shock Absorber
 2008 Ford Crown Victoria Shock And Strut Mount
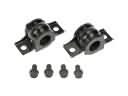 2008 Ford Crown Victoria Sway Bar Bracket
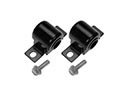 2008 Ford Crown Victoria Sway Bar Bushing
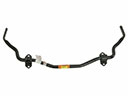 2008 Ford Crown Victoria Sway Bar Kit
 2008 Ford Crown Victoria Sway Bar Link