My Garage
Cart

OEM 2008 Ford Escape Oil Pan

Oil Drain Pan
  • Select Vehicle by Model
  • Select Vehicle by VIN
Select Vehicle by Model
Make
Model
Year
or
Select Vehicle by VIN
For the most accurate results, select vehicle by your VIN (Vehicle Identification Number).

2 Oil Pans found

  • 2008 Ford Escape Oil Pan - 8L8Z-6675-A
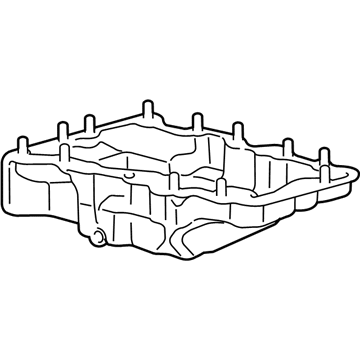
    2008 Ford Escape Oil Pan Diagram - 8L8Z-6675-A
    View related parts

    2008 Ford Escape Oil Pan Part Number: 8L8Z-6675-A

    $94.95 MSRP: $138.22
    You Save: $43.27 (32%)
    Ships in 1-3 Business Days
    ADD TO CART
    Product Specifications
    • Other Name: Pan Assembly - Engine Oil; Engine Oil Pan
    • Replaces: 7L8Z-6675-A, 5L8Z-6675-AA
    • Base No.: 6675
    • Item Weight: 12.00 Pounds
    • Item Dimensions: 9.6 x 18.9 x 14.9 inches
    • Condition: New
    • Fitment Type: Direct Replacement
    • SKU: 8L8Z-6675-A
    • Warranty: This genuine part is guaranteed by Ford's factory warranty.
    More Info
    Fits the following 2008 Ford Escape Submodels:
    • Limited, XLS, XLT, XLT No Boundaries, XLT Sport | 6 Cyl 3.0 L GAS
  • 2008 Ford Escape Oil Pan - 3M4Z-6675-AA
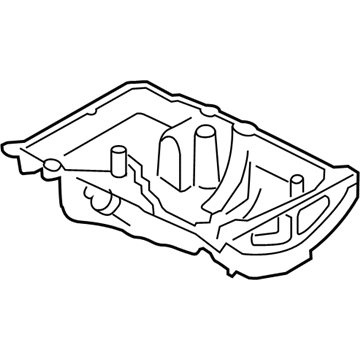
    2008 Ford Escape Oil Pan Diagram - 3M4Z-6675-AA
    View related parts

    2008 Ford Escape Oil Pan Part Number: 3M4Z-6675-AA

    $123.68 MSRP: $180.03
    You Save: $56.35 (32%)
    Ships in 1-3 Business Days
    ADD TO CART
    Product Specifications
    • Other Name: Pan Assembly - Engine Oil; Engine Oil Pan
    • Manufacturer Note: Use RTV Silicone Sealer In Place Of Gasket For This Application. Refer To Workshop Manual For Specification
    • Base No.: 6675
    • Item Weight: 11.90 Pounds
    • Item Dimensions: 8.4 x 19.2 x 13.8 inches
    • Condition: New
    • Fitment Type: Direct Replacement
    • SKU: 3M4Z-6675-AA
    • Warranty: This genuine part is guaranteed by Ford's factory warranty.
    More Info
    Fits the following 2008 Ford Escape Submodels:
    • Hybrid, XLS, XLT, XLT No Boundaries | 4 Cyl 2.3 L FULL HYBRID EV-GAS (FHEV), 4 Cyl 2.3 L GAS

2008 Ford Escape Oil Pan

If you're seeking quality and affordability, look no further than our extensive inventory of genuine 2008 Ford Escape Oil Pan available at FordPartsDeal.com. You can confidently purchase our OEM 2008 Ford Escape Oil Pan as they are supported by the manufacturer's warranty and our hassle-free return policy, alongside the benefit of our fast delivery service.

2008 Ford Escape Oil Pan Parts Q&A

  • Q: How to service and repair the oil pan, oil pump screen, and pickup tube for all on 2008 Ford Escape?
    A: All vehicles require the hoist and neutral position for performing oil pan and pickup tube and oil pump screen service and repairs. Begin the procedure by removing the air cleaner outlet pipe then use a torque wrench to loosen the two top bellhousing-to-engine bolts by 0.19 inches while maintaining less than 0.19-inch torque to prevent transmission damage. The two lower bolt connections between engine and transmission bellhousing on rear locations of all-wheel drive (AWD) vehicles require loosening to 5 mm (0.19 in). This procedure needs to be repeated on the two upper power transfer unit (PTU) to engine bracket bolts found beneath the car. The technician begins by taking out the pin-type retainer, six bolts, left-hand splash shield and oil level indicator and tube. Release the initial tension on two bellhousing-to-engine lower bolts at the front by contrasting it with 5 mm (0.19 in). FWD vehicle owners should also lower the manual transaxles one rear engine-to-bellhousing bolt by this amount and both automatic transaxles' equivalent bolts. Legally remove the two bellhousing bolts connecting to the oil pan and the two bellhousing bolts holding the pan together. Slide the transaxle 5 mm (0.19 in) backwards before draining engine oil and reinstalling the drain plug which must be tightened to 28 Nm (21 lb-ft). You must remove four engine front cover-to-oil pan bolts followed by removal of the thirteen bolts which secure the oil pan. The installation requires clean and inspecting mating surfaces through non-abrasive methods but when sealant application exceeds 10 minutes without the oil pan being secured you must use metal surface cleaner followed by surface drying. Place a 2.5 mm (0.09 in) silicone bead sealant on both the oil pan mating surfaces and then set the oil pan onto the engine before installing the bolts while keeping them loose. First use a torque wrench to tighten the four engine front cover-to-oil pan bolts to 10 Nm before proceeding to tighten the oil pan bolts to 25 Nm following a specific sequence. The engine and transaxle assembly of FWD vehicles requires front-rear bolt alternation to enable their sliding movement before tightening each bolt to 48 Nm (35 lb-ft). Then tighten all remaining bolts. AWD vehicle engine installation requires torqueing of one upper engine-to-PTU bracket bolt and one front lower bolt while starting with 45 Nm (33 lb-ft) for the bracket bolt followed by 48 Nm (35 lb-ft) for the front lower bolt and finishing with the bracket bolt and remaining front lower bolt torqued to 45 Nm (33 lb-ft) and 48 Nm (35 lb-ft) respectively. The bellhousing-to-oil pan bolts need installation with 48 Nm (35 lb-ft) torque while oil pan-to-bellhousing bolts require the same torque setting for final tightening. After reinstallation of the oil level indicator with its tube followed by the left-hand splash shield the vehicle requires pin-type retainers secured by six bolts that need tightening to 9 Nm (80 lb-in). AWD vehicles require the technician to tighten two top bellhousing-to-engine bolts and two rear lower engine-to-bellhousing bolts to 48 Nm (35 lb-ft) from the top side. Reinsert the outlet pipe on the air cleaner before adding new engine oil that has been properly cleaned.