My Garage
Cart

OEM 2009 Ford Escape Oil Pan

Oil Drain Pan
  • Select Vehicle by Model
  • Select Vehicle by VIN
Select Vehicle by Model
Make
Model
Year
or
Select Vehicle by VIN
For the most accurate results, select vehicle by your VIN (Vehicle Identification Number).

2 Oil Pans found

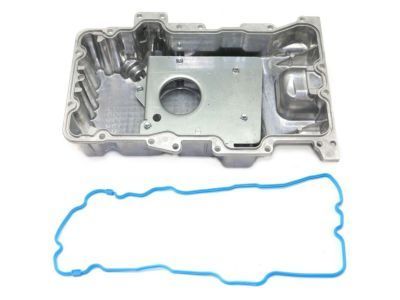
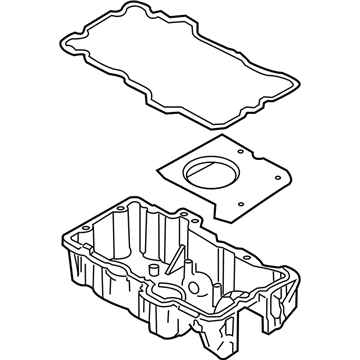
  • 2009 Ford Escape Oil Pan Diagram - 9L8Z-6675-A
    View related parts

    2009 Ford Escape Oil Pan Part Number: 9L8Z-6675-A

    $137.81 MSRP: $200.60
    You Save: $62.79 (32%)
    Ships in 1-2 Business Days
    ADD TO CART
    Product Specifications
    • Other Name: Pan Assembly - Engine Oil; Engine Oil Pan
    • Replaces: 6E5Z-6675-CA
    • Base No.: 6675
    • Item Weight: 12.40 Pounds
    • Item Dimensions: 18.5 x 13.7 x 8.1 inches
    • Condition: New
    • Fitment Type: Direct Replacement
    • SKU: 9L8Z-6675-A
    • Warranty: This genuine part is guaranteed by Ford's factory warranty.
    More Info
    Fits the following 2009 Ford Escape Submodels:
    • Limited, XLT | 6 Cyl 3.0 L FLEX, 6 Cyl 3.0 L GAS
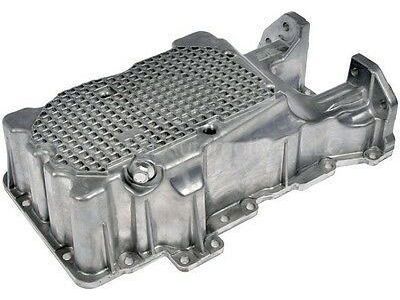
  • 2009 Ford Escape Oil Pan - 9E5Z-6675-B
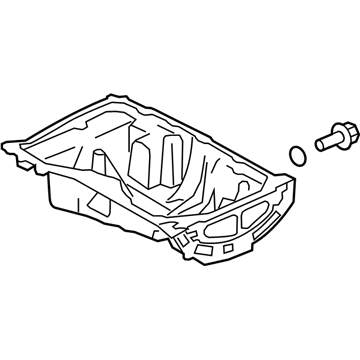
    2009 Ford Escape Oil Pan Diagram - 9E5Z-6675-B
    View related parts

    2009 Ford Escape Oil Pan Part Number: 9E5Z-6675-B

    $129.64 MSRP: $188.70
    You Save: $59.06 (32%)
    Ships in 1-3 Business Days
    ADD TO CART
    Product Specifications
    • Other Name: Pan Assembly - Engine Oil; Engine Oil Pan
    • Replaces: 9E5Z-6675-A, 8E5Z-6675-A
    • Base No.: 6675
    • Item Weight: 12.50 Pounds
    • Item Dimensions: 7.5 x 21.0 x 14.2 inches
    • Condition: New
    • Fitment Type: Direct Replacement
    • SKU: 9E5Z-6675-B
    • Warranty: This genuine part is guaranteed by Ford's factory warranty.
    More Info
    Fits the following 2009 Ford Escape Submodels:
    • Hybrid, Limited, Limited Hybrid, XLS, XLT | 4 Cyl 2.5 L FULL HYBRID EV-GAS (FHEV), 4 Cyl 2.5 L GAS

2009 Ford Escape Oil Pan

If you're seeking quality and affordability, look no further than our extensive inventory of genuine 2009 Ford Escape Oil Pan available at FordPartsDeal.com. You can confidently purchase our OEM 2009 Ford Escape Oil Pan as they are supported by the manufacturer's warranty and our hassle-free return policy, alongside the benefit of our fast delivery service.

2009 Ford Escape Oil Pan Parts Q&A

  • Q: How to service and repair the oil pan on 2009 Ford Escape?
    A: Service and repair of an oil pan begins with positioning a vehicle on a hoist with it set to neutral. Detach the Air Cleaner (ACL) outlet pipe before you loosen the 2 bellhousing-to-engine bolts by 5 mm (0.19 in) which must not exceed this distance to protect the transmission. When working on AWD vehicles you should loosen the 2 RH engine-to-bellhousing bolts together with the 2 RH engine bracket-to-Power Transfer Unit (PTU) bolts to the same amount. After removing the 7 retainers along with the LH splash shield the technician should loosen the 2 LH bellhousing-to-engine bolts. Front Wheel Drive (FWD) drivers should loosen between 1 manual transaxle or 2 automatic transaxle RH engine-to-bellhousing bolts by 5 mm (0.19 in). Drain the engine oil while removing both bellhousing-to-oil pan bolts together with the two oil pan-to-bellhousing bolts because this action allows you to move the transaxle backward by 5 mm (0.19 in). Reinstall the drain plug before tightening it to 28 Nm (21 lb-ft). Disconnect the combination of 4 bolts joining the engine front cover to the oil pan while also removing the 13 bolts holding the oil pan. A plastic scraping tool should replace metal scrapers for cleaning all sealing surfaces during installation. Any delay in securing the oil pan after sealant treatment requires cleaning of the sealing area and waiting for it to dry. The installation process requires a 2.5 mm (0.09 in) strand of silicone gasket and sealant placed between the engine block and oil pan as well as the front cover of the oil pan. Mount the oil pan onto the engine block while keeping the bolts loose at first. Tighten the 4 engine front cover to oil pan bolts to 10 Nm (89 lb-in) before progressing with the oil pan bolt tightening at 25 Nm (18 lb-ft) using the specified bolt order. The tightening sequence for FWD vehicles includes alternately tightening 1 LH bellhousing-to-engine and 1 RH engine-to-bellhousing bolts to slide transaxle and engine together until they reach 48 Nm (35 lb-ft). Within the AWD configuration alternate tightening the 1 RH engine-to-PTU bracket bolt with the 1 LH bellhousing-to-engine bolt then torque the PTU bracket bolt to 45 Nm (33 lb-ft) and the LH bellhousing bolt to 48 Nm (35 lb-ft). Install the two bellhousing-to-oil pan bolts as well as the two oil pan-to-bellhousing bolts while torquing them to 48 Nm (35 lb-ft). Reinstall the LH splash shield by securing seven retainers to 9 Nm (80 lb-in) and fasten the 2 RH engine-to-bellhousing bolts to 48 Nm (35 lb-ft) in addition to tightening the 2 upper bellhousing-to-engine bolts to 48 Nm (35 lb-ft). For the completion install the ACL outlet pipe and then add clean engine oil into the engine.