FordParts
My Garage
My Account
Cart
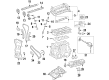
OEM 2008 Ford Focus Oil Pan
Oil Drain Pan- Select Vehicle by Model
- Select Vehicle by VIN
Select Vehicle by Model
orMake
Model
Year
Select Vehicle by VIN
For the most accurate results, select vehicle by your VIN (Vehicle Identification Number).
1 Oil Pan found


2008 Ford Focus Oil Pan Part Number: 1S7Z-6675-D
$101.48 MSRP: $156.17You Save: $54.69 (36%)Ships in 1-3 Business DaysProduct Specifications- Other Name: Pan Assembly - Engine Oil; Engine Oil Pan
- Replaces: 1S7Z-6675-AA, 1S7Z-6675-A
- Base No.: 6675
- Item Weight: 12.70 Pounds
- Item Dimensions: 7.7 x 21.2 x 14.1 inches
- Condition: New
- Fitment Type: Direct Replacement
- SKU: 1S7Z-6675-D
- Warranty: This genuine part is guaranteed by Ford's factory warranty.
2008 Ford Focus Oil Pan
If you're seeking quality and affordability, look no further than our extensive inventory of genuine 2008 Ford Focus Oil Pan available at FordPartsDeal.com. You can confidently purchase our OEM 2008 Ford Focus Oil Pan as they are supported by the manufacturer's warranty and our hassle-free return policy, alongside the benefit of our fast delivery service.
2008 Ford Focus Oil Pan Parts Q&A
- Q: How to service and repair the oil pan on 2008 Ford Focus?A: Putting the vehicle on a hoist with it set to neutral position is the starting point for oil pan servicing and repair. The heated oxygen sensor (HO2S) and catalyst monitor sensor wire connector bracket should be set aside while removing the two nuts from the system. Apply 5 mm (0.19 in) of slack to the upper bellhousing-to-engine bolt along with stud bolt but do not exceed this amount to avert transmission breakdown. Start by taking out both the oil level indicator and tube after which you should loosen the 3 front lower bellhousing-to-engine bolts (manual transaxle) or 2 (automatic transaxle) by 5 mm (0.19 in) until you are ready to loosen the rear lower engine-to-bellhousing bolt and stud bolt by 5 mm (0.19 in). Pull off the 2 bellhousing-to-oil pan bolts and the 2 oil pan-to-bellhousing bolts before moving the transaxle 5 mm (0.19 in) toward the back. First drain engine oil while removing the accessory drive belt splash shield bolts and then reinstall the drain plug and torque it to 28 Nm (21 lb-ft). Starting from front to back remove the 4 engine front cover-to-oil pan bolts followed by the removal of the 13 bolts securing the oil pan. Deployment of metal scrapers and abrasive tools for sealing surface cleaning should be avoided when installing components because a plastic scraping tool must be used instead. Ordinary silicone sealer application must end before 10 minutes or else perform metal surface preparation on the sealant area followed by drying the area before adding more silicone sealer. Adjunct the installation by applying 0.09 in (2.5 mm) of silicone gasket and sealant across the interfacial areas of the oil pan with the engine block and engine front cover. Place the oil pan onto the motor and install the 13 pan bolts with extremely light torque at first. Crank the engine front cover-to-oil pan bolts to 10 Nm (89 lb-in) before setting the oil pan bolts to 25 Nm (18 lb-ft) according to their specified torque pattern. Place back the accessory drive belt splash shield and fasten its 2 bolts at 9 Nm (80 lb-in). Use an alternating pattern when tightening the front bellhousing-to-engine bolts and rear engine-to-bellhousing lower bolts to connect the transaxle and engine while torquing to 48 Nm (35 lb-ft). All remaining bellhousing bolts that connect the front side of the bellhousing to the engine must receive a torque of 48 Nm (35 lb-ft) followed by a specification of 48 Nm (35 lb-ft) for the engine-to-bellhousing stud bolt and bellhousing-to-oil pan bolts and oil pan-to-bellhousing bolts. Reinstall the oil level indicator followed by putting in the tube and securing the top bellhousing-to-engine bolt and stud bolt to 48 Nm (35 lb-ft). Position the HO2S and catalyst monitor sensor wire connector bracket before tightening 2 nuts to 25 Nm (18 lb-ft). The engine requires clean engine oil as you replace the battery tray before completing the oil procedure.
Related 2008 Ford Focus Parts
 2008 Ford Focus Camshaft
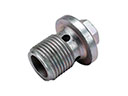 2008 Ford Focus Drain Plug
 2008 Ford Focus Cam Gear
 2008 Ford Focus Crankshaft Seal
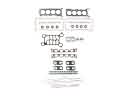 2008 Ford Focus Cylinder Head Gasket
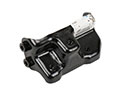 2008 Ford Focus Engine Mount Bracket
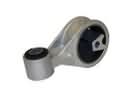 2008 Ford Focus Engine Torque Strut Mount
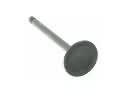 2008 Ford Focus Intake Valve
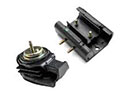 2008 Ford Focus Motor And Transmission Mount
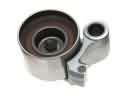 2008 Ford Focus Timing Belt Idler Pulley
 2008 Ford Focus Timing Chain Tensioner
 2008 Ford Focus Valve Stem Seal