FordParts
My Garage
My Account
Cart
OEM Ford Contour Windshield
Glass Windshield- Select Vehicle by Model
- Select Vehicle by VIN
Select Vehicle by Model
orMake
Model
Year
Select Vehicle by VIN
For the most accurate results, select vehicle by your VIN (Vehicle Identification Number).
2 Windshields found

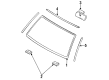
Ford Contour Windshield Part Number: F6RZ-5403100-AM
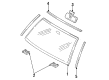
Ford Contour Windshield Part Number: F5RZ-5403100-A
Ford Contour Windshield
OEM Windshield boasts unmatched quality. Each part goes through full quality checks. They adhere to Ford's official factory standards. These steps remove flaws and inconsistencies. So you can get Windshield with long life and a perfect fit. Come to our website and find genuine Ford Contour parts. We keep a wide inventory of OEM Contour parts at the highly affordable prices. It's easy to search, compare, and pick what you need. You'll love the clear info and simple checkout. We offer top-rated customer service, and we reply fast. We also ship promptly to ensure your order arrives on time.
The Ford Contour Windshield serves as an essential element to maintain the reliability and performance quality of the Ford Contour sedan which manufactured between 1995 and 2000. A laminated safety glass construction makes the Ford Contour Windshield renowned for both its optical clarity and its strong structure which defends drivers in all weather against flying objects. The car benefits from this windshield due to its air-resistance-minimizing properties which in turn boost overall vehicle performance. The windshield fits different Ford Contour versions like GL, LX and SE while serving as a safety standard requirement because impaired driver sight results from a damaged windshield. This Ford Contour Windshield fits the vehicle precisely to maximize both security performance and operational effectiveness. The car Windshield stands out in the automotive market because it uses a dual-layer structure which enhances protection for its users. Investing in a quality the manufacturer car component is necessary because the replacement costs fall between $110 and $140. The car part serves as a solid demonstration of the brand's dedication to safety performance which ensures vital protection for each the automaker model vehicle owner.
Ford Contour Windshield Parts and Q&A
- Q: How to remove and install a windshield on Ford Contour?A:Providing windshield removal requires first disconnecting the battery ground cable followed by heating the polyurethane (PU) adhesive when operating temperatures remain below 10°C by placing cartridges on a warm radiator or applying a hot air gun set to 25°C for about 15 minutes. The first step consists of removing the grille assembly together with cowl top vent panel and A-pillar windshield trims and the 12 A-pillar trim retaining clips. You should detach the windshield top weatherseal and door weather strip before dropping the headliner near the windshield with a small block of suitable material serving as a roof spacer. The Oscillating Cutter No. 107-R1511 with its 28 mm hook blade should be used for windshield cutting while wearing protective gloves and eye gear because splinters are possible. When working on heated windshield installations keep the blade of your equipment low so that it does not affect the heated connectors. Cut the bottom portion of the windshield with a 60 mm hook blade equipped cutter from the same tool before proceeding to cut out the PU adhesive on top and side edges using Interior Auto Glass Cut-out Knife No. 164-R2450 or its equivalent cutting tool with a 4 in cutter blade. The PU adhesive responds best for cutting operations when lubricated at its glass junction with EC7784 or similar products applied as a mixture of ten parts water to one part soap. The 8 in cutter blade from Interior Auto Glass Cut-out Knife No. 164-R2450 enables you to make a second cut on the windshield bottom edge while receiving assistance to extract the glass through suction cups after drilling out locator block rivets. When installing the windshield remove additional PU adhesive from the opening flange while keeping no more than 1 millimeter adhering to the bodywork then scan the pinch weld sealing area for any signs of damage or foreign objects. Through use of a hot air gun operating at 25°C the technician applies warm air to dry the windshield opening area including the glass bond line to allow for optimum PU adhesive curing. Proceed according to the adhesive kit instructions when preparing the windshield glass and opening and trimmed PU adhesive. Extra adhesive must be removed from the reusable original windshield. Fits new locator blocks using a heavy-duty riveter for new rivets while installing the windshield weather strip. Climb into the car with assistance while using suction cups along with fast and uniform pressure to mount the windshield glass. Proceed only after discarding 100 mm (4 in) of adhesive due to shorter working time. You should direct the warm air stream at the substrate while keeping the distance to 50 mm for continuous application of 15 minutes during conditions under 10°C. The procedure ends by removing the spacer while installing the headliner and trim panels, along with the door weather strip and eleven retaining clips before placing the windshield trims and cowl vent panel. Lastly, reattach the Battery Cable ground.

Related Ford Contour Parts
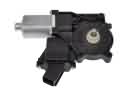 Ford Contour Window Motor
 Ford Contour Car Mirror
 Ford Contour Door Latch Assembly
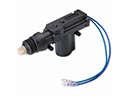 Ford Contour Door Lock Actuator
 Ford Contour Emblem
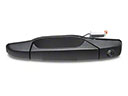 Ford Contour Exterior Door Handle
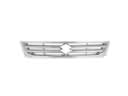 Ford Contour Grille
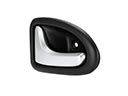 Ford Contour Interior Door Handle
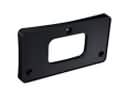 Ford Contour License Plate
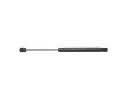 Ford Contour Lift Support
 Ford Contour Weather Strip
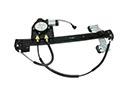 Ford Contour Window Regulator