FordParts
My Garage
My Account
Cart
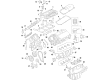
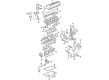
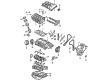
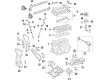
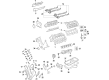
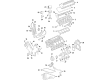
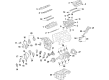
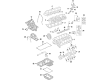
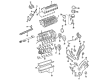
OEM Ford Cylinder Head
Head- Select Vehicle by Model
- Select Vehicle by VIN
Select Vehicle by Model
orMake
Model
Year
Select Vehicle by VIN
For the most accurate results, select vehicle by your VIN (Vehicle Identification Number).
246 Cylinder Heads found


Ford Cylinder Head, Driver Side Part Number: 9T4Z-6049-D
$595.54 MSRP: $807.23You Save: $211.69 (27%)Ships in 1-3 Business DaysProduct Specifications- Other Name: Cylinder Head Assembly
- Position: Driver Side
- Replaces: 7T4Z-6049-B, 9T4Z-6049-A


Ford Cylinder Head, Driver Side Part Number: JC3Z-6049-B
$853.50 MSRP: $1160.00You Save: $306.50 (27%)Ships in 1 Business DayProduct Specifications- Other Name: Cylinder Head Assembly
- Position: Driver Side
- Replaces: FC3Z-6049-A


Ford Cylinder Head Part Number: BE8Z-6049-A
$956.89 MSRP: $1301.38You Save: $344.49 (27%)Product Specifications- Other Name: Cylinder Head Assembly
- Manufacturer Note: Includes Valves And Springs Only


Ford Cylinder Head, Passenger Side Part Number: FR3Z-6049-A
$1105.50 MSRP: $1504.62You Save: $399.12 (27%)Product Specifications- Other Name: Cylinder Head Assembly
- Position: Passenger Side

Ford Cylinder Head Part Number: 1F2Z-6049-BA
$539.86 MSRP: $776.77You Save: $236.91 (31%)Ships in 1-3 Business DaysProduct Specifications- Other Name: Cylinder Head Assembly
- Replaces: YF2Z-6049-BA

Ford Cylinder Head, Passenger Side Part Number: 9L3Z-6049-C
$2249.17 MSRP: $4247.69You Save: $1998.52 (48%)Ships in 1-2 Business DaysProduct Specifications- Other Name: Cylinder Head Assembly
- Manufacturer Note: Less Valves
- Position: Passenger Side

Ford Cylinder Head, Driver Side Part Number: 2S7Z-6049-AALH
$738.89 MSRP: $1078.00You Save: $339.11 (32%)Ships in 1-2 Business DaysProduct Specifications- Other Name: Cylinder Head Assembly
- Position: Driver Side
- Replaces: YL8Z-6049-AA

Ford Cylinder Head Part Number: EJ7Z-6049-A
$901.95 MSRP: $1313.85You Save: $411.90 (32%)Ships in 1-3 Business DaysProduct Specifications- Other Name: Cylinder Head Assembly


Ford Cylinder Head Part Number: FM5Z-6049-C
$843.15 MSRP: $1227.69You Save: $384.54 (32%)Ships in 1-2 Business DaysProduct Specifications- Other Name: Cylinder Head Assembly
- Replaces: CM5Z-6049-B, CM5Z-6049-A, FM5Z-6049-A


Ford Cylinder Head Part Number: 9C2Z-6049-EA
$909.62 MSRP: $1325.08You Save: $415.46 (32%)Ships in 1-3 Business DaysProduct Specifications- Other Name: Cylinder Head Assembly
- Manufacturer Note: Less Valves
- Replaces: 2L1Z-6049-DA, XL3Z-6049-DA


Ford Cylinder Head Part Number: DL3Z-6049-B
$1170.75 MSRP: $1707.69You Save: $536.94 (32%)Ships in 1-3 Business DaysProduct Specifications- Other Name: Cylinder Head Assembly
- Replaces: DL3Z-6049-A

Ford Cylinder Head Part Number: JL3Z-6049-N
$1333.50 MSRP: $1946.15You Save: $612.65 (32%)Ships in 1-3 Business DaysProduct Specifications- Other Name: Cylinder Head Assembly
- Replaces: JL3Z-6049-G, JL3Z-6049-C, JL3Z-6049-H
Ford Cylinder Head, Passenger Side Part Number: AC2Z-6049-A
$1421.28 MSRP: $2074.77You Save: $653.49 (32%)Ships in 1-2 Business DaysProduct Specifications- Other Name: Cylinder Head Assembly
- Manufacturer Note: Includes Valves, Rockers, Tappets And Camshaft
- Position: Passenger Side
Ford Cylinder Head, Driver Side Part Number: AC2Z-6049-B
$1422.44 MSRP: $2076.46You Save: $654.02 (32%)Ships in 1-2 Business DaysProduct Specifications- Other Name: Cylinder Head Assembly
- Manufacturer Note: Includes Valves, Rockers, Tappets And Camshaft
- Position: Driver Side

Ford Cylinder Head, Driver Side Part Number: FL3Z-6049-J
$1579.20 MSRP: $2306.15You Save: $726.95 (32%)Ships in 1-2 Business DaysProduct Specifications- Other Name: Cylinder Head Assembly
- Position: Driver Side
- Replaces: FL3Z-6049-F, FL3Z-6049-D
Ford Cylinder Head, Driver Side Part Number: 9L3Z-6049-E
$2904.30 MSRP: $4247.69You Save: $1343.39 (32%)Ships in 1-3 Business DaysProduct Specifications- Other Name: Cylinder Head Assembly
- Manufacturer Note: Less Valves
- Position: Driver Side


Ford Cylinder Head, Passenger Side Part Number: 9L3Z-6049-J
Product Specifications- Other Name: Cylinder Head Assembly
- Manufacturer Note: Includes Valves, Rockers, Tappets And Camshaft
- Position: Passenger Side
- Replaces: 9L3Z-6049-G

Ford Cylinder Head, Passenger Side Part Number: JC3Z-6049-A
$1060.50 MSRP: $1443.08You Save: $382.58 (27%)Product Specifications- Other Name: Cylinder Head Assembly
- Position: Passenger Side
- Replaces: BC3Z-6049-N, FC3Z-6049-B


Ford Cylinder Head, Driver Side Part Number: FR3Z-6049-B
$1027.88 MSRP: $1398.46You Save: $370.58 (27%)Product Specifications- Other Name: Cylinder Head Assembly
- Position: Driver Side

Ford Cylinder Head Part Number: 6C3Z-6049-DRM
$1274.25 MSRP: $1880.00You Save: $605.75 (33%)Product Specifications- Other Name: Reman Kit
- Replaces: 6C3Z-6049-AA, 6C3Z-6049-A
| Page 1 of 13 |Next >
1-20 of 246 Results
Ford Cylinder Head
If you own Ford and want to keep it in top shape, choosing OEM Cylinder Head is a smart move. They are precisely engineered and follow strict factory standards. They are made in advanced facilities that use cutting edge technology. Each part goes through thorough testing to confirm strength and safety, so you can trust it. FordPartsDeal.com gives you genuine Ford Cylinder Head at some of the affordable online prices without cutting quality. Every OEM Ford part includes the manufacturer's warranty, easy returns, and super-fast delivery. So why wait? Shop now and get your vehicle back to peak condition.
Ford Cylinder Head maintains tightness of combustion and maintains stable temperatures to engines to breathe clean and burn strong. It was started in 1903 and then took off in 1913 when Ford developed the moving assembly line that reduced the time it took to produce the everyday drivers in the whole world. Ford takes powerplants that combine punch with thrift and launches SYNC voice technology so that hands are on the wheel and ears are on the joy. Ford packs on Co-Pilot360 safety technology and the company currently sells electric trucks, which eliminate tailpipe fumes, which demonstrates that innovation can be clean and keep drivers confident. The company is relying on the power of data-driven testing and fast feedback loops and pushing updates that make engines smoother, cabins smarter and the overall drive feel more like what people expect to be the case tomorrow. The Cylinder Head was made of light aluminum by Ford to get the heat away quick and cut off weight without gnashing the block. Fresh air and fuel are introduced into each cylinder by the Cylinder Head and exhaust is swept out to maintain power constant and emissions low. Torque is applied in Cylinder Head to clamp hard torque bolts that prevent leaks of coolants or oil. Warming speeds in hybrids Cylinder Head speeds that warm up to match combustion across variants and demonstrate that the same part can serve the broader lineup.
Ford Cylinder Head Parts and Q&A
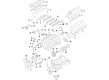
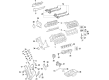
- Q: How to clean and inspect the cylinder head and valve train components during an engine overhaul on Ford Bronco?A:These decarbonizing chemicals are very beneficial in the cleaning of cylinder head and valve train parts, but are very aggressive and will hence require extreme precaution on their usage as reiterated on the container information. Cylinder head and a great many other related valve train parts should be cleaned and then inspected to discover what kind of valve service will be needed during the course of the engine overhaul. Start by using a wire cut to remove old gasket material and sealing compounds from the head gasket and intake and exhaust manifold sealing surfaces but a care should be taken not on gouge the cylinder head. Scrape off the coolant deposits from the passage, scrub off deposits in various holes by using a metal stiff wire brush, and to eliminate corrosion and thread sealant, tap the correct size into the threaded holes. It is recommended that the threads of the rocker arm bolt and the cylinder head are cleaned with solvent and then dried, though air drying can be accelerated with the help of application of air pressure. Rocker arms, fulcrums, and pushrods need to be cleaned individually and do not mix even if they are off the same cylinder, all valve springs, the keepers, and retainers must be cleaned individually too. Foul formations on these valves should be scraped off with the use of a wire brush on the heads and on the stems of the valves without interchanging the valves. Check the cylinder head for scratch, signs of coolant seepage and etc., if you find one you should replace the cylinder head. Use straightedge and feeler gauge on the head gasket mating surface for warpage and for pitted, cracked or burnt valve seats especially if they need professional valve service. Check the valve stem to guide clearance using a dial gauge and in case of any problem with the valve guides, contact an automotive machine shop. The faces of all valves should be checked for signs of wear, deformation and checks for crack; if there exist any of the mentioned, then the service of a professional is required. Check the margin width on each of the valves and replace those with a margin that is not wider than 1/32 of an inch. Examine check valve springs for wear or pits, measure that free length of springs is still to specifications, if its sagged then its should not be used. Check the squareness of every spring and also check for wear and crack on retainers and keepers and replace such parts. Rocker arm faces checked for wear and damage, rocker arm bolts or studs threads checked for wear as well as worn rocker arms are to be replaced. In order to inspect the general poor condition of the valve elements if exists, the valves installed that in cylinder head for further servicing advice; when no parts worn severely are found, and the valve face and seat are both in good conditions, the valve train parts can be directly reassembled for servicing.
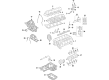
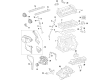
- Q: What are the steps involved in the removal and installation of a cylinder head in SOHC four cylinder engine on 2000-2011 Ford Ranger?A:On 2.5L engines, have the air conditioning refrigerant recovered by a dealer service department or service station, then relieve the fuel system pressure. Disconnect the cable from the negative battery terminal and position the number one piston at Top Dead Center (TDC) on the compression stroke. Drain the cooling system, remove the air cleaner assembly and air duct, and take off the drivebelt. Remove the bolt retaining the heater hose to the valve cover if equipped, then take out the spark plug wires, ignition coil packs, and spark plugs. Label and disconnect any electrical connectors or vacuum hoses attached to components on the cylinder head, and remove the dipstick tube. Remove the upper and lower intake manifolds, the valve cover, and the air conditioning compressor from its mounting bracket without disconnecting the hoses. Remove the bracket, power steering pump, and alternator bracket mounting bolts, then disconnect the upper radiator hose at both ends. Remove the radiator fan/clutch assembly, water pump pulley, and timing belt front cover, confirming that all camshaft and crankshaft marks are still aligned before loosening the timing belt tensioner and removing the timing belt from the camshaft or oil pump sprockets. Remove the heat shield from the exhaust manifold and the exhaust manifold mounting bolts, allowing the manifold to remain in place. Remove the timing belt tensioner bolts and spring stop from the cylinder head, disconnect the oil pressure sending unit wiring harness connector, and remove the intake manifold. Using a new head gasket, outline the cylinders and bolt pattern on cardboard, indicating the front of the engine and punching holes at the bolt locations. Loosen the cylinder head mounting bolts in 1/4-turn increments until they can be removed by hand, storing them in the cardboard holder to ensure proper reinstallation. Lift the head off the engine, using a soft-face hammer or block of wood if necessary to break the gasket seal, and place it on a block of wood to prevent damage to the gasket surface. If a new cylinder head is being installed, transfer all external parts from the old head to the new one, ensuring the mating surfaces of the cylinder head and block are perfectly clean. Use a gasket scraper to remove all traces of carbon and old gasket material, then clean the surfaces with lacquer thinner or acetone, taking care to remove any debris that falls into the cylinders. Check the block and head mating surfaces for damage, using a file for slight imperfections and considering machining for excessive damage. Chase the threads in the head bolt holes with a tap of the correct size, and run a die down the threads of each bolt to remove corrosion. Position the new gasket over the dowel pins in the block without using a gasket sealer, and confirm that the crankshaft is at TDC, rotating it if necessary. Before installing the cylinder head, turn the camshaft until the pin is in the five o'clock position to avoid valve damage, ensuring the camshaft lobes are in the correct position for all valves to be seated. Carefully position the head on the block without disturbing the gasket, install the cylinder head bolts, and tighten them in sequence to the specified torque. Return the camshaft to its original TDC position, and complete the installation in reverse order of removal, finishing by changing the engine oil and filter.


Related Ford Parts
 Ford Timing Chain
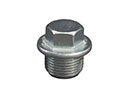 Ford Oil Drain Plug
 Ford Oil Drain Plug Gasket
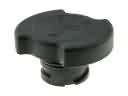 Ford Oil Filler Cap
 Ford Pushrod
 Ford Timing Chain Tensioner
 Ford Timing Cover
 Ford Camshaft Bearing
 Ford Crankshaft Gear
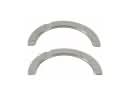 Ford Crankshaft Thrust Washer
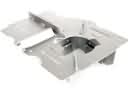 Ford Oil Pan Baffle
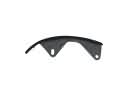 Ford Timing Chain Guide
Browse Ford Cylinder Head by Models
Ranger Bronco Mustang Explorer Focus Fusion F-150 Maverick Escape Edge Excursion Expedition Fiesta Taurus Thunderbird Flex Transit Connect Bronco Sport Explorer Sport Trac Crown Victoria EcoSport Escort F-250 Aerostar C-Max Contour E-150 Econoline Explorer Sport F-350 Five Hundred Freestar Freestyle Police Interceptor Utility Taurus X Tempo Windstar F-350 Super Duty Police Interceptor Sedan E-150 E-150 Econoline Club Wagon E-250 E-250 Econoline E-250 Econoline Club Wagon E-350 Econoline E-350 Econoline Club Wagon E-350 Super Duty F-150 Heritage F-250 HD F-250 Super Duty Special Service Police Sedan Transit-150 Transit-250 Transit-350 Transit-350 HD