FordParts
My Garage
My Account
Cart
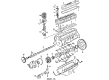
OEM Ford E-250 Econoline Oil Pan
Oil Drain Pan- Select Vehicle by Model
- Select Vehicle by VIN
Select Vehicle by Model
orMake
Model
Year
Select Vehicle by VIN
For the most accurate results, select vehicle by your VIN (Vehicle Identification Number).
7 Oil Pans found


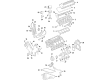
Ford E-250 Econoline Oil Pan Part Number: F7UZ-6675-AC
$148.85 MSRP: $216.67You Save: $67.82 (32%)
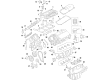
Ford E-250 Econoline Oil Pan Part Number: 3L3Z-6675-CA
$89.54 MSRP: $130.33You Save: $40.79 (32%)Ships in 1-3 Business Days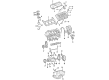
Ford E-250 Econoline Oil Pan Part Number: F65Z-6675-CB
$240.26 MSRP: $332.38You Save: $92.12 (28%)Ships in 1-2 Business Days

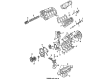
Ford E-250 Econoline Oil Pan Part Number: E7TZ6675E
Ford E-250 Econoline Oil Pan Part Number: F6TZ-6675-NA

Ford E-250 Econoline Oil Pan Part Number: F6TZ-6675-MA

Ford E-250 Econoline Oil Pan Part Number: F6TZ-6675-LA
Ford E-250 Econoline Oil Pan
OEM Oil Pan boasts unmatched quality. Each part goes through full quality checks. They adhere to Ford's official factory standards. These steps remove flaws and inconsistencies. So you can get Oil Pan with long life and a perfect fit. Come to our website and find genuine Ford E-250 Econoline parts. We keep a wide inventory of OEM E-250 Econoline parts at the highly affordable prices. It's easy to search, compare, and pick what you need. You'll love the clear info and simple checkout. We offer top-rated customer service, and we reply fast. We also ship promptly to ensure your order arrives on time.
Ford E-250 Econoline Oil Pan Parts and Q&A
- Q: How to service and repair the oil pan on Ford E-250 Econoline?A:Repair and servicing of the oil pan begins with disconnection of the battery ground cable followed by draining of the cooling system. First remove the air cleaner assembly together with the Fan Shroud and fan assembly then extract the upper intake manifold. First detach the bolt holding the transmission converter housing dipstick tube support bracket. Afterward raise the vehicle while draining the oil pan. Start by loosening each nut found on the side of the oil pan and following up by removing them.Secure the oil pan with a screw jack combined with a block of wood. The engine requires height adjustment to create at least 33 mm (13 inches) separation between the crankshaft damper and the crossmember bottom. The motor should be supported after elevation using blocks of wood applied between the engine mount bracket and Exhaust Manifolds followed by screw jack and wood block removal from the oil pan. By starting with the right-side converter housing, you should remove the bolt followed by the left-side bolts and finally extract all supporting bolts along with the oil pan which should be thrown away with the existing oil pan seal. The procedures for installation require that both the oil pan and rear oil seal should be installed within seven minutes or else the applied sealant should be removed and reapplied. Use Metal Surface Cleaner F4AZ-19A536-RA or an equivalent WSE-M513392-A approved by Ford to clean the mating surfaces between the oil pan and cylinder block. Then install a bead of Silicone Gasket and Sealant F7AZ-19554-EA or a substitute that meets the specifications of WSE-M4G323-A4. Two-step bolt torquing procedure includes initial tightening to 4 - 5 Nm (35 - 44 inch lbs.) through Stage 1 followed by an additional tightening to 9 - 12 Nm (79 - 106 inch lbs.) in Stage 2 according to bolt sequence.

Related Ford E-250 Econoline Parts
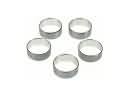 Ford E-250 Econoline Camshaft Bearing
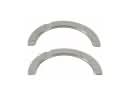 Ford E-250 Econoline Crankshaft Thrust Washer
 Ford E-250 Econoline Cylinder Head
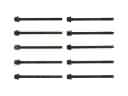 Ford E-250 Econoline Cylinder Head Bolts
 Ford E-250 Econoline Cylinder Head Gasket
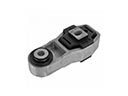 Ford E-250 Econoline Engine Mount Torque Strut
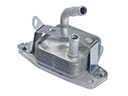 Ford E-250 Econoline Engine Oil Cooler
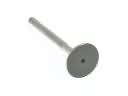 Ford E-250 Econoline Exhaust Valve
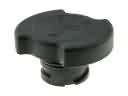 Ford E-250 Econoline Oil Filler Cap
 Ford E-250 Econoline Oil Pump
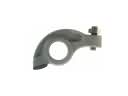 Ford E-250 Econoline Rocker Arm
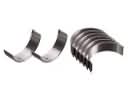 Ford E-250 Econoline Rod Bearing