FordParts
My Garage
My Account
Cart
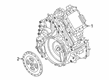
OEM Ford Escape Clutch Disc
Friction Disc- Select Vehicle by Model
- Select Vehicle by VIN
Select Vehicle by Model
orMake
Model
Year
Select Vehicle by VIN
For the most accurate results, select vehicle by your VIN (Vehicle Identification Number).
3 Clutch Discs found


Ford Escape Pressure Plate Part Number: 9L8Z-7B546-A
$400.77 MSRP: $543.23You Save: $142.46 (27%)
Ford Escape Torque Converter Part Number: NZ6Z-7550-A
$123.66 MSRP: $166.15You Save: $42.49 (26%)Ships in 1-2 Business Days

Ford Escape Pressure Plate Part Number: 3L8Z-7L596-AA
$201.52 MSRP: $270.77You Save: $69.25 (26%)
Ford Escape Clutch Disc
OEM Clutch Disc boasts unmatched quality. Each part goes through full quality checks. They adhere to Ford's official factory standards. These steps remove flaws and inconsistencies. So you can get Clutch Disc with long life and a perfect fit. Come to our website and find genuine Ford Escape parts. We keep a wide inventory of OEM Escape parts at the highly affordable prices. It's easy to search, compare, and pick what you need. You'll love the clear info and simple checkout. We offer top-rated customer service, and we reply fast. We also ship promptly to ensure your order arrives on time.
Ford Escape Clutch Disc Parts and Q&A
- Q: How to remove and replace the clutch disc and pressure plate on Ford Escape?A:The first task to start clutch disc and pressure plate replacement consists of removing the transaxle. The Flywheel Holding Tool should be used to lock the flywheel into place with the engine. Examining the diaphragm spring fingers needs immediate attention because you will check for discoloration and examine each segment for breaks along with inspecting that both spring ends sit at an equal height. Caution is necessary since the clutch disc and pressure plate develop enough weight to drop when you remove their bolts which could lead to severe injuries. Unfasten the 6 bolts over an equal period while maintaining the pressure plate from damage until you can remove both the clutch pressure plate and disc. A suitable cleaning solution should clean the pressure plate friction surface before examining it for burn marks and looking for scores and checking flatness and ridges. Repair of the disc should be delayed when oil saturation is present as the rear engine Crankshaft Seal requires replacement before installing a new clutch disc. The clutch disc lining needs to have its minor imperfections cleaned using emery cloth until it requires replacement if the disc shows oil or grease saturation or worn or loose facings or warpage or loose rivets at the hub or wear or rust on the splines. An inspection of the clutch disc must evaluate its runout and wear condition. Use Clutch Aligner to put the clutch disc on the flywheel and position the clutch pressure plate onto the flywheel before securing the 6 bolts at 29 Nm (21 lb-ft) torque setting per specified order before rebuilding the transaxle.

Related Ford Escape Parts
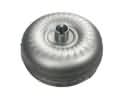 Ford Escape Torque Converter
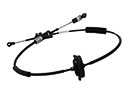 Ford Escape Shift Cable
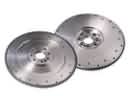 Ford Escape Flywheel
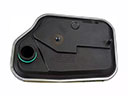 Ford Escape Automatic Transmission Filter
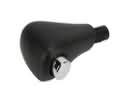 Ford Escape Automatic Transmission Shift Levers
 Ford Escape Automatic Transmission Shifter
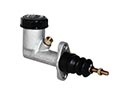 Ford Escape Clutch Master Cylinder
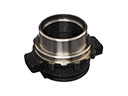 Ford Escape Clutch Release Bearing
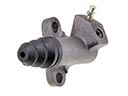 Ford Escape Clutch Slave Cylinder
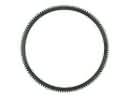 Ford Escape Flywheel Ring Gear
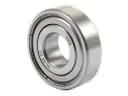 Ford Escape Pilot Bearing
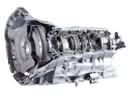 Ford Escape Transmission Assembly