FordParts
My Garage
My Account
Cart
OEM Ford Excursion Thermostat
Engine Coolant Thermostat- Select Vehicle by Model
- Select Vehicle by VIN
Select Vehicle by Model
orMake
Model
Year
Select Vehicle by VIN
For the most accurate results, select vehicle by your VIN (Vehicle Identification Number).
4 Thermostats found


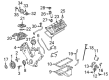
Ford Excursion Thermostat Part Number: 7L3Z-8575-E
$22.20 MSRP: $35.82You Save: $13.62 (39%)Ships in 1 Business Day


Ford Excursion Thermostat Housing Part Number: 3C3Z-8575-AA
$40.08 MSRP: $63.64You Save: $23.56 (38%)Ships in 1 Business Day


Ford Excursion Thermostat Part Number: F6TZ-8575-EA
$45.11 MSRP: $71.64You Save: $26.53 (38%)Ships in 1 Business Day

Ford Excursion Thermostat Part Number: 7C3Z-8575-B
$12.93 MSRP: $20.00You Save: $7.07 (36%)
Ford Excursion Thermostat
OEM Thermostat boasts unmatched quality. Each part goes through full quality checks. They adhere to Ford's official factory standards. These steps remove flaws and inconsistencies. So you can get Thermostat with long life and a perfect fit. Come to our website and find genuine Ford Excursion parts. We keep a wide inventory of OEM Excursion parts at the highly affordable prices. It's easy to search, compare, and pick what you need. You'll love the clear info and simple checkout. We offer top-rated customer service, and we reply fast. We also ship promptly to ensure your order arrives on time.
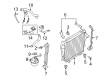
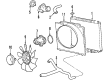
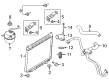
The Thermostat in Ford Excursion vehicles is well-circuited in the cooling system is located around the radiator to control the heat. Its main work is to ensure the temperate of the engine is well regulated for efficiency purposes. It thus serves as a closed loop control device that turns off or on the heating or cooling system depending on the level of temperature present. The traditional mechanical thermostats such as bimetallic strip thermostat and wax pellet thermostat have been used in varieties of models of Ford Excursion. Wax pellet thermostats are especially suitable, because their shape changes with temperature fluctuations to regulate engine heat. It has provided the advances in these devices that resulted in the current integrations which work to improve the control of the temperature which in return increases efficiency of the vehicle and the general comfort it poses.
Ford Excursion Thermostat Parts and Q&A
- Q: How to service and repair the thermostat on Ford Excursion?A:The first step to work on the thermostat should involve partially draining the cooling system components. The upper radiator hose gets disconnected while you remove the water outlet connection by unscrewing its bolts. Start by taking out the water thermostat together with its attached O-ring seal before discarding the seal piece. Install the water thermostat in the upper intake manifold by using an O-ring seal that is brand new while ensuring it finds its proper installation position. Follow this process to reattach the water outlet connection to the upper intake manifold by installing its bolts then reconnecting the upper radiator hose while finishing with cooling system filling.

Related Ford Excursion Parts
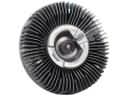 Ford Excursion Fan Clutch
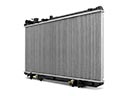 Ford Excursion Radiator
 Ford Excursion Water Pump
 Ford Excursion Coolant Reservoir
 Ford Excursion Coolant Reservoir Cap
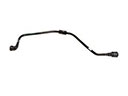 Ford Excursion Coolant Reservoir Hose
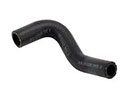 Ford Excursion Cooling Hose
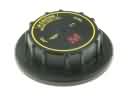 Ford Excursion Radiator Cap
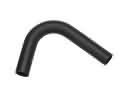 Ford Excursion Radiator Hose
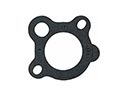 Ford Excursion Thermostat Gasket
 Ford Excursion Water Hose
 Ford Excursion Water Pump Gasket