FordParts
My Garage
My Account
Cart
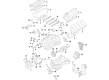
OEM Ford Flex Oil Pan
Oil Drain Pan- Select Vehicle by Model
- Select Vehicle by VIN
Select Vehicle by Model
orMake
Model
Year
Select Vehicle by VIN
For the most accurate results, select vehicle by your VIN (Vehicle Identification Number).
4 Oil Pans found


Ford Flex Oil Pan Part Number: 7T4Z-6675-A
$130.68 MSRP: $201.67You Save: $70.99 (36%)Ships in 1-3 Business Days

Ford Flex Oil Pan Part Number: DG1Z-6675-F
$110.26 MSRP: $160.50You Save: $50.24 (32%)Ships in 1-2 Business Days
Ford Flex Oil Pan Part Number: BG1Z-6675-E
$158.01 MSRP: $230.00You Save: $71.99 (32%)Ships in 1-3 Business Days
Ford Flex Oil Pan Part Number: AA5Z-6675-J
Ford Flex Oil Pan
OEM Oil Pan boasts unmatched quality. Each part goes through full quality checks. They adhere to Ford's official factory standards. These steps remove flaws and inconsistencies. So you can get Oil Pan with long life and a perfect fit. Come to our website and find genuine Ford Flex parts. We keep a wide inventory of OEM Flex parts at the highly affordable prices. It's easy to search, compare, and pick what you need. You'll love the clear info and simple checkout. We offer top-rated customer service, and we reply fast. We also ship promptly to ensure your order arrives on time.
Thus, the Ford Flex Oil Pan is one of the significant components, which speaks about the high reliability and performance of the Ford Flex models. Thus acting as a temporary storage for the engine oil, flexibility allows the Ford Flex Oil Pan to deliver the oil to the engine smoothly while avoiding any leaks as this is important when it comes to health of the vehicle's engine. Featuring a wet sump system, this oil pan gathers the oil drawn through a pickup tube by the oil pump for circulation in the engine to cool and lubricate it before it returning to the pan. Modern Ford Flex Oil Pans are normally made of a cast aluminum material as this material is stronger and more efficient than the stamped steel used earlier. Sufficient quantities of oil are provided for this aspect, and any problem such as the oil splashing during forceful cornering do not affect the entire film of lubrication. The Ford Flex serves different models such as the base, a mid-level, and advanced level, that is, SE, SEL, and Limited respectively, and therefore, the Ford Flex Oil Pan is recommendable for use by the owners. Its importance cannot be overemphasized as it plays part of the impacts to the optimization of the engine's efficiency and safety. Also, it will be noted that the Ford Flex Oil Pan also comes with a special design that will enable for a higher mount off the vehicle, hence increase its usefulness. Featuring the optimal attributes of reliability, Ford Flex Oil Pan is iconic in the automotive market, and serves as an important factor for Ford Flex users who want to protect the car's performance and structure.
Ford Flex Oil Pan Parts and Q&A
- Q: How to service and repair the oil pan on Ford Flex?A:A proper servicing and repairing process should start by removing the engine and cleaning both areas meticulously because foreign material can lead to engine failure. First remove the 8 bolts along with the Flywheel then the crankshaft sensor ring. Secure the engine stand bolts along the cylinder block while omitting the oil pan location then fasten the engine to an appropriate stand. You must start by disconnecting the electrical connector of the block heater and detaching all the engine block heater harness retainers before removing the harness. The technician should disconnect three components: the PCV hose from the valve, and then take down the electrical connector of the throttle body before removing 4 wiring harness retainers from the upper intake manifold. The upper intake manifold support bracket bolt should be removed with the fuel tube bracket bolt that secures it. A replacement or repair history due to upper engine failure requires checking the intake manifold for metal debris as a new intake might be needed. Drain the six bolts from the upper intake manifold while throwing away its original gaskets. Disconnect the electrical connector of the Power Steering Pressure switch so does the RH Catalyst Monitor Sensor for FWD vehicles and the RH Variable Camshaft Timing solenoid and the 3 RH coil-on-plug electrical connectors and the RH Heated Oxygen Sensor electrical connector. Remove the wiring harness retainers from both valve covers and studs before disconnecting the electrical connectors for the LH Catalyst Monitor Sensor and VCT solenoid followed by LH coil-on-plug connectors on three plugs and the retainers of both wiring harnesses on the valve cover studs. You need to uninstall the 6 bolts and the 6 coil-on-plugs while maintaining the A/C compressor attached to the cylinder block before you take off the A/C compressor nut and stud. Remove the Power Steering Pump bolts while removing its 3 bolts and position the power steering pump aside after taking out the bolt that connects PSP tube bracket to the RH valve cover stud bolt and its nut. Detach the 3 bolts from the accessory drive belt tensioner before removing the 4 nuts from the LH catalytic converter along with discarding both components and the gasket. FWD vehicle owners should remove four nuts from the right catalytic converter then dispose of the gasket together with these nuts. Sequence the coolant drain process by first removing plug or heater block from the RH cylinder block before proceeding to remove the plug from the LH cylinder block. The installer first removes the LH valve cover by discarding its gasket then removing the RH valve cover using the thread bolt and 10 stud bolts before discarding the second gasket as well. Use the VCT Spark Plug Tube Seal Remover and Handle to remove all busted VCT solenoid seals from the spark plug tube seals. The Strap Wrench must be used as a tool to remove the crankshaft bolt with washer before discarding it and utilizing a 3 Jaw Puller to remove the crankshaft pulley as well as using an Oil Seal Remover to discard the crankshaft front seal. The removal process requires hand tools to extract two engine mount studs and three bolts from the engine mount bracket after you take out the two bolts and engine mount bracket. Start by removing the engine front cover bolts then put 6 bolts into the available threaded holes but keep them finger-tight. Continue to tighten the bolts by alternating across patterns until the engine front cover seals from the cylinder block. Finish by taking off the front engine cover. First tighten two of the sixteen oil pan bolts superficially into the threaded spots and alternate the bolt actions to break the seal between the oil pan and cylinder block before taking out the oil pan. Clean the engine front cover and oil pan by using a 3M™ Roloc® Bristle Disk (2-in white, part number 07528) operated at 15,000 rpm while paying attention to complete foreign material removal during cleaning. Apply new cleansed shop towels across engine opening cavities followed by careful extraction to stop outside material from entering the machine. Clean the gasket remnants then treat the cylinder block sealing surfaces with a composed method that includes silicone gasket remover and metal surface prep as a means to get rid of any oil and coolant residues. Check that both locating dowel pins found in the cylinder block maintain proper seating position.

Related Ford Flex Parts
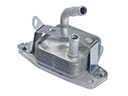 Ford Flex Engine Oil Cooler
 Ford Flex Timing Chain
 Ford Flex Camshaft
 Ford Flex Engine Mount
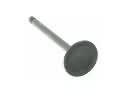 Ford Flex Intake Valve
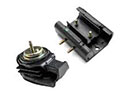 Ford Flex Motor And Transmission Mount
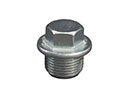 Ford Flex Oil Drain Plug
 Ford Flex Oil Pump
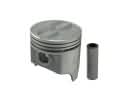 Ford Flex Piston
 Ford Flex Timing Chain Guide
 Ford Flex Timing Chain Tensioner
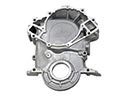 Ford Flex Timing Cover