FordParts
My Garage
My Account
Cart
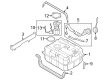
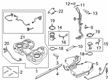
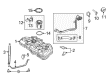
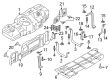
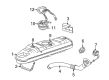
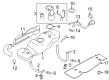
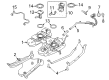
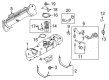
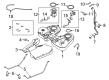
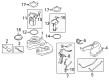
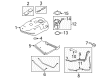
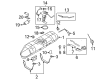
OEM Ford Fuel Tank
Gas Tank- Select Vehicle by Model
- Select Vehicle by VIN
Select Vehicle by Model
orMake
Model
Year
Select Vehicle by VIN
For the most accurate results, select vehicle by your VIN (Vehicle Identification Number).
246 Fuel Tanks found


Ford Fuel Tank Part Number: 9C2Z-9002-E
$1391.31 MSRP: $2061.20You Save: $669.89 (33%)Ships in 1-3 Business DaysProduct Specifications- Other Name: Tank Assembly - Fuel
- Manufacturer Note: 55 Gallon Capacity


Ford Fuel Tank Part Number: DA8Z-9002-A
$618.69 MSRP: $916.58You Save: $297.89 (33%)Ships in 1-2 Business DaysProduct Specifications- Other Name: Tank Assembly - Fuel


Ford Fuel Tank Part Number: AE8Z-9002-D
$732.80 MSRP: $1085.63You Save: $352.83 (33%)Ships in 1-3 Business DaysProduct Specifications- Other Name: Tank Assembly - Fuel
- Replaces: AE8Z-9002-C


Ford Fuel Tank Part Number: HC3Z-9002-Y
$842.90 MSRP: $1248.73You Save: $405.83 (33%)Product Specifications- Other Name: Tank Assembly - Fuel
- Replaces: HC3Z-9002-B, HC3Z-9002-M


Ford Fuel Tank Part Number: BV6Z-9002-E
$849.12 MSRP: $1257.95You Save: $408.83 (33%)Ships in 1-2 Business DaysProduct Specifications- Other Name: Tank Assembly - Fuel
- Replaces: BV6Z-9002-C, BV6Z-9002-D


Ford Fuel Tank Part Number: 4L5Z-9002-AA
$922.05 MSRP: $1366.00You Save: $443.95 (33%)Product Specifications- Other Name: Tank Assembly - Fuel
- Manufacturer Note: 17 Gallon Capacity


Ford Fuel Tank Part Number: BC3Z-9002-E
$1108.79 MSRP: $1642.65You Save: $533.86 (33%)Ships in 1-3 Business DaysProduct Specifications- Other Name: Tank Assembly - Fuel
- Manufacturer Note: 28 Gallon Capacity


Ford Fuel Tank Part Number: F81Z-9002-CA
Product Specifications- Other Name: Tank Assembly - Fuel
- Manufacturer Note: 19 gallon steel midship tank., gas, 141", 162", 165", 176", 189",200",201"WB,

Ford Fuel Tank Part Number: 6C3Z-9002-F
Product Specifications- Other Name: Tank Assembly - Fuel
- Replaces: 6C3Z-9002-E, 6C3Z-9002-A, 6E7Z-9002-AA

Ford Fuel Tank Part Number: 5C3Z-9002-E
Product Specifications- Other Name: Tank Assembly - Fuel
- Replaces: 5C3Z-9002-MA


Ford Fuel Tank Part Number: 2C2Z-9002-FA
Product Specifications- Other Name: Tank Assembly - Fuel
- Manufacturer Note: 35 gal midship, Reg/Extended Vans/Wagons, Unleaded/Leaded/Diesel Fuel, FROM 2/23/2002
- Replaces: 1C2Z-9002-AA


Ford Fuel Tank Part Number: DL3Z-9002-A
$617.78 MSRP: $915.23You Save: $297.45 (33%)Product Specifications- Other Name: Tank Assembly - Fuel
- Replaces: 9L3Z-9A032-G, 9L3Z-9002-A, AL3Z-9002-A, BL3Z-9A032-B


Ford Fuel Tank Part Number: 4L5Z-9002-CA
$732.47 MSRP: $1085.13You Save: $352.66 (33%)Product Specifications- Other Name: Tank Assembly - Fuel
- Manufacturer Note: 19.5 Gallon Capacity


Ford Fuel Tank Part Number: BT4Z-9002-A
$872.56 MSRP: $1292.68You Save: $420.12 (33%)Product Specifications- Other Name: Tank Assembly - Fuel


Ford Fuel Tank Part Number: BC2Z-9002-B
$953.35 MSRP: $1412.37You Save: $459.02 (33%)Product Specifications- Other Name: Tank Assembly - Fuel
- Manufacturer Note: 35 Gallon Capacity
- Replaces: BC2Z-9002-A

Ford Fuel Tank Part Number: F81Z-9002-UA
Product Specifications- Other Name: Tank Assembly - Fuel
- Manufacturer Note: 19 gallon steel midship tank., Diesel; 141", 162", 165", 176", 189", 200", 201" WB


Ford Fuel Tank Part Number: AE9Z-9002-A
Product Specifications- Other Name: Tank Assembly - Fuel; Fuel Tank Filler Neck; Filler Neck


Ford Fuel Tank Part Number: 8G1Z-9002-F
Product Specifications- Other Name: Tank Assembly - Fuel
- Replaces: 8G1Z-9002-B, 8G1Z-9002-D


Ford Fuel Tank Part Number: 8G1Z-9002-E
Product Specifications- Other Name: Tank Assembly - Fuel
- Replaces: 8G1Z-9002-C


Ford Fuel Tank Part Number: 8C2Z-9002-A
Product Specifications- Other Name: Tank Assembly - Fuel
- Manufacturer Note: 35 Gallon Capacity
- Replaces: 7C2Z-9002-E
| Page 1 of 13 |Next >
1-20 of 246 Results
Ford Fuel Tank
If you own Ford and want to keep it in top shape, choosing OEM Fuel Tank is a smart move. They are precisely engineered and follow strict factory standards. They are made in advanced facilities that use cutting edge technology. Each part goes through thorough testing to confirm strength and safety, so you can trust it. FordPartsDeal.com gives you genuine Ford Fuel Tank at some of the affordable online prices without cutting quality. Every OEM Ford part includes the manufacturer's warranty, easy returns, and super-fast delivery. So why wait? Shop now and get your vehicle back to peak condition.
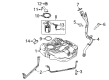
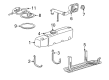
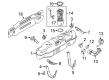
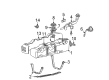
Gasoline is safely stored in Ford Fuel Tank to ensure that all journeys proceed without annoying delays. It was started in 1903 by Henry Ford and the assembly that could move cars in 1913 saw cars that were rolling out at an affordable rate, which could be purchased by regular families. Ford is now punching above its weight by lowering EcoBoost engines under hoods and getting more bang out of each drop and saving money on gas for their drivers. Even drivers yell at Ford SYNC and the system complies, changing the music or charting the routes without a movement of the hands out of the wheel, which will keep the eyes focused and nerves relaxed. Roads are now gentler with Co-Pilot360 activating auto braking and lane nudges and battery trucks such as the F-150 Lightning demonstrating that Ford still can pull without spewing smoke. The reason why the company keeps tinkering is that the company feels that a car should do the work and the driver retains the fun. The Fuel Tank is between the frame rails, contains gasoline, encloses the electric pump and sender, and includes internal baffles that rip apart slosh to maintain a constant pressure on hairpin turns or washboard tracks and is connected to the Evaporative Emission Control System that traps vapor before it leaks out through the nozzle. Metal Fuel Tank will shrug off road debris but may rust when water gets inside. A plastic Fuel Tank laughs at corrosion but can crack when there is a rapid change in temperature due to hard flexing. Racing crews choose reinforced Fuel Tank cells, which vibrate through holes to ensure that fire remains an inevitable option in high-speed anarchy.
Ford Fuel Tank Parts and Q&A
- Q: Should all repairs to the fuel tank or filler neck be carried out by a professional due to the potential dangers involved on Ford Mustang?A:The fuel tank or filler neck repairs have to be done by a professional since it is a sensitive area that can be dangerous when not well handled after explosive fumes may linger even after cleaning and flushing the fuel tank. In the event that the fuel tank has been removed from the car, it must not be positioned, for instance in a garage with appliances that produce sparks or flames near the fumes, this pose a risk of explosion.
- Q: How to remove a fuel tank on 2000-2011 Ford Ranger?A:The procedure is much easier to perform with an empty fuel tank, which may have a drain plug for this purpose; if not, siphon the gasoline into an approved container. Begin by removing the fuel tank filler cap to relieve pressure, then relieve the fuel system pressure. Detach the negative cable from the battery and siphon any remaining fuel into an approved container if necessary. Raise the vehicle securely on jackstands, then remove the heat shield, skid plate if equipped, and the front retaining strap. Support the fuel tank with a floor jack or jackstands, using a piece of wood to protect it. For 2010 and earlier models, remove the bolt from the rear retaining strap and pivot it down. Loosen the screw clamps at the fill pipe and vent pipe, disconnecting the pipes at the tank. Lower the tank enough to disconnect all vapor valve, fuel line, and electrical connectors from the sender unit, vapor valve, and fuel pump module as equipped. Clearly label hoses and fittings to simplify installation, and plug them to prevent leakage and contamination. For 2011 models, remove the fuel pump module cover to access some connectors. Disconnect any remaining connectors for the fuel pump, fuel gauge sending unit, or Fuel Tank Pressure sensor at the rear of the tank, then remove the tank from the vehicle. Installation follows the reverse order of removal, with new tank retaining strap bolts recommended, and for 2011 models, tighten the fuel pump module cover nuts to 80 in-lbs.


Related Ford Parts
 Ford Gas Cap
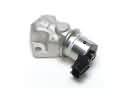 Ford Idle Control Valve
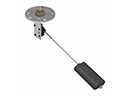 Ford Fuel Sending Unit
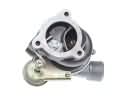 Ford Turbocharger
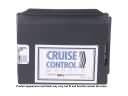 Ford Cruise Control Module
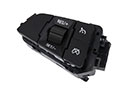 Ford Cruise Control Switch
 Ford Fuel Filler Hose
 Ford Fuel Pressure Sensor
 Ford Fuel Tank Vent Valve
 Ford Air Filter Box
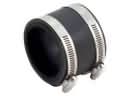 Ford Air Intake Coupling
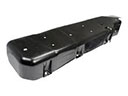 Ford Fuel Tank Skid Plate
Browse Ford Fuel Tank by Models
Ranger Bronco Mustang Explorer Focus Fusion F-150 Maverick Escape Edge Excursion Expedition Fiesta Taurus Thunderbird Flex Transit Connect Bronco Sport Explorer Sport Trac Crown Victoria EcoSport Escort F-250 C-Max Contour E-150 Econoline Explorer Sport F-350 Five Hundred Freestar Freestyle Police Interceptor Utility Taurus X Windstar F-350 Super Duty Police Interceptor Sedan E-150 E-150 Club Wagon E-150 Econoline Club Wagon E-250 E-250 Econoline E-250 Econoline Club Wagon E-350 Club Wagon E-350 Econoline E-350 Econoline Club Wagon E-350 Super Duty F-150 Heritage F-250 HD F-250 Super Duty Police Responder Hybrid Special Service Police Sedan SSV Plug-In Hybrid Transit-150 Transit-250 Transit-350 Transit-350 HD