FordParts
My Garage
My Account
Cart
OEM Ford Thunderbird Clock Spring
Spiral Cable Clock Spring- Select Vehicle by Model
- Select Vehicle by VIN
Select Vehicle by Model
orMake
Model
Year
Select Vehicle by VIN
For the most accurate results, select vehicle by your VIN (Vehicle Identification Number).
4 Clock Springs found


Ford Thunderbird Clockspring Part Number: XW4Z-14A664-AA
$181.12 MSRP: $263.63You Save: $82.51 (32%)

Ford Thunderbird Clockspring Part Number: 3W6Z-14A664-AA

Ford Thunderbird Clockspring Part Number: 3W4Z-14A664-AA

Ford Thunderbird Clockspring Part Number: F5SZ-14A664-A
Ford Thunderbird Clock Spring
OEM Clock Spring boasts unmatched quality. Each part goes through full quality checks. They adhere to Ford's official factory standards. These steps remove flaws and inconsistencies. So you can get Clock Spring with long life and a perfect fit. Come to our website and find genuine Ford Thunderbird parts. We keep a wide inventory of OEM Thunderbird parts at the highly affordable prices. It's easy to search, compare, and pick what you need. You'll love the clear info and simple checkout. We offer top-rated customer service, and we reply fast. We also ship promptly to ensure your order arrives on time.
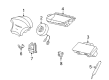
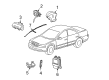
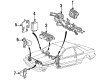
As a vital part of the vehicle's Supplemental Restraint System (SRS) the Ford Thunderbird Clock Spring enables a smooth electrical connection between the airbag module and Ford Thunderbird electrical system. The connection plays an important role by ensuring prompt airbag release in accidents thus improving passenger protection. A flat spiral-shaped multicore cable makes up this device which can store energy through its spiral design to match steering wheel rotational needs. Different models of Ford Thunderbird implement multiple Clock Spring designs which demonstrate how material selection and manufacturing techniques generated better reliability and performance. The personal luxury Ford Thunderbird existed from 1955 through 1997 and resurfaced from 2002 to 2005 while its safety feature set included the essential Clock Spring. This component shows compatibility with different Thunderbird models across generations to enhance specific performance requirements while raising safety standards. The Ford car Clock Spring represents a market-leading device because of its fundamental safety role and durably built design which thus makes the performance of airbag systems dependable. Any the automaker model owner should consider the purchase of a quality Clock Spring given that replacement costs span between $50 to $400.
Ford Thunderbird Clock Spring Parts and Q&A
- Q: What Safety Precautions Should Be Taken When Servicing the Clock Spring Assembly on Ford Thunderbird?A:The Clock Spring assembly service requires safety glasses for protecting eyes against potential air bag deployment plus proper handling of live air bag modules should be done by keeping them away from your body. Proper handwashing with water is needed to eliminate residual sodium hydroxide from hand surfaces after air bag deployment. Always replace discolored or damaged air bag module trim covers rather than attempting to repaint them which is also disallowed when probing air bag module connectors. Inspection of SRS system must confirm both operational readiness and free-from-fault condition before returning the vehicle to customers. The first step involves adjusting the steering column angle together with system depowering action while gaining alignment of the road wheels. The technician should begin by unbolting the driver air bag module together with the Steering Wheel then extract both lower and upper steering column shrouds while removing the multi-function switch screws. To stop the Clock Spring from rotating during installation users should place masking tape on it. The installation requires separation of Clock Spring and multi-function switch electrical connectors before removing them as a single unit. When installing a new Clock Spring securing the outer housing while keeping it stationary will help reach its center point by rotating the rotor counterclockwise until resistance occurs followed by clockwise rotation of 2-1/2 turns. Attach the Clock Spring to the multi-function switch while joining its tabs together before connecting wires. Connect the Clock Spring on the steering column by lining up the flat surface while using the multi-function switch screws and Clock Spring screws for attachment. After removing the pin from new Clock Springs or tape from reused ones, return the steering column shrouds first before installing the steering wheel together with the driver air bag module. Finally, repower the system.

Related Ford Thunderbird Parts
 Ford Thunderbird Ignition Coil
 Ford Thunderbird Air Bag Control Module
 Ford Thunderbird Air Bag Sensor
 Ford Thunderbird Airbag
 Ford Thunderbird Antenna
 Ford Thunderbird Armature
 Ford Thunderbird Brake Controller
 Ford Thunderbird Brake Light Switch
 Ford Thunderbird Coolant Temperature Sensor
 Ford Thunderbird Key Fob
 Ford Thunderbird Seat Belt
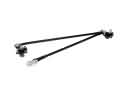 Ford Thunderbird Wiper Linkage