FordParts
My Garage
My Account
Cart
OEM Ford Windstar Shift Interlock Solenoid
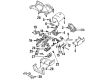
Shift Lock Actuator- Select Vehicle by Model
- Select Vehicle by VIN
Select Vehicle by Model
orMake
Model
Year
Select Vehicle by VIN
For the most accurate results, select vehicle by your VIN (Vehicle Identification Number).
1 Shift Interlock Solenoid found


Ford Windstar Lock Actuator Part Number: F2DZ-3Z719-A
$56.22 MSRP: $89.27You Save: $33.05 (38%)
Ford Windstar Shift Interlock Solenoid
OEM Shift Interlock Solenoid boasts unmatched quality. Each part goes through full quality checks. They adhere to Ford's official factory standards. These steps remove flaws and inconsistencies. So you can get Shift Interlock Solenoid with long life and a perfect fit. Come to our website and find genuine Ford Windstar parts. We keep a wide inventory of OEM Windstar parts at the highly affordable prices. It's easy to search, compare, and pick what you need. You'll love the clear info and simple checkout. We offer top-rated customer service, and we reply fast. We also ship promptly to ensure your order arrives on time.
The Ford Windstar Shift Interlock Solenoid functions as a safety and efficiency elevator for vehicles carrying the Ford Windstar brand. The solenoid functions as a crucial safety component to stop transmission shifts between park and neutral until particular operational requirements are satisfied prior to brake pedal engagement. The electronic system of the Ford Windstar Shift Interlock Solenoid engages following input from sensors like the Transmission Range (TR) switch that provides information about the manual lever position to the vehicle computer. This solenoid odens from the Windstar's 1995 through 2007 production period and functions with the other components including Brake On/Off (BOO) switch for complete system integration and reliable driving performance. A complete Ford Windstar Shift Interlock Solenoid system includes an energy-responsive coil and an iron-moving element that changes fluid path for gear shifting operations. The automotive market recognizes the Ford car Shift Interlock Solenoid because of its dependable mechanics that offer reliable vehicle operation and enhanced safety protections for drivers and their passengers. Ensuring vehicle safety while delivering ford-class quality the the automaker model Shift Interlock Solenoid stands as a critical component contributing to the overall performance and reliability of this vehicle series.
Ford Windstar Shift Interlock Solenoid Parts and Q&A
- Q: How to Service and Repair the Shift Interlock Solenoid on Ford Windstar?A:Before repairing or servicing the brake shift interlock actuator users need to secure system safety through power supply depletion to stop air bag system activation. Switch off the battery ground cable and permit a minimum one-minute wait time together with the immediate deconnection of auxiliary batteries if your vehicle has these power supplies. First remove the two screws that retain the instrument panel lower steering column opening cover after which detach the left-hand instrument panel finish panel from the instrument panel while removing the right-hand finish panel. The technician then removes screws from the instrument panel opening cover reinforcement along with steering column opening brace. To the side of the selector lever indicator cable you should loosen its screw and disconnect the cable from its position. You must remove the four nuts and bracket to enable lowering the steering column. First separate the shift lock actuator and transmission shift selector position insert by removing the bolts and disconnecting their electrical connector through the process of separating both components from the steering column. The installation process includes all procedures in reverse order from removal.

Related Ford Windstar Parts
 Ford Windstar Power Steering Pump
 Ford Windstar Steering Wheel
 Ford Windstar Ignition Lock Cylinder
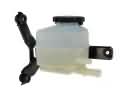 Ford Windstar Power Steering Reservoir
 Ford Windstar Rack & Pinion Bushing
 Ford Windstar Rack And Pinion
 Ford Windstar Slip Yoke
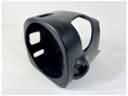 Ford Windstar Steering Column Cover
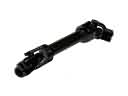 Ford Windstar Steering Shaft
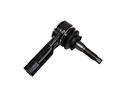 Ford Windstar Tie Rod
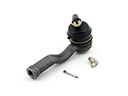 Ford Windstar Tie Rod End
 Ford Windstar Upper Steering Column Bearing