My Garage
Cart
Make sure this part fits

Ford BG1Z-19712-A
Condenser

2008-2012 Ford BG1Z19712A

Customer Questions & Expert Answers (5)
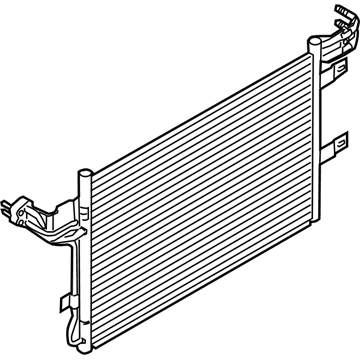
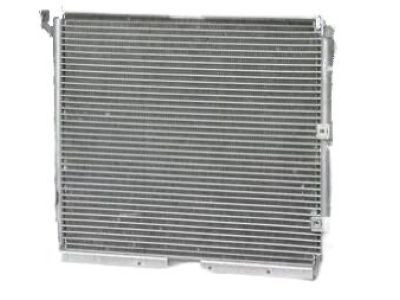
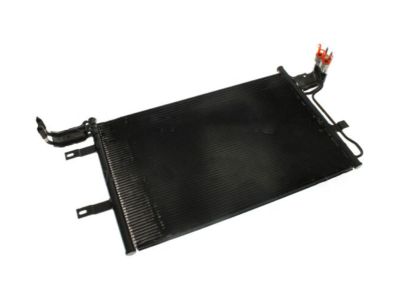
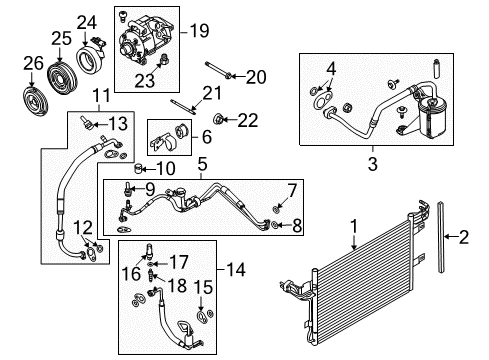
Ford BG1Z-19712-A Condenser
  • Part Description
    Condenser Assembly; A/C Condenser; Condenser A/C
  • Base No.
    19712
  • Replaces
    8G1Z-19712-A, YJ-511
  • Manufacturer
    Ford
Make sure this part fits
$210.24 MSRP: $349.09
You Save: $138.85 (40%)
Ships in 1-2 Business Days
1
ADD TO CART
  • Related Parts
  • Product Specifications
  • Vehicle Fitment
  • Customer Questions & Expert Answers
  • Product Specifications

    BrandGenuine Ford
    Base No.19712
    Manufacturer Part NumberBG1Z-19712-A
    Part DescriptionCondenser Assembly; A/C Condenser; Condenser A/C
    Item Dimensions41.3 x 9.9 x 20.7 inches
    Item Weight11.40 Pounds
    ConditionNew
    Fitment TypeDirect Replacement
    Replaces8G1Z-19712-A, YJ-511
    ManufacturerFord
    SKUBG1Z-19712-A
    WarrantyThis genuine Ford part is guaranteed by Ford's factory warranty.
    Shipping & ReturnShipping Policy Return Policy
    Warning: California's Proposition 65
  • Vehicle Fitment

    Year Make Model Trim Engine
    2009-2012 Ford FlexLimited, SE, SEL, Titanium6 Cyl 3.5 L GAS
    2008-2012 Ford TaurusLimited, SE, SEL6 Cyl 3.5 L GAS
    2008-2009 Ford Taurus XEddie Bauer, Limited, SEL6 Cyl 3.5 L GAS
    2009-2012 Lincoln MKSBase6 Cyl 3.7 L GAS
    2010-2012 Lincoln MKTBase6 Cyl 3.7 L GAS
    2008-2009 Mercury SableBase, Premier6 Cyl 3.5 L GAS
  • Customer Questions & Expert Answers

    Q:
    Will this BG1Z-19712-A work in my car? Posted by FordPartsDeal Specialist
    A:
    Select Your Vehicle model to verify if part number BG1Z-19712-A fits your car.
    Posted by FordPartsDeal Specialist
    Q:
    How to service and repair the A/C Condenser core on Ford Flex? Posted by Customer
    A:
    The HVAC condenser core repair process starts with putting the vehicle in neutral gear on a hoisting system. Recover the refrigerant and drain all engine coolant. Begin by taking out the front bumper cover before releasing the clamp from the upper radiator hose at the radiator and removing the hose. Detach two clips from each radiator bracket on the radiator support before moving the radiator backward. Following that you must remove the engine cooling fan. Issue the two radiator brackets while the two condenser fitting nuts help detach the fittings except for O-ring and gasket seals. To mount the radiator fittings properly tighten them to 15 Nm which equals 133 lb-in. First disconnect both transmission cooler lines from the condenser core by releasing their clamps before removing the two A/C condenser bolts and tightening them to 6 Nm (53 lb-in). Lifting the condenser core with upward motions will allow you to separate it from the radiator for removal. Reverse the condenser core removal sequence while using new gasket seals together with O-ring seals, follow by adding the right amount of clean PAG oil to the refrigerant system during installation. The sequence ends with evacuating and pressure testing the refrigerant system while ultimately filling up transmission fluid to the right specifications.
    Posted by FordPartsDeal Specialist
    Q:
    How to Service and Repair the A/C Condenser on Lincoln MKS? Posted by Customer
    A:
    The vehicle needs positioning on a hoist with NEUTRAL gear selection to perform HVAC condenser servicing work. The first task requires the recovery of refrigerant followed by draining engine coolant. Start by removing the front bumper cover before you detach the upper radiator hose from its position at the radiator by unclamping it. Identify the engine cooling fan before you detach the two clips from each radiator bracket on the radiator support while moving the radiator toward the rear. Begin by removing the two radiator brackets and disconnect both condenser fitting nuts while removing the fittings. Throw away the O-ring seals with the gasket seals. During the installation process keep the fittings secured at 15 Nm tightening strength which equals 133 lb-in. Begin by loosening both transmission cooler line clamps then disconnecting the lines from the condenser core before removing the two A/C condenser bolts that need to be tightened to 6 Nm (53 lb-in) during installation. Use a lift motion to separate the condenser core from the radiator before the removal process. The installation of the new condenser core requires following the previous removal steps while using new gasket and O-ring seals and then filling the system with the recommended PAG oil amount. Performance of the evacuation task alongside a leak test and charging process for the refrigerant system will be followed by appropriate fluid transmission level filling.
    Posted by FordPartsDeal Specialist
    Q:
    How to Service and Repair the A/C Condenser Core on Mercury Sable? Posted by Customer
    A:
    Service and repair of the condenser core must be performed by positioning the vehicle in NEUTRAL on a hoist and recovering refrigerant with draining engine coolant. Start by taking off the front bumper cover while clamping loose the upper radiator hose at the radiator then disconnecting the hose. The first step requires removing the engine cooling fan before dissolving the radiator bracket clips from radiator support brackets. Position the radiator in a backward direction with both clips detached. Start by removing the two radiator brackets after which you should disconnect the two condenser fitting nuts and remove the fittings while disposing of the O-ring seals and gasket seals together. Use a torques of 15 Nm (11 lb-ft) when installing all the fittings. First release the two transmission cooler line clamps followed by detaching the lines from the condenser core followed by removing the two A/C condenser bolts that need tightness of 6 Nm (53 lb-in) for installation. You must lift upward to disconnect the condenser core from the radiator before removing it. The installation process starts with following the reverse order of removal then using new gasket and O-ring seals before oiling the refrigerant system with specified PAG oil amounts. The process ends with evacuating the refrigerant system for testing before adding refrigerant and filling the transmission to its appropriate level.
    Posted by FordPartsDeal Specialist
    Q:
    How to Service and Repair the A/C Condenser on Ford Taurus X? Posted by Customer
    A:
    Service and repair of the HVAC condenser requires starting with vehicle placement into neutral gear before positioning on a hoist. First drain out the engine coolant while recovering the refrigerant. Begin by taking off the front bumper cover while unclamping the upper radiator hose at the radiator before disconnecting the hose. Detach the engine cooling fan before disassembling both radiator bracket clips from the radiator support until the radiator can be pushed toward the rear. The two radiator brackets should be removed before unscrewing the two condenser fitting nuts and disconnecting the fittings while throwing out the O-ring seals and gasket seals. Follow the installation process by applying torque between 133.lb-in to 15.Nm on all fittings. Release the two transmission cooler line clamps, detach lines from condenser core elements before removing two A/C condenser bolts that need to be tightened to 6 Nm (53 lb-in) for proper installation. Raise the condenser core upward to unclip it from the radiator before you withdraw the component. Follow the opposite installation steps to place the new condenser core while also applying new gasket seals and O-ring seals together with adding the required amount of clean PAG oil into the refrigerant system. Evacuation and leak testing of the refrigerant system must be followed by charging as part of the final installation steps and completing the transmission fluid at its recommended level.
    Posted by FordPartsDeal Specialist
    If you have any questions about this product, please don't hesitate to ask us. We will be happy to help you!

OEM Ford BG1Z-19712-A, Excellent Performance and Perfect Fitment

To ensure reliability, purchase Ford part # BG1Z-19712-A Condenser. It is sometimes referred to as Ford A/C Condenser. For those Ford owners who aspire to maintain their vehicles in optimal shape, opting for OEM parts is a wise choice. Precisely engineered, these components adhere to stringent factory guidelines and are produced in state-of-the-art facilities using cutting-edge technologies. Moreover, they are subjected to thorough testing to certify their resilience and safety, thereby making them a dependable option for Ford owners.

FordPartsDeal.com is a leading supplier of genuine Ford parts such as Ford BG1Z19712A Condenser. A vast selection of genuine Ford parts is available on our website, all offered at discounted prices. Every OEM Ford part is covered by the manufacturer's warranty, which also applies to our hassle-free return policy. Enjoy fast delivery service, ensuring you get your parts when you need them. Your shopping experience here is guaranteed to be pleasurable. For detailed Ford parts information, click here.
Choose FordPartsDeal for discounted prices, exceptional service and fast delivery