My Garage
Cart
Make sure this part fits

Ford 9L3Z-8146-BA
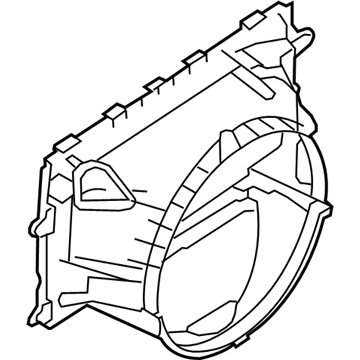
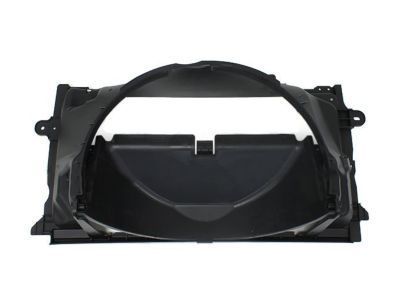
Fan Shroud, Front

2007-2010 Ford 9L3Z8146BA

Customer Questions & Expert Answers (5)
Ford 9L3Z-8146-BA Fan Shroud, Front
  • Part Description
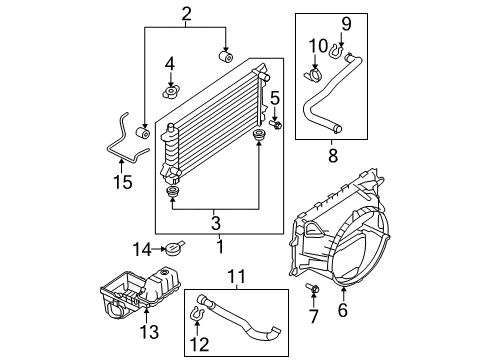
    Shroud - Radiator Fan; Engine Cooling Fan Shroud, Front, Front Upper, Upper
  • Base No.
    8146
  • Position
    Front
  • Replaces
    7L1Z-8146-BA
  • Manufacturer
    Ford
Make sure this part fits
$238.53 MSRP: $350.27
You Save: $111.74 (32%)
Ships in 1-2 Business Days
1
ADD TO CART
  • Related Parts
  • Product Specifications
  • Vehicle Fitment
  • Customer Questions & Expert Answers
  • Product Specifications

    BrandGenuine Ford
    Base No.8146
    Manufacturer Part Number9L3Z-8146-BA
    Part DescriptionShroud - Radiator Fan; Engine Cooling Fan Shroud, Front, Front Upper, Upper
    Other NamesUpper Shroud
    Item Dimensions40.3 x 25.3 x 15.6 inches
    Item Weight15.90 Pounds
    PositionFront
    ConditionNew
    Fitment TypeDirect Replacement
    Replaces7L1Z-8146-BA
    ManufacturerFord
    SKU9L3Z-8146-BA
    WarrantyThis genuine Ford part is guaranteed by Ford's factory warranty.
    Shipping & ReturnShipping Policy Return Policy
    Warning: California's Proposition 65
  • Vehicle Fitment

    Year Make Model Trim Engine
    2007-2009 Ford ExpeditionEddie Bauer, EL Eddie Bauer, EL King Ranch, EL Limited, EL XLT, Funkmaster Flex Edition, King Ranch, Limited, XLT8 Cyl 5.4 L FLEX, 8 Cyl 5.4 L GAS
    2009-2010 Ford F-150FX4, King Ranch, Lariat, Platinum, STX, XL, XLT8 Cyl 4.6 L GAS, 8 Cyl 5.4 L FLEX
    2007-2009 Lincoln NavigatorBase, L, L Luxury, L Ultimate, Luxury, Ultimate8 Cyl 5.4 L FLEX, 8 Cyl 5.4 L GAS
  • Customer Questions & Expert Answers

    Q:
    Is this 9L3Z-8146-BA compatible with my car? Posted by FordPartsDeal Specialist
    A:
    Select Your Vehicle model to verify if part number 9L3Z-8146-BA fits your car.
    Posted by FordPartsDeal Specialist
    Q:
    How to service the cooling fan shroud on Ford Expedition? Posted by Customer
    A:
    Service of the cooling fan shroud begins with parking the vehicle in NEUTRAL position on a hoist system. The first priority is disconnecting the battery ground cable while draining the engine cooling system. You must first remove the upper air deflector after uninstalling its 10 pushpin-type retainers and deflector fuselage. Unfasten the outlet pipe from the air cleaner before disconnecting the electrical cables and fastening them to 10 Nm (89 lb-in) while reinstalling the parts. CTest the wiring harness retainer and detach the upper radiator hose from the radiator along with its position retainer from the cooling fan shroud. First remove the vacuum canister by taking out the electrical connector and wiring harness position retainer. Also detach the wiring harness position retainer from the vacuum reservoir and vacuum connectors and electrical connector on the LH side of the cooling fan shroud when equipped. First disconnect the wiring harness retainer located on the RH side of the radiator before removing the 2 cooling fan shroud bolts and wiring harness retainers and tightening them to 10 Nm (89 lb-in). Start the power distribution box (PDB) securing bolts by hand to protect the radiator support while you remove the 4 bolts before reattaching them tightly to 10 Nm (89 lb-in). Unhook both the mass air flow (MAF) sensor electrical harness position retainer alongside the power steering fluid hose position retainers from their positions on the cooling shroud and radiator support. The power steering reservoir requires removal after its bolt is loose. Tighten the bolt to 11 Nm (8 lb-ft) before final installation. Users should detach the degas bottle hose from the radiator followed by releasing the lower position tab found on the cooling fan shroud. Next users should rotate the shroud upward until it locks into position at the tab. The lower radiator hose quick connect coupling requires removal from the radiator after the clip comes off and before the disconnecting step. The installation process should follow the exact steps in reverse order.
    Posted by FordPartsDeal Specialist
    Q:
    How to service and repair the cooling fan shroud on Ford F-150? Posted by Customer
    A:
    Start the cooling fan shroud servicing and repairing process by draining the cooling system fluids. Start the repair by disconnecting both the battery ground and crankcase vent tube from the outlet tube of the Air Cleaner (ACL) then disconnect the Mass Air Flow (MAF) sensor. The service technician should loosen the ACL outlet tube clamp attached to the throttle body and remove the assembly by disconnecting cover clips from the tube. Begin by removing six screw-like pushpins followed by the upper air deflector then unplug the upper radiator hose from the radiator and take out the pushpin clamp from the shroud. To start the procedure disconnect the generator battery positive cable by unfastening the nut then disconnect its electrical connector and unfasten two wire harness retainers before setting it aside. Within 4WD systems disconnect both reservoir vacuum lines along with solenoid electrical connectors then eliminate the solenoid electrical connector retainer from the fan shroud. Drain the power steering reservoir and detach the power steering return line together with the pushpin retainer from the radiator before taking out the engine wiring harness from its stud. The stud bolt securing the power steering reservoir needs to be removed before setting the reservoir to the side. Sever the four PDB latches before you open the two pushpin connectors to set the PDB along with engine wiring harness out of the way. The PDB bracket removal requires four bolt removal before disconnecting the shroud pushpins to move the lower shroud upwards and discard the pushpins. First remove both shroud bolts and pull out the shroud. You must install the cooling fan shroud by applying two bolts while tightening them to 7 Nm (62 lb-in). Set the lower cooling fan shroud at a downward angle as you install new pushpins. Reinstall the PDB bracket with four bolts that should be tightened to 10 Nm (89 lb-in). Next attach the PDB while fastening the latches. Fix the engine wiring pushpin retainers before positioning the power steering pump reservoir then install the stud bolt with 11 Nm (97 lb-in) of torque. Install the harness retainer to the stud bolt and connect the power steering pump rack return line along with its plastic retainer. To install the reservoir vacuum lines and solenoid electrical connector, connect the solenoid electrical connector retainer near the fan shroud of 4WD vehicles. Position the wiring harness after connecting the wiring harness retainer and electrical connector then attach the generator battery positive cable followed by installing the nut while tightening it to 9 Nm (80 lb-in). Connect the upper radiator hose before attaching its pushpin clamp to the shroud area. The procedure requires installation of the upper air deflector followed by six pushpin retainers before setting the ACL outlet tube in its TB clamp and attaching the ACL cover assembly with proper torque settings to 4 Nm (35 lb-in). The last step involves connecting the MAF sensor after reconnecting the crankcase vent tube from the ACL outlet tube and connecting the battery ground cable to fill the power steering fluid and bleed then fill the cooling system.
    Posted by FordPartsDeal Specialist
    Q:
    How to Address Issues with the Fan Shroud on a Lincoln Navigator? Posted by Customer
    A:
    Start the cooling fan shroud service and repair process by placing the vehicle on a hoist while keeping it in NEUTRAL and removing the battery ground cable. Start by draining the engine cooling system and remove the upper air deflector through removing both the 12 pushpin retainers and the deflector unit. Service technicians should disconnect the Outlet pipe of the Air Cleaner (ACL) by removing its nut and electrical cables that require tightening to 10 Nm or 89 lb-in before reinstallation. Afterward they should remove the wiring harness retainer. First, disconnect the upper radiator hose from the radiator and the position retainer of the cooling fan shroud. Next, execute the removal of the electrical connector and wiring harness position retainer. The procedure requires disconnection of vacuum components that include the wiring harness position retainer from the vacuum reservoir and vacuum connectors with an electrical connector from the LH side of the cooling fan shroud. Once these steps are completed you can remove the vacuum canister. Reviewing the torque to 7 Nm or 62 lb-in before reinstalling, remove the 2 cooling fan shroud bolts and wiring harness retainers along with the wiring harness retainer from the RH side of the radiator. Users must first remove the Mass Air Flow (MAF) sensor electrical harness position retainer followed by the power steering fluid hose position retainer from the radiator support and the bolt which will allow space for relocating the power steering reservoir (reinstalling each component with 11 Nm or 97 lb-in torque). The radiator overflow hose should be disconnected while the 2 lower cooling fan shroud pushpin retainers are removed along with the downward release of a lower position tab. The shroud can then be lifted upwards for locking into new placement. You should remove the clip followed by disconnecting the lower radiator hose quick connector from the radiator and finally take out the cooling fan shroud. You should follow the removal steps in reverse order to install the 2 new lower cooling fan shroud pushpin retainers.
    Posted by FordPartsDeal Specialist
    Q:
    How to service and repair the cooling fan shroud on Lincoln Navigator? Posted by Customer
    A:
    Service and repair of the cooling fan shroud begins with placing the vehicle on a hoist where the NEUTRAL gear engages. First disconnect the battery ground cable then drain all fluid from the engine cooling system. Perform this service by removing the air cleaner outlet pipe then loosen the nut while disconnecting electrical cables that must be tightened to 10 Nm (89 inch lbs.) during reinstallation. Start the cooling fan shroud service by unplugging the wiring harness retainer before removing the upper radiator hose from the radiator followed by disconnecting the upper radiator hose position retainer from the cooling fan shroud. The electrical connector must be disconnected together with the wiring harness position retainer before vacuum reservoir removal. Additionally, vacuum connectors and electrical connector disconnection from the cooling fan shroud's LH side is required. You must first disconnect the wiring harness retainer on the radiator right-hand side before removing two cooling fan shroud bolts and wiring harness retainers while tightening each to 10 Nm (89 inch lbs.) for reinstallation. Start the four bolts of the power distribution box (PDB) support bracket manually before setting aside the PDB and its bracket. Take caution to protect the radiator support when starting the bolts and tighten all PDB support bracket bolts to a torque value of 10 Nm (89 inch lbs.) upon reinstallation. Detach the mass air flow sensor position retainer and the power steering fluid hose position retainers which connect to the radiator support and cooling shroud. The power steering reservoir can be positioned aside utilizing this bolt while securing it to 11 Nm (8 ft. lbs.) when reassembly is complete. Remove the degas bottle coolant inlet hose from the radiator before you unlock the lower cooling fan shroud position tab and raise the lower shroud until its lower tab locks in position. Drain the clip before you disconnect the lower radiator hose quick connect coupling from the radiator and detach the cooling fan shroud. The reverse procedure should be followed for reinstallation.
    Posted by FordPartsDeal Specialist
    If you have any questions about this product, please don't hesitate to ask us. We will be happy to help you!

OEM Ford 9L3Z-8146-BA, Excellent Performance and Perfect Fitment

To ensure reliability, purchase Ford part # 9L3Z-8146-BA Fan Shroud, Front. It is sometimes referred to as Ford Fan Shroud. For those Ford owners who aspire to maintain their vehicles in optimal shape, opting for OEM parts is a wise choice. Precisely engineered, these components adhere to stringent factory guidelines and are produced in state-of-the-art facilities using cutting-edge technologies. Moreover, they are subjected to thorough testing to certify their resilience and safety, thereby making them a dependable option for Ford owners.

FordPartsDeal.com is a leading supplier of genuine Ford parts such as Ford 9L3Z8146BA Fan Shroud, Front. A vast selection of genuine Ford parts is available on our website, all offered at discounted prices. Every OEM Ford part is covered by the manufacturer's warranty, which also applies to our hassle-free return policy. Enjoy fast delivery service, ensuring you get your parts when you need them. Your shopping experience here is guaranteed to be pleasurable. For detailed Ford parts information, click here.
Choose FordPartsDeal for discounted prices, exceptional service and fast delivery