FordParts
My Garage
My Account
Cart
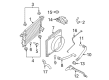
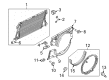
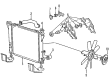
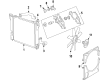
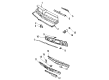
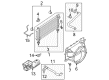
OEM Ford Fan Shroud
Radiator Fan Shroud- Select Vehicle by Model
- Select Vehicle by VIN
Select Vehicle by Model
orMake
Model
Year
Select Vehicle by VIN
For the most accurate results, select vehicle by your VIN (Vehicle Identification Number).
100 Fan Shrouds found


Ford Fan Shroud, Upper Part Number: 7C3Z-8146-G
$353.70 MSRP: $554.57You Save: $200.87 (37%)Ships in 1-2 Business DaysProduct Specifications- Other Name: Shroud - Radiator Fan; Engine Cooling Fan Shroud, Upper; Upper Shroud
- Position: Upper
- Replaces: 7C3Z-8146-C


Ford Fan Shroud, Lower Part Number: 7C3Z-8146-J
$80.38 MSRP: $123.70You Save: $43.32 (36%)Ships in 1-2 Business DaysProduct Specifications- Other Name: Shroud - Radiator Fan; Engine Cooling Fan Shroud, Lower; Shroud
- Position: Lower
- Replaces: 7C3Z-8146-B


Ford Fan Shroud, Lower Part Number: BC3Z-8146-F
$135.72 MSRP: $214.48You Save: $78.76 (37%)Ships in 1-2 Business DaysProduct Specifications- Other Name: Shroud - Radiator Fan; Engine Cooling Fan Shroud, Lower; Lower Shroud
- Position: Lower
- Replaces: BC3Z-8146-B


Ford Fan Shroud, Lower Part Number: BC3Z-8146-K
$51.50 MSRP: $77.12You Save: $25.62 (34%)Ships in 1 Business DayProduct Specifications- Other Name: Shroud - Radiator Fan; Engine Cooling Fan Shroud, Lower; Lower Shroud
- Position: Lower
- Replaces: BC3Z-8146-A


Ford Fan Shroud Part Number: 1L2Z-8146-EA
$94.70 MSRP: $137.85You Save: $43.15 (32%)Product Specifications- Other Name: Shroud - Radiator Fan; Engine Cooling Fan Shroud; Shroud
- Replaces: F87Z-8146-BA


Ford Fan Shroud, Lower Part Number: 7C3Z-8146-A
$95.56 MSRP: $139.10You Save: $43.54 (32%)Ships in 1-3 Business DaysProduct Specifications- Other Name: Shroud - Radiator Fan; Engine Cooling Fan Shroud, Lower; Lower Shroud
- Position: Lower


Ford Fan Shroud, Upper Part Number: 6L2Z-8146-B
$106.13 MSRP: $154.48You Save: $48.35 (32%)Ships in 1-2 Business DaysProduct Specifications- Other Name: Shroud - Radiator Fan; Engine Cooling Fan Shroud, Upper; Upper Shroud
- Position: Upper


Ford Fan Shroud, Upper Part Number: BC3Z-8146-L
$123.42 MSRP: $179.65You Save: $56.23 (32%)Ships in 1 Business DayProduct Specifications- Other Name: Shroud - Radiator Fan; Engine Cooling Fan Shroud, Upper; Upper Shroud
- Position: Upper
- Replaces: BC3Z-8146-E


Ford Fan Shroud, Lower Part Number: HC3Z-8146-A
$132.09 MSRP: $203.85You Save: $71.76 (36%)Product Specifications- Other Name: Shroud - Radiator Fan; Engine Cooling Fan Shroud, Front Lower; Engine Cooling Fan Shroud Clip, Lower; Lower Shroud
- Position: Lower


Ford Shroud Part Number: F87Z-8146-AC
$149.11 MSRP: $217.05You Save: $67.94 (32%)Ships in 1-3 Business DaysProduct Specifications- Other Name: Shroud - Radiator Fan; Engine Cooling Fan Shroud; Fan Shroud


Ford Fan Shroud, Front Upper Part Number: 7C3Z-8146-F
$199.23 MSRP: $290.00You Save: $90.77 (32%)Ships in 1-2 Business DaysProduct Specifications- Other Name: Shroud - Radiator Fan; Engine Cooling Fan Shroud, Front Upper; Upper Shroud
- Position: Front Upper


Ford Fan Shroud Part Number: YC3Z-8146-HA
$199.37 MSRP: $290.20You Save: $90.83 (32%)Product Specifications- Other Name: Shroud - Radiator Fan; Engine Cooling Fan Shroud; Shroud
- Replaces: F81Z-8146-HA


Ford Fan Shroud, Front Part Number: 9L3Z-8146-BA
$238.53 MSRP: $350.27You Save: $111.74 (32%)Ships in 1-2 Business DaysProduct Specifications- Other Name: Shroud - Radiator Fan; Engine Cooling Fan Shroud, Front, Front Upper, Upper; Upper Shroud
- Position: Front
- Replaces: 7L1Z-8146-BA


Ford Fan Shroud, Upper Part Number: BC3Z-8146-G
$260.51 MSRP: $382.53You Save: $122.02 (32%)Ships in 1 Business DayProduct Specifications- Other Name: Shroud - Radiator Fan; Engine Cooling Fan Shroud; Upper Shroud
- Position: Upper
- Replaces: BC3Z-8146-C

Ford Fan Shroud, Upper Part Number: 7C3Z-8146-H
$287.16 MSRP: $421.67You Save: $134.51 (32%)Product Specifications- Other Name: Shroud - Radiator Fan; Engine Cooling Fan Shroud, Upper; Shroud
- Position: Upper


Ford Rear Shroud Part Number: BC3Z-8B614-A
$326.71 MSRP: $479.75You Save: $153.04 (32%)Ships in 1 Business DayProduct Specifications- Other Name: Shroud - Fan; Engine Cooling Fan Shroud, Rear; Fan Shroud
- Position: Rear


Ford Fan Shroud Part Number: 7L3Z-8146-A
$334.10 MSRP: $490.60You Save: $156.50 (32%)Ships in 1-3 Business DaysProduct Specifications- Other Name: Shroud - Radiator Fan; Engine Cooling Fan Shroud
- Replaces: 4L3Z-8146-BAB


Ford Fan Shroud Part Number: 8C2Z-8B614-A
$356.39 MSRP: $523.33You Save: $166.94 (32%)Product Specifications- Other Name: Shroud - Fan; Engine Cooling Fan Shroud; Shroud
- Manufacturer Note: Retaining Bolts Are Captive To The 8B614 Asy. Not Serviced Separately
- Replaces: 4C2Z-8B614-AC

Ford Fan Shroud Part Number: 8C2Z-8B614-B
$375.07 MSRP: $550.77You Save: $175.70 (32%)Ships in 1-3 Business DaysProduct Specifications- Other Name: Shroud - Fan; Engine Cooling Fan Shroud; Shroud
- Manufacturer Note: Retaining Bolts Are Captive To The 8B614 Asy. Not Serviced Separately
- Replaces: 4C2Z-8B614-BC


Ford Rear Shroud Part Number: 7C3Z-8B614-A
$397.92 MSRP: $584.32You Save: $186.40 (32%)Ships in 1-3 Business DaysProduct Specifications- Other Name: Shroud - Fan; Engine Cooling Fan Shroud, Rear; Shroud; Fan Shroud
- Manufacturer Note: Mounting Bolts Are Only Serviced In The 8B614 Assembly. They Are Not Designed To Be Removed.
- Position: Rear
| Page 1 of 5 |Next >
1-20 of 100 Results
Ford Fan Shroud
If you own Ford and want to keep it in top shape, choosing OEM Fan Shroud is a smart move. They are precisely engineered and follow strict factory standards. They are made in advanced facilities that use cutting edge technology. Each part goes through thorough testing to confirm strength and safety, so you can trust it. FordPartsDeal.com gives you genuine Ford Fan Shroud at some of the affordable online prices without cutting quality. Every OEM Ford part includes the manufacturer's warranty, easy returns, and super-fast delivery. So why wait? Shop now and get your vehicle back to peak condition.
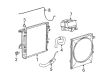
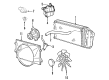
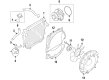
The airflow is directed by the Ford Fan Shroud to flow snugly on the blades to ensure the engine stays cool. In 1913, Ford unleashed the moving assembly line, followed by EcoBoost engines that combine power with frugality, SYNC voice technologies that allow drivers to play DJ and use the navigation, and Co-Pilot360 assistants that bang the brakes before things get out of hand. In 2022, Ford proved that big trucks can run without tailpipes as the all-electric F-150 Lightning lit up the market, and every jump will demonstrate that it is a company that is obsessed with making driving easier, safer, and cleaner for all. With hatchbacks to work vans, Ford values its speed and adds millions of components with the same no-nonsense promise, solid construction, clever technology, and a price that remains affordable to people who only need a car that works. The Fan Shroud is a tunnel that fits around the cooling fan and causes air to flow through the radiator rather than swirling in the fan so the coolant will cool quicker, the thermostat will not vary, and hoses will not have to endure the pressures of the steam bath that ruins summer road trips. Drivers can see how Ford engines can keep their cool in crawling traffic since the Fan Shroud shields debris, reduces fan drag, and holds the temp needle pegged in the center despite an hour of bumper-to-bumper traffic. When there are cracks and you need a new Fan Shroud, swap the old one in and your coolant loop will repay you with miles of even performance.
Ford Fan Shroud Parts and Q&A
- Q: How to service the cooling fan shroud on gasoline engines on Ford F-350 Super Duty?A:The first step to service a gasoline engine cooling fan shroud includes placing the vehicle in neutral and hoisting it to work on it. The first step requires draining the engine cooling system while you take off the air cleaner outlet pipe. Start the servicing process by disassembling the quick connect coupling of the upper radiator hose using the retaining clip followed by removing two bolts to set the power steering reservoir in place correctly tighten to 7 Nm (62 lb-in) while reinstituting it after service. The radiator degas bottle coolant inlet hose requires separation followed by removal of the cooling fan shroud position retainer which will be set aside. You can remove the bolt attaching the four-wheel-drive differential vacuum valve on vehicles with 4WD only before placing it aside for reinstallation with 8 Nm (71 lb-in) torque. Moving the engine compartment wiring harness requires you to disconnect the four position retainers. Press the five retaining tabs on the cooling fan shroud while rotating it upward to activate the position retainer lock. You need to complete the procedure by following the removal guidelines backward. Install the four engine cooling fan shroud bolts while tightening them to 7 Nm (62 lb-in).
- Q: How to service the Fan Shroud and cooling fan motor on 2.3L on Ford Ranger?A:The service of both the cooling fan motor and shroud on 2.3L vehicles starts with disconnecting the battery ground cable whenever the vehicle comes with A/C. The first step requires removal of the air intake tube followed by detachment of the electric cooling fan electrical connector (if present). Car owners should detach bolts which secure the metal power steering fluid reservoir bracket before moving the fluid reservoir to a different position. Users who have integral plastic power steering fluid reservoir brackets should perform the steps in the same order. Lift the shroud assembly together with the electric cooling fan from the vehicle through the removal of its two bolts. The appropriate bolts need removal before extracting the electric cooling fan from its position. Proceed with disassembling additional components by taking out bolts and bracket alongside nuts when necessary. The installation ends by reversing all steps used during removal.


Related Ford Parts
 Ford Serpentine Belt
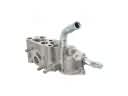 Ford Thermostat Housing
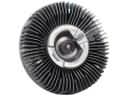 Ford Fan Clutch
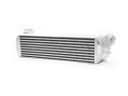 Ford Intercooler
 Ford Power Steering Cooler
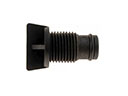 Ford Radiator Drain Plug
 Ford Water Pump Gasket
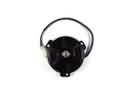 Ford Fan Motor
 Ford Automatic Transmission Oil Cooler Line
 Ford Cooling Fan Assembly
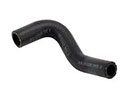 Ford Cooling Hose
 Ford Water Hose
Browse Ford Fan Shroud by Models
Ranger Bronco Explorer F-150 Excursion Expedition Taurus Thunderbird Explorer Sport Trac Probe Bronco II F-250 Aspire E-150 Econoline Explorer Sport F-350 Tempo F-350 Super Duty E-150 E-150 Club Wagon E-150 Econoline Club Wagon E-250 E-250 Econoline E-250 Econoline Club Wagon E-350 Club Wagon E-350 Econoline E-350 Econoline Club Wagon E-350 Super Duty F-150 Heritage F-250 HD F-250 Super Duty