FordParts
My Garage
My Account
Cart
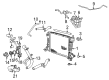
OEM 2000 Lincoln LS Radiator
Cooling Radiator- Select Vehicle by Model
- Select Vehicle by VIN
Select Vehicle by Model
orMake
Model
Year
Select Vehicle by VIN
For the most accurate results, select vehicle by your VIN (Vehicle Identification Number).
1 Radiator found

2000 Lincoln LS Radiator Part Number: H2MZ-8005-AA
Product Specifications- Other Name: Radiator Assembly
- Replaces: 6W4Z-8005-AA
- Condition: New
- Fitment Type: Direct Replacement
- SKU: H2MZ-8005-AA
- Warranty: This genuine part is guaranteed by Ford's factory warranty.
2000 Lincoln LS Radiator
If you're seeking quality and affordability, look no further than our extensive inventory of genuine 2000 Lincoln LS Radiator available at FordPartsDeal.com. You can confidently purchase our OEM 2000 Lincoln LS Radiator as they are supported by the manufacturer's warranty and our hassle-free return policy, alongside the benefit of our fast delivery service.
2000 Lincoln LS Radiator Parts Q&A
- Q: How to service and repair the radiator and fan motor assembly on 2000 Lincoln LS?A: Draining the engine cooling system stands as the first step for radiator and fan motor assembly servicing. The first step includes removing both the upper radiator sight shield together with the air cleaner outlet tube. First disconnect all upper radiator support brackets and six bolts before noticing that procedures for 3.9L and 3.0L engines stay equivalent. Unfasten the upper radiator hose and detach the bolt on the receiver drier before setting them to the side. Disconnect both electrical connections of the dual flow coolant valve along with the A/C line installed on the fan shroud. To service 3.0L engines experts must separate the Throttle Position sensor connectors and Idle Air Control valve connectors before removing the bracket along with its bolts. The electric water pump must be set aside after bolt removal for 3.9L engines. Inspection of the high-pressure cooling fan seal requires its bracket and line to be disconnected followed by necessary seal replacement. Empty the cooling fan shroud return hose before isolating it from the fan shroud unit. Disassemble the system by taking out the two securing bolts which hold the fan shroud assembly and the A/C condenser and disconnecting the lower radiator hose. Begin by removing two bolts that hold the multi-cooler assembly before placing it to the side followed by removing all bolts on the condenser support bracket which leads to removing the radiator from its position. The installation process will be reversed from component removal steps.
Related 2000 Lincoln LS Parts
 2000 Lincoln LS Coolant Reservoir
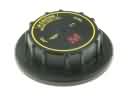 2000 Lincoln LS Radiator Cap
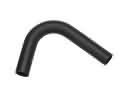 2000 Lincoln LS Radiator Hose
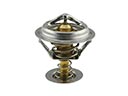 2000 Lincoln LS Thermostat
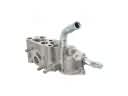 2000 Lincoln LS Thermostat Housing
 2000 Lincoln LS Water Pump
 2000 Lincoln LS Coolant Reservoir Cap
 2000 Lincoln LS Cooling Fan Assembly
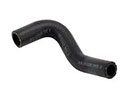 2000 Lincoln LS Cooling Hose
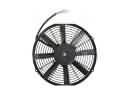 2000 Lincoln LS Engine Cooling Fan
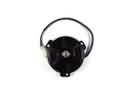 2000 Lincoln LS Fan Motor
 2000 Lincoln LS Thermostat Gasket