FordParts
My Garage
My Account
Cart
OEM 2001 Ford E-150 Econoline A/C Condenser
Air Conditioning Condenser- Select Vehicle by Model
- Select Vehicle by VIN
Select Vehicle by Model
orMake
Model
Year
Select Vehicle by VIN
For the most accurate results, select vehicle by your VIN (Vehicle Identification Number).
1 A/C Condenser found


2001 Ford E-150 Econoline Condenser Part Number: 6C2Z-19712-BA
Product Specifications- Other Name: Kit - Air Conditioning Condenser; A/C Condenser
- Replaces: 6C2Z-19712-AA, YJ-470
- Base No.: 19712
- Item Weight: 15.20 Pounds
- Item Dimensions: 38.3 x 6.9 x 26.6 inches
- Condition: New
- Fitment Type: Direct Replacement
- SKU: 6C2Z-19712-BA
- Warranty: This genuine part is guaranteed by Ford's factory warranty.
2001 Ford E-150 Econoline A/C Condenser
If you're seeking quality and affordability, look no further than our extensive inventory of genuine 2001 Ford E-150 Econoline A/C Condenser available at FordPartsDeal.com. You can confidently purchase our OEM 2001 Ford E-150 Econoline A/C Condenser as they are supported by the manufacturer's warranty and our hassle-free return policy, alongside the benefit of our fast delivery service.
2001 Ford E-150 Econoline A/C Condenser Parts Q&A
- Q: How to service and repair the A/C condenser core on 2001 Ford E-150 Econoline?A: In order to repair the A/C condenser core, the suction accumulator/drier must be replaced only when contaminated. Conduct a leak test if needed. Proceed with a discharge procedure and remove parts carefully and replace the condenser core with the appropriate oil. Putting parts back, lubricating seals and refilling the A/C system finishes the task.
Related 2001 Ford E-150 Econoline Parts
 2001 Ford E-150 Econoline A/C Accumulator
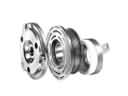 2001 Ford E-150 Econoline A/C Clutch
 2001 Ford E-150 Econoline A/C Compressor
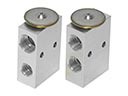 2001 Ford E-150 Econoline A/C Expansion Valve
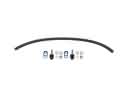 2001 Ford E-150 Econoline A/C Hose
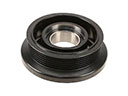 2001 Ford E-150 Econoline A/C Idler Pulley
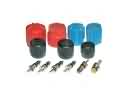 2001 Ford E-150 Econoline A/C System Valve Core
 2001 Ford E-150 Econoline Blower Motor
 2001 Ford E-150 Econoline Blower Motor Resistor
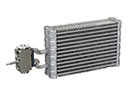 2001 Ford E-150 Econoline Evaporator
 2001 Ford E-150 Econoline Heater Core
 2001 Ford E-150 Econoline HVAC Pressure Switch