FordParts
My Garage
My Account
Cart
OEM 2001 Ford Taurus Heater Core
HVAC Heater Core- Select Vehicle by Model
- Select Vehicle by VIN
Select Vehicle by Model
orMake
Model
Year
Select Vehicle by VIN
For the most accurate results, select vehicle by your VIN (Vehicle Identification Number).
1 Heater Core found


2001 Ford Taurus Heater Core Part Number: H2MZ-18476-A
Product Specifications- Other Name: Heater Assembly - Less Radiator; HVAC Heater Core
- Replaces: F5OY-18476-A, HC-19, F8OZ-18476-AA
- Condition: New
- Fitment Type: Direct Replacement
- SKU: H2MZ-18476-A
- Warranty: This genuine part is guaranteed by Ford's factory warranty.
2001 Ford Taurus Heater Core
If you're seeking quality and affordability, look no further than our extensive inventory of genuine 2001 Ford Taurus Heater Core available at FordPartsDeal.com. You can confidently purchase our OEM 2001 Ford Taurus Heater Core as they are supported by the manufacturer's warranty and our hassle-free return policy, alongside the benefit of our fast delivery service.
2001 Ford Taurus Heater Core Parts Q&A
- Q: How to service and repair the heater core with electronic automatic temperature control on 2001 Ford Taurus?A: It is essential to start heater core service by removing the instrument panel and right-side cowl vent screen before proceeding to the water shield removal stage. The next step requires removing screws before taking out the water shield. The correct hose pinching pliers should be used to disconnect the heater hoses while clamping them. The RCC module needs to be disassembled through an electrical connector removal accompanied by two nuts and vacuum harness and two screw separation. Unfasten the screws and shield before disconnecting the electrical connector of the temperature blend door actuator and then removing the screws and the actuator. First venturate inside the supplemental blend door to both extract the temperature blend door assist spring and supplemental temperature blend lever shaft and push the tab to free the door before rotating the supplemental blend door pivot shaft loose from its fixed metal position. It is essential to prevent any deformation of the supplemental temperature blend door lever. Start by taking off the metal link from the temperature blend door pivot shaft and then proceed to remove the heater core cover after uninstalling screws before rotating the temperature blend door pivot shaft to extract the cover and seal. To entirely remove the heater core you must first rotate the blend door pivot shaft before extracting it from the installation. During installation follow the removing sequence and apply coolant hose lubricant or plain water on the hoses and fill the cooling system with liquid.
Related 2001 Ford Taurus Parts
 2001 Ford Taurus Cabin Air Filter
 2001 Ford Taurus Blower Motor
 2001 Ford Taurus Blower Motor Resistor
 2001 Ford Taurus A/C Accumulator
 2001 Ford Taurus A/C Compressor Cut-Out Switches
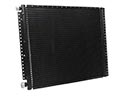 2001 Ford Taurus A/C Condenser
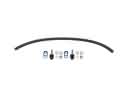 2001 Ford Taurus A/C Hose
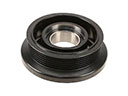 2001 Ford Taurus A/C Idler Pulley
 2001 Ford Taurus A/C Orifice Tube
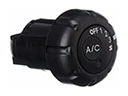 2001 Ford Taurus A/C Switch
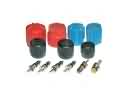 2001 Ford Taurus A/C System Valve Core
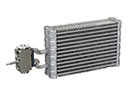 2001 Ford Taurus Evaporator