FordParts
My Garage
My Account
Cart
OEM 2004 Ford E-250 Crankshaft Position Sensor
Engine Crankshaft Position Sensor- Select Vehicle by Model
- Select Vehicle by VIN
Select Vehicle by Model
orMake
Model
Year
Select Vehicle by VIN
For the most accurate results, select vehicle by your VIN (Vehicle Identification Number).
1 Crankshaft Position Sensor found


2004 Ford E-250 Crankshaft Position Sensor Part Number: 1W7Z-6C315-AB
$41.91 MSRP: $66.55You Save: $24.64 (38%)Ships in 1 Business DayProduct Specifications- Other Name: Sensor - Crankshaft Position; Engine Crankshaft Position Sensor; Crankshaft Sensor; Position Sensor; Sensor - Crankshaft Position - Cps
- Manufacturer Note: Sensor asy. (Crankshaft position) #1W7E 6C315-AA
- Replaces: 1W7Z-6C315-AA
- Base No.: 6C315
- Item Weight: 0.30 Pounds
- Item Dimensions: 8.1 x 6.2 x 4.2 inches
- Condition: New
- Fitment Type: Direct Replacement
- SKU: 1W7Z-6C315-AB
- Warranty: This genuine part is guaranteed by Ford's factory warranty.
2004 Ford E-250 Crankshaft Position Sensor
If you're seeking quality and affordability, look no further than our extensive inventory of genuine 2004 Ford E-250 Crankshaft Position Sensor available at FordPartsDeal.com. You can confidently purchase our OEM 2004 Ford E-250 Crankshaft Position Sensor as they are supported by the manufacturer's warranty and our hassle-free return policy, alongside the benefit of our fast delivery service.
2004 Ford E-250 Crankshaft Position Sensor Parts Q&A
- Q: How to Service the Crankshaft Position Sensor on 2004 Ford E-250?A: The first step to service the crankshaft position (CKP) sensor includes disconnecting the battery ground cable followed by vehicle elevation for access. Start the A/C compressor pulley service by removing both the splash shield and accessory drive belt. The first step involves removing the CKP sensor electrical connector followed by setting the wiring harness to the side before removing the bracket-mounted harness. The A/C compressor field coil electrical connection needs to be removed but A/C compressor bolts must stay in place while you create enough free space to pull the compressor down an inch for accessing CKP sensor components. To complete the procedure disconnect both the sensor bolt and sensor unit. After removing the CKP sensor follow the exact opposite steps to complete the installation.
Related 2004 Ford E-250 Parts
 2004 Ford E-250 Ignition Coil
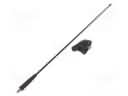 2004 Ford E-250 Antenna
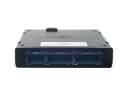 2004 Ford E-250 Body Control Module
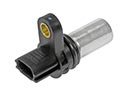 2004 Ford E-250 Camshaft Position Sensor
 2004 Ford E-250 Coolant Temperature Sensor
 2004 Ford E-250 Engine Control Module
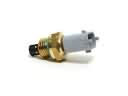 2004 Ford E-250 Intake Manifold Temperature Sensor
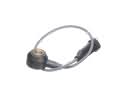 2004 Ford E-250 Knock Sensor
 2004 Ford E-250 Neutral Safety Switch
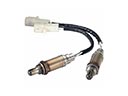 2004 Ford E-250 Oxygen Sensors
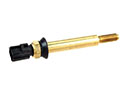 2004 Ford E-250 Temperature Sender
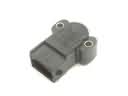 2004 Ford E-250 Throttle Position Sensor