
Popular OEM Ford E-250 Parts
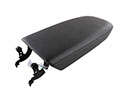
- Body & Hardware Parts View More >
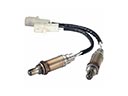
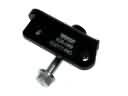
- Electrical Parts View More >
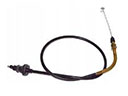
- Air & Fuel Delivery Parts View More >
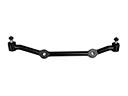
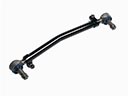
- Steering Parts View More >
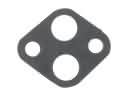
- Emission Control & Exhaust Parts View More >
- Charging & Starting Parts View More >
- Engine Parts View More >
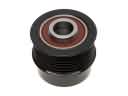
- Belts & Cooling Parts View More >
- Suspension Parts View More >
- Brakes Parts View More >
- A/C & Heating Parts View More >
- Headlights & Lighting Parts View More >


Why Buy Genuine Ford E-250 Parts From FordPartsDeal.com
FordPartsDeal.com offers a smart and convenient way to buy genuine parts online. We sell new OEM Ford E-250 parts, including Transmission. Authorized dealers directly provide all the Ford E-250 parts and assemblies to ensure the optimal quality and fit. We also provide all properly fitting Ford E-250 parts, such as Driveline & Axles specific to your model. When you shop here, you get real Ford value at highly competitive prices. All our products come with the same Ford warranty available at other dealerships. Our easy-to-use catalog helps you quickly identify the right part for your car. You'll receive fast shipping from our warehouse network, keeping your Ford E-250 running smoothly. Our staff consists of Ford professionals who are ready to assist you. We aim to treat each customer as if they were stepping out of a Ford showroom. VIN verification and our live support ensure that the part you order is the right Ford E-250 part for your vehicle.
The Ford E-250 launched commercially in 1961 after developers started working on its design during 1957 which began the van quality improvement process. Ford achieved lasting achievements through its E-250 panel van substitution of the Ford F-Series series that incorporated dependable engineering while providing multiple flexible market applications. When the E-250 first launched to the market it carried a 4.9-liter inline-six engine but customers later gained the ability to get 5.0-liter V8 power. The line added diesel engine choices including the 7.3-liter V8 diesel option as it gained more production years to enhance towing abilities and fuel consumption. New transmission system designs in the vehicle focus on producing efficient gear shifts and improved fuel economy during driving tasks. The Ford E-250 fourth-generation launched in 1992 used its earlier powertrain configuration while redesigning the vehicle body alongside its chassis to keep its position among light commercial vehicles. The vehicle utilizes a body-on-frame design that enhances its durability for standard uses which extends to potential conversion applications into customized vans. Choosing genuine Ford replacement parts becomes crucial to preserving the Ford E-250 since they achieve factory specifications that guarantee peak performance combined with extended lifespan.
The problems that Ford E-250 vans share are organized into categories of transmission, engine ignition and exhaust systems. On the drivetrain, the E-250 has the potential of leakage at the bell housing. Excessive temperature destroys internals and the transmission front pump seal fails. Know the timing to expect slippage, sluggish engagement, and crimson puddle under the E-250. Repair consists of the extraction of the unit, pump and seal replacement, and flushing of lines. To flow cooler and avoid overloading of the E-250. In the engine compartment, the common problems will be in ignition coil misfires and poor engine performance. Broken boots jolt toward the head and activate a Check Engine Light. Check coils and boots, replace plugs and confirm grounds on the E-250. There is a buzzing sound in the exhaust, which indicates that there is a loose catalytic converter heat shield. There are certain speeds and conditions in which the metal contacts vibrate. Use a band clamp to hold the assembly in place, or new one of the damaged shields. Testing the E-250 by repacking and inspection road testing it again and scanning it to look at the codes or possible leaks. Use Ford procedures to check torque values and fluids and cool checks. Follow Ford recommended software calibrations where needed. Constant maintenance and quality component usage make every Ford reliable.
Ford E-250 Parts and Q&A
- Q: How to service and repair the steering wheel on Ford E-250?A:It requires turning the steering wheel straight and make sure the ignition is turned off to service. Unplug switches, pull the airbag module and drop the steering wheel bolt. Install a new bolt at 38 Nm. Install a Differential Bearing Remover, tape the Clock Spring and repeat the process when removing the Clock Spring.
- Q: How to service and repair the catalytic converter on a stripped chassis with a 5-speed transmission on Ford E-250?A:Finding a solution to replace a stripped chassis that has a 5-speed transmission, has a catalytic converter, and needs repair is easy with the following steps. Hoist the vehicle, support the muffler, and release the components.Unplug the catalyst monitor sensor, unscrew the Y-pipe nuts and swap the catalytic converter, being careful of orientation and appropriate torque during replacement.
- Q: How to service and repair the alternator on 4.6L, 5.4L, and 6.8L gasoline engines on Ford E-250?A:To adjust the alternator on the 4.6L, 5.4L, and 6.8L engines, loosen the battery, loosen the air filter or outlet pipe and tighten the accessory drive belt tensioner. Disassemble electrical connectors, disassemble the B+ terminal and sew the generator with the required torque. Undo the steps on reinstallment.


