My Garage
Cart

OEM 2005 Lincoln Aviator Catalytic Converter

Cat. Converter
  • Select Vehicle by Model
  • Select Vehicle by VIN
Select Vehicle by Model
Make
Model
Year
or
Select Vehicle by VIN
For the most accurate results, select vehicle by your VIN (Vehicle Identification Number).

1 Catalytic Converter found

  • 2005 Lincoln Aviator Catalytic Converter - 3C5Z-5F250-AA
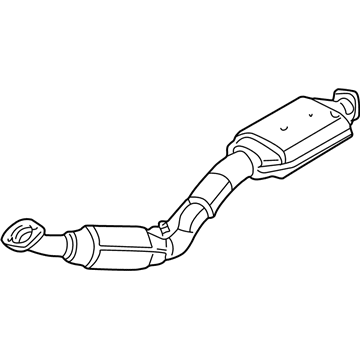
    2005 Lincoln Aviator Catalytic Converter Diagram - 3C5Z-5F250-AA
    View related parts
    Product Specifications
    • Other Name: Converter Assembly; Exhaust Pipe; Converter & Pipe
    • Base No.: 5F250
    • Item Weight: 14.50 Pounds
    • Item Dimensions: 14.4 x 11.0 x 17.7 inches
    • Condition: New
    • Fitment Type: Direct Replacement
    • SKU: 3C5Z-5F250-AA
    • Warranty: This genuine part is guaranteed by Ford's factory warranty.
    More Info
    Fits the following 2005 Lincoln Aviator Submodels:
    • Base | 8 Cyl 4.6 L GAS

2005 Lincoln Aviator Catalytic Converter

If you're seeking quality and affordability, look no further than our extensive inventory of genuine 2005 Lincoln Aviator Catalytic Converter available at FordPartsDeal.com. You can confidently purchase our OEM 2005 Lincoln Aviator Catalytic Converter as they are supported by the manufacturer's warranty and our hassle-free return policy, alongside the benefit of our fast delivery service.

2005 Lincoln Aviator Catalytic Converter Parts Q&A

  • Q: How should one service the catalytic converter to prevent deterioration and ensure proper installation on 2005 Lincoln Aviator?
    A: Keep oil or grease-based lubricants away from your service of the catalytic converter since they will degrade the rubber while creating a risk of exhaust hanger insulator detachment from the exhaust hanger bracket when the vehicle operates. Exhaust fasteners need precise torque settings for installation therefore replace them with new parts having matching original part numbers and follow torque limit specifications. Place the vehicle in neutral mode while setting it up on a hoist before applying support to the exhaust system by using a suitable jack. Begin by seating the tab from the muffler outlet pipe inside the extension pipe notch before clamping it tight and afterward remove the extension pipe-to-muffler clamp nut alongside the isolator then reinstall the components with a torque of 48 Nm (35 ft. lbs.). Start by removing the muffler-to-catalytic converter assembly nuts together with springs and flag nuts while discarding the flag nuts and then carefully detach the muffler assembly isolators by tightening them to 40 Nm during reinstallation. To access the catalytic converter assembly operators need to take out the transmission crossmember so they should place a suitable jack beneath the transmission followed by removing the heat shield bolts that require a torque setting of 20 Nm (15 ft. lbs.) for reinstallation. A right-side plastic shield on the crossmember should be removed before tightening it to 9 Nm (80 inch lbs.) then proceed with separating the four upper and four lower crossmember bolts which require 70 Nm (52 ft. lbs.) torque during reinstallation. Unscrew both the transmission mount bolt from catalytic converter support isolator before retightening to 90 Nm (66 ft. lbs.) and proceed to detach the transmission nuts and transmission crossmember. Separate the electrical connectors of the catalyst monitor sensor and heated oxygen sensor while cleaning the outlet flare on the manifold and inlet flare of the catalytic converter. Support the catalytic converter near its rear outlet while avoiding damage to the flares or studs because you should alternately tighten exhaust manifold-to-catalytic converter nuts to their specified torque. Before installing a new catalytic converter assembly the catalyst monitor and heated oxygen sensors need to be removed while applying anti-seize compound to their threads. Replace the catalytic converter-to-exhaust manifold stud nuts with tightened torque of 40 Nm (30 ft. lbs.) when reinstalling them. Once you reverse the removal steps begin the engine and test for exhaust leaks while adjusting the exhaust alignment if needed.