FordParts
My Garage
My Account
Cart
OEM 2007 Ford E-150 Evaporator
A/C Evaporator Core- Select Vehicle by Model
- Select Vehicle by VIN
Select Vehicle by Model
orMake
Model
Year
Select Vehicle by VIN
For the most accurate results, select vehicle by your VIN (Vehicle Identification Number).
3 Evaporators found


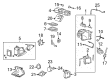
2007 Ford E-150 Evaporator Assembly, Front Part Number: AC2Z-19B555-A
$230.27 MSRP: $374.55You Save: $144.28 (39%)Ships in 1-2 Business DaysProduct Specifications- Other Name: Evaporator And Housing Assembly; A/C Evaporator Core Case, Front; HVAC Blower Motor Housing; Repair Kit; Case Assembly; Blower Case; Housing; A/C Evaporator
- Position: Front
- Replaces: 4C2Z-19B555-BA, 6C2Z-19B555-A, CC2Z-19B555-A
- Base No.: 19B555
- Item Weight: 16.30 Pounds
- Item Dimensions: 22.4 x 22.1 x 16.5 inches
- Condition: New
- Fitment Type: Direct Replacement
- SKU: AC2Z-19B555-A
- Warranty: This genuine part is guaranteed by Ford's factory warranty.


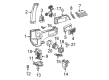
2007 Ford E-150 Evaporator Core, Front Part Number: 6C2Z-19860-C
$101.77 MSRP: $167.45You Save: $65.68 (40%)Ships in 1 Business DayProduct Specifications- Other Name: Core - Air Conditioning Evaporator; A/C Evaporator Core, Front; A/C Evaporator Core Repair Kit; Evaporator; A/C Evaporator Core; A/C Evaporator
- Position: Front
- Base No.: 19860
- Item Weight: 5.20 Pounds
- Item Dimensions: 11.0 x 8.0 x 16.3 inches
- Condition: New
- Fitment Type: Direct Replacement
- SKU: 6C2Z-19860-C
- Warranty: This genuine part is guaranteed by Ford's factory warranty.


2007 Ford E-150 Evaporator Core, Rear Part Number: 6C2Z-19860-B
$158.02 MSRP: $260.00You Save: $101.98 (40%)Ships in 1-2 Business DaysProduct Specifications- Other Name: Evaporator Assembly; A/C Evaporator Core, Rear; A/C Evaporator Core Repair Kit; Evaporator; A/C Evaporator Core; A/C Evaporator
- Manufacturer Note: Includes A/C Evaporator Expansion Valve That Is Not Serviced Separately
- Position: Rear
- Replaces: 6C2Z-19860-A, F4UZ-19835-AB
- Base No.: 19835
- Item Weight: 6.00 Pounds
- Item Dimensions: 12.4 x 11.2 x 9.4 inches
- Condition: New
- Fitment Type: Direct Replacement
- SKU: 6C2Z-19860-B
- Warranty: This genuine part is guaranteed by Ford's factory warranty.
2007 Ford E-150 Evaporator
If you're seeking quality and affordability, look no further than our extensive inventory of genuine 2007 Ford E-150 Evaporator available at FordPartsDeal.com. You can confidently purchase our OEM 2007 Ford E-150 Evaporator as they are supported by the manufacturer's warranty and our hassle-free return policy, alongside the benefit of our fast delivery service.
2007 Ford E-150 Evaporator Parts Q&A
- Q: How to service and repair the evaporator core on 2007 Ford E-150?A: Refrigerant recovery and battery disconnect must happen before starting any evaporator core service work. The procedure to service or repair the evaporator core starts with the removal of air cleaner assemblies on 4.6L, 5.4L, 6.8L vehicles in addition to the battery and battery tray. After replacement you should tighten the battery tray bolts to 28 Nm (21 lb-ft). The maintenance procedure requires you to remove the bolt and clamp from the oil filler tube which needs to be tightened to 10 Nm (89 lb-in) when reinstalling it. The procedure requires removing junction box bracket bolts together with the junction box bracket bolt from vehicles using a 6.0L diesel engine before reinstallation demands a torque of 28 Nm (21 lb-ft). The engineering procedure involves removing the engine cover then softening the charge air cooler tube clamps before tightening them to 12 Nm (9 lb-ft) at reassembly time. Remove the wiring harness alongside the ground wire and electrical connector before removing all bolts from the CAC tube and oil fill tube. Disconnect the oil fill tube from the valve cover. The manifold absolute pressure (MAP) sensor and the retaining nuts as well as CAC tube and oil fill tube with bracket should be set aside for maintenance. Use 15 Nm (11 lb-ft) torque for 4.6L, 5.4L or 6.8L vehicles but diesel vehicles require 8 Nm (71 lb-in) when tightening condenser fittings after removing the O-ring seal and gasket seal applications. The filler tube of the washer reservoir needs unfastening followed by evaporator outlet fitting disconnection using a new O-ring seal. Tighten this fitting to 39 Nm (29 lb-in) for reassembly. When reinstalling the system connect the high-pressure cutoff switch electrical connector and suction accumulator outlet fitting along with the outlet line bracket screw and fitting nut while using a new O-ring seal and gasket seal and tightening both components to 15 Nm (11 lb-ft) and 2 Nm (18 lb-in). When working on auxiliary A/C systems you must disconnect the suction accumulator fitting and get rid of its O-ring seals. Reinstallation of the evaporator inlet fitting requires screw removal of the bracket followed by discarding the O-ring seal then tightening the fitting to 18 Nm (13 lb-ft) and the screw to 2 Nm (18 lb-in). First remove the screws and then peel away the evaporator housing support bracket before pulling off the evaporator core cover through five screw and four additional screw disconnection. When installing the evaporator core follow the uninstallation steps backward while replacing the gasket seal and new O-ring seals and evacuating and testing the refrigerant system for leaks before adding the correct amount of clean PAG oil.
Related 2007 Ford E-150 Parts
 2007 Ford E-150 Blower Motor
 2007 Ford E-150 Blower Motor Resistor
 2007 Ford E-150 A/C Accumulator
 2007 Ford E-150 A/C Clutch
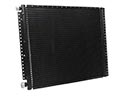 2007 Ford E-150 A/C Condenser
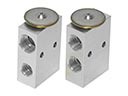 2007 Ford E-150 A/C Expansion Valve
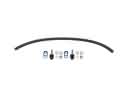 2007 Ford E-150 A/C Hose
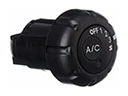 2007 Ford E-150 A/C Switch
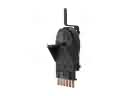 2007 Ford E-150 Blower Control Switches
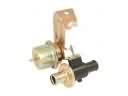 2007 Ford E-150 Heater Control Valve
 2007 Ford E-150 Heater Core
 2007 Ford E-150 HVAC Pressure Switch