FordParts
My Garage
My Account
Cart
OEM 2007 Ford Ranger Washer Reservoir
Windshield Washer Reservoir- Select Vehicle by Model
- Select Vehicle by VIN
Select Vehicle by Model
orMake
Model
Year
Select Vehicle by VIN
For the most accurate results, select vehicle by your VIN (Vehicle Identification Number).
2 Washer Reservoirs found


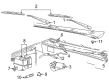
2007 Ford Ranger Washer Reservoir Part Number: 8L5Z-17618-A
$54.14 MSRP: $90.73You Save: $36.59 (41%)Product Specifications- Other Name: Reservoir - Windshield Washer; Washer Fluid Reservoir; Windshield Washer Reservoir; Reservoir
- Replaces: 2L2Z-17618-AA
- Base No.: 17618
- Item Weight: 2.10 Pounds
- Item Dimensions: 9.1 x 14.0 x 11.3 inches
- Condition: New
- Fitment Type: Direct Replacement
- SKU: 8L5Z-17618-A
- Warranty: This genuine part is guaranteed by Ford's factory warranty.


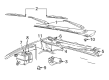
2007 Ford Ranger Reservoir Part Number: 1L5Z-17618-AA
Product Specifications- Other Name: Reservoir - Water; Washer Fluid Reservoir; Windshield Washer Reservoir
- Manufacturer Note: Less pump #17664, washer tank only, refer to 8A080 for coolant tank, with 2.3, without low fluid sensor
- Base No.: 17618
- Item Weight: 2.00 Pounds
- Item Dimensions: 15.5 x 11.6 x 11.1 inches
- Condition: New
- Fitment Type: Direct Replacement
- SKU: 1L5Z-17618-AA
- Warranty: This genuine part is guaranteed by Ford's factory warranty.
2007 Ford Ranger Washer Reservoir
If you're seeking quality and affordability, look no further than our extensive inventory of genuine 2007 Ford Ranger Washer Reservoir available at FordPartsDeal.com. You can confidently purchase our OEM 2007 Ford Ranger Washer Reservoir as they are supported by the manufacturer's warranty and our hassle-free return policy, alongside the benefit of our fast delivery service.
2007 Ford Ranger Washer Reservoir Parts Q&A
- Q: How to service the windshield washer reservoir safely and effectively on 2007 Ford Ranger?A: The first step for servicing the windshield washer reservoir includes handling windshield washer fluid with caution since it contains poisonous methanol. Begin the removal process only after draining out the windshield washer reservoir fluid to stop any spillage. Proceed by disconnecting both the electrical connector of the windshield washer reservoir pump and the wiring harness retainer. You need to remove the air cleaner assembly followed by removal of the two reservoir bolts together with two reservoir nuts but keep the windshield washer reservoir and washer pump separate during this operation. Follow these directions to first eliminate the windshield washer reservoir-to-coolant reservoir stud before putting the coolant reservoir to one side and removing the windshield washer reservoir. The windshield washer hose needs to be disconnected from the pump component while safely removing the washer pump through the reservoir by avoiding any damage to the grommet. Follow the removal steps in reverse to install the components by screwing the bolts to 6 Nm (53 lb-in).
Related 2007 Ford Ranger Parts
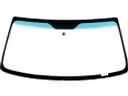 2007 Ford Ranger Windshield
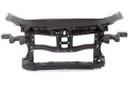 2007 Ford Ranger Radiator Support
 2007 Ford Ranger Washer Pump
 2007 Ford Ranger Wiper Arm
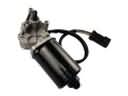 2007 Ford Ranger Wiper Motor
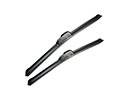 2007 Ford Ranger Wiper Blade
 2007 Ford Ranger Air Deflector
 2007 Ford Ranger Car Mirror
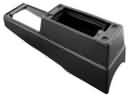 2007 Ford Ranger Center Console Base
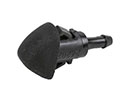 2007 Ford Ranger Windshield Washer Nozzle
 2007 Ford Ranger Windshield Wiper
 2007 Ford Ranger Wiper Pivot