FordParts
My Garage
My Account
Cart
OEM 2008 Lincoln Town Car Clock Spring
Spiral Cable Clock Spring- Select Vehicle by Model
- Select Vehicle by VIN
Select Vehicle by Model
orMake
Model
Year
Select Vehicle by VIN
For the most accurate results, select vehicle by your VIN (Vehicle Identification Number).
1 Clock Spring found


2008 Lincoln Town Car Clockspring Part Number: 6W1Z-14A664-A
$97.91 MSRP: $142.52You Save: $44.61 (32%)Product Specifications- Other Name: Cover And Contact Plate Assembly; Air Bag Clockspring
- Manufacturer Note: AFTER 05/23/06
- Replaces: 5W1Z-14A664-AA
- Base No.: 14A664
- Item Weight: 1.20 Pounds
- Item Dimensions: 8.1 x 6.0 x 3.0 inches
- Condition: New
- Fitment Type: Direct Replacement
- SKU: 6W1Z-14A664-A
- Warranty: This genuine part is guaranteed by Ford's factory warranty.
2008 Lincoln Town Car Clock Spring
If you're seeking quality and affordability, look no further than our extensive inventory of genuine 2008 Lincoln Town Car Clock Spring available at FordPartsDeal.com. You can confidently purchase our OEM 2008 Lincoln Town Car Clock Spring as they are supported by the manufacturer's warranty and our hassle-free return policy, alongside the benefit of our fast delivery service.
2008 Lincoln Town Car Clock Spring Parts Q&A
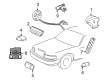
- Q: How to Service and Repair the Clock Spring Assembly on 2008 Lincoln Town Car?A: The first procedure for servicing or repairing the Clock Spring assembly includes disabling the SRS while removing the driver air bag module. You must position both road wheels straight ahead before you take off the steering wheel. Masking tape strips should be applied across the Clock Spring to stop it from turning while being removed. The tilt steering column needs to extend fully up during the removal process of both lower and upper steering column shrouds. Clear the tilt column lever while also removing the three screws which fasten the lower steering column shroud. After this release the upper shroud retainers to detach the lower version. This process requires you to disconnect the Clock Spring electrical connector then release the retaining clips followed by sliding the Clock Spring off the steering column. While installing a new Clock Spring users should take out the key which both maintains the rotor center position but prevents rotation from occurring. For recentering the Clock Spring first make sure both road wheels point straight and then rotate the rotor counterclockwise until it resting point followed by clockwise rotation until arrows meet and finally provide two full clockwise turns to achieve center position. The tape should be removed from the Clock Spring only after it stops rotating. Insert the column flats of the Clock Spring into the steering column and push it onto the column until the retaining tabs automatically lock in place. Install the Clock Spring electric connector then put the steering column shroud on top and place the column shift lever boot if your car has one. The lower steering column shroud needs reattachment while installing the three screws, the tilt column lever, the steering wheel and the driver air bag module before powering the SRS system.
Related 2008 Lincoln Town Car Parts
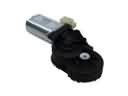 2008 Lincoln Town Car Seat Motor
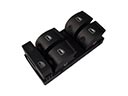 2008 Lincoln Town Car Window Switch
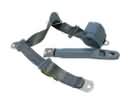 2008 Lincoln Town Car Seat Belt
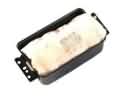 2008 Lincoln Town Car Air Bag
 2008 Lincoln Town Car Air Bag Control Module
 2008 Lincoln Town Car Air Bag Sensor
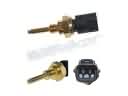 2008 Lincoln Town Car Cylinder Head Temperature Sensor
 2008 Lincoln Town Car Door Jamb Switch
 2008 Lincoln Town Car Mass Air Flow Sensor
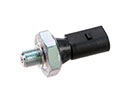 2008 Lincoln Town Car Oil Pressure Switch
 2008 Lincoln Town Car PCV Valve Hose
 2008 Lincoln Town Car Speedometer